Mass Effect 3 Priority: Thessia Guide — Combat, Collectibles, and Choices
This section of the Mass Effect 3 wiki guide focuses on the “Priority: Thessia” mission—covering how to work through each combat stretch, where to grab every collectible, and which dialogue responses to choose based on the Paragon/Renegade path you want for your run.
Checklists
Need to jump straight to a specific part of the mission? Here are the guide’s main waypoints:
- Mission Stats
- Find Route to Asari Temple
- Get to Outpost Tykis
- Fight to the Temple
- Investigate Artifacts
- Fight Kai Leng
- Back on the Normandy
Mission Stats
Video Guide
Mission Rewards
- Experience: 3,000 XP
- Reputation: +15
- Mission Credits: 15,000 credits
- Found Credits: 15,000 credits
- Weapon: M-98 Widow
- Armor: Umbra Visor
- Mods:
- Shotgun High Caliber Barrel
- Sniper Rifle Concentration Module
- Assault Rifle Extended Barrel
- SMG Heat Sink
Mission Enemies
- Husk
- Brute
- Marauder
- Cannibal
- Banshee
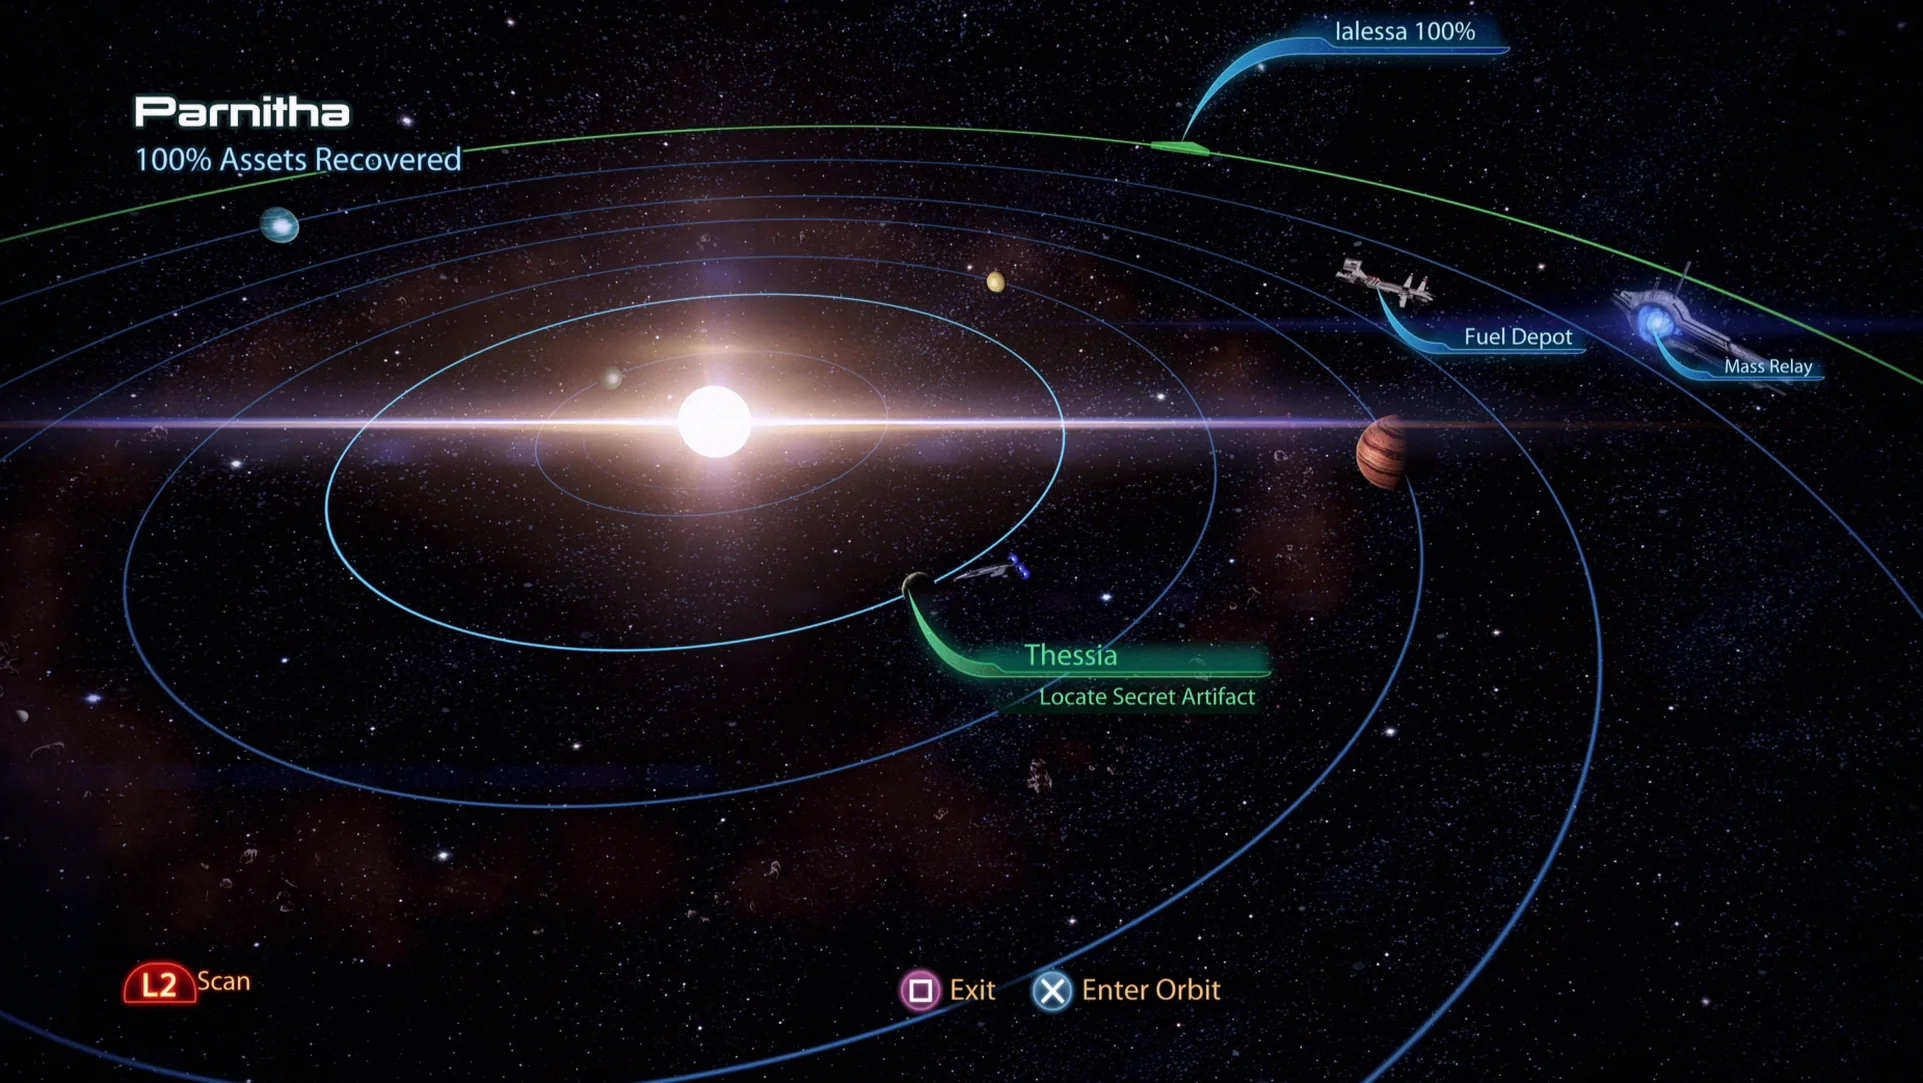
Travel to Thessia
- Prerequisite: Complete “Priority: The Citadel 3”
- Location: Athena Nebula – Parintha – Thessia
To start “Priority: Thessia,” travel to the Athena Nebula (near the Serpent Nebula, where the Citadel is), then land on Thessia—the system’s innermost planet.
Recommended Loadout
- Squad Tactics:
- Liara will automatically be part of your squad. Level up Liara’s Warp skill and also upgrade Warp ammo.
- A biotics-focused squad is a strong option. Javik or Kaidan are ideal picks.
- Unique Dialogue:
- Javik brings a large amount of unique dialogue to this mission.
- If you didn’t bring Javik, then Garrus will cover that role instead.
- Shepard’s Loadout:
- The Sniper Rifle Concentration Module makes sniping Banshees easier by briefly slowing time when aiming down their scopes.
Find Route to Asari Temple
During the next cutscene, you’ll talk with Liara. She’s deeply shaken because the Reapers are attacking her homeworld, and you’ll be able to guide her on what to do in the moment.
The wording changes depending on whether Javik is in your squad, but the choice structure stays consistent: the option in the upper-right corner grants +2 Paragon Points, while the lower-right choice grants +2 Renegade Points.
When you reach the area, move downhill through rubble toward the outpost. Before speaking with Lieutenant Kurin (positioned to your left), check the body bags on your right for items. You must collect these now, because the mission will quickly push you forward into the next section without giving you a chance to return.
- Umbra Visor – To find it, look to the right of the two body-bag rows directly ahead. It’s close to a red ammo crate.
- Supplies – 4,500 credits. Continue ahead toward a light stand at the base of a column to pick them up.
Now approach Lieutenant Kurin—but before you can speak, rockets wipe out the guard. You’ll need to hold the position. Use the Mounted Turret on the right side of the entrance to destroy the Barrier Engine from the jump, then eliminate all six Brutes, plus the Husks that attack the Asari. Keep an eye on the biotic barrier: don’t let it collapse, and reload between waves. Pay special attention to the barrier bubble itself, since Husks may try to slip around and hit it.
Once the enemies are cleared, talk to Kurin again. She’s been instructed to hold this “hopeless” position specifically for you, even though she doesn’t recognize who you are.
- You can start with “What are your orders?” on the left, then choose:
- “I sympathize” for +2 Paragon Points
- “There’s a good reason” for +2 Renegade Points
- After that, you can continue with:
- “I’m looking for an artifact” for +2 Paragon Points
- “Just follow your orders” for +2 Renegade Points
The next morality change depends on whether you brought Javik:
- If you have Javik, he’ll read the Asari’s memories and help her feel confident. In that case, you can say:
- “We have the Crucible” for +2 Paragon Points
- “Listen to him” for +2 Renegade Points
- If you do not have Javik, you can choose “I’ve beaten Reapers before” for +2 Renegade Points.
Get to Outpost Tykis
After your conversation with Kurin, you’ll be on a bridge where the path behind you is blocked. Push forward and clear the Marauders and Cannibals that show up at the far end. Cannibals tend to eat their fallen allies to strengthen their armor—so don’t let them get the chance. Once they’re down, reach the end of the bridge and head right, crossing more rubble and looping around the building into a plaza.
Expect a heavy wave here: multiple Marauders and dozens of Cannibals. A good approach is to assign your squad to focus on one Marauder while you handle another. Use squad commands via the D-pad. Toward the back of the area, a Banshee will arrive through your exit door.
Banshees are Reaper-converted Ardat-Yakshi, and this is the first time you’re guaranteed to meet them. You can encounter them earlier in “Kallini: Ardat-Yakshi Monastery,” or in the Leviathan DLC. They carry extremely strong barriers and teleport around, making headshots difficult. Use Warp or Disruptor Ammo to weaken their barrier, and if you have the Sniper Rifle Concentration Mod, use it to land headshots. Above all, keep your distance.
Once the enemies are defeated, search the area for loot—both items are near the middle plaza.
- Med Kit – 50 XP. In the plaza, face the Banshee door, then look left near the steps for a rubble pile with the Med Kit tucked beneath a light.
- Med Kit – 50 XP. Near the plaza is a building on the right. Its front door sits in a shaded section under a large overhang, and the Med Kit is at that door.
Enter the destroyed building through the Banshee door, turn left to climb the ramp, vault up the ledge, and go through the doorway. Turn right and you’ll find an orange bypass-style panel door at the end of the damaged hallway.
- Terminal – 7,500 credits. Drop down from the next ledge to find it in the rubble on your left, just before the orange bypass door.
In the next zone, you’ll see a View Prompt for a Reaper towering above you, plus Asari snipers across the area. Drop down and eliminate the Cannibals below—mostly unaware of your arrival. If you’re using a sniper rifle, this is a great spot to practice.
- Broken Shotgun – 3,000 credits. Head into the lower right side of the area. Look for a large two-tier, square structure; circle it clockwise and climb the steps into a very dark alcove to grab the item.
- Shotgun High Caliber Barrel – Located above the Broken Shotgun. A balcony sits overhead, and you’ll reach it by climbing the rubble ramp where the mod is found.
- Med Kit – 50 XP. This is on the same balcony as the Shotgun mod.
Run up the rubble ramp from the collapsed building and talk to the lone sniper, but you’ll quickly need to clear additional enemies below. Your elevated position is an excellent sniper perch, with the following items available:
- Sniper Rifle Concentration Module – On the overlook, at the foot of the wall directly behind the Asari sniper.
- Med Kit – 50 XP. Right beside the module above.
- M-98 Widow – The sniper rifle is to the Asari sniper’s left, next to Thermal Clips.
M-98 Widow
The M-98 Widow is among the strongest weapons in the game. With the correct Ammo Powers active, it can kill any enemy in a single shot. The trade-off is low ammo and a long reload animation after every shot, meaning you must make each shot count.
After clearing the area, go down the ladder and look for a gap in the opposite wall to reach Outpost Tykis. Through the wall, head left and vault up the ledges to reach what remains of the path forward. Unfortunately, you can’t reach the temple without air support—at this point, respond with either:
- “We could use their help” for +2 Paragon Points
- “No choice” for +2 Renegade Points
Fight to the Temple
After the dialogue, you’ll need to clear what’s immediately ahead. Just before the stairs up, look down to spot another Hydra Missile Launcher. It should help in this section, where you’ll face Ravagers and another Banshee, both with heavy armor. If you want to, handle the Banshee first, then switch to the Ravagers. Also destroy the Barrier generator to strip away additional protection for the enemies.
When the fight ends, keep moving up the rubble hill.
- Assault Rifle Extended Barrel – Near the top of the slope, stop and turn right to spot wreckage from a gunship. Search among the rubble for this mod, which is near a Thermal Clip.
Continue forward carefully. The road ahead is brutal: you’ll have to fight Husks, Ravagers, Marauders, and take the brunt of two Harvesters. Destroy the Barrier Engine first, stay in cover at all times, and keep your distance. Also don’t forget to use Liara’s Singularity power.
Don’t try to eliminate the Harvesters directly—if you damage them, they’ll be replaced. Instead, focus on the rest of the Reaper forces while hiding in the rubble. Once the Harvesters depart, move through the debris and take the left route to reach the temple entrance.
- SMG Heat Sink Mod – When you arrive at the temple entrance, check the left side to find the mod resting against an ammo box.
Bypass the Barrier Control on the right to enter the temple.
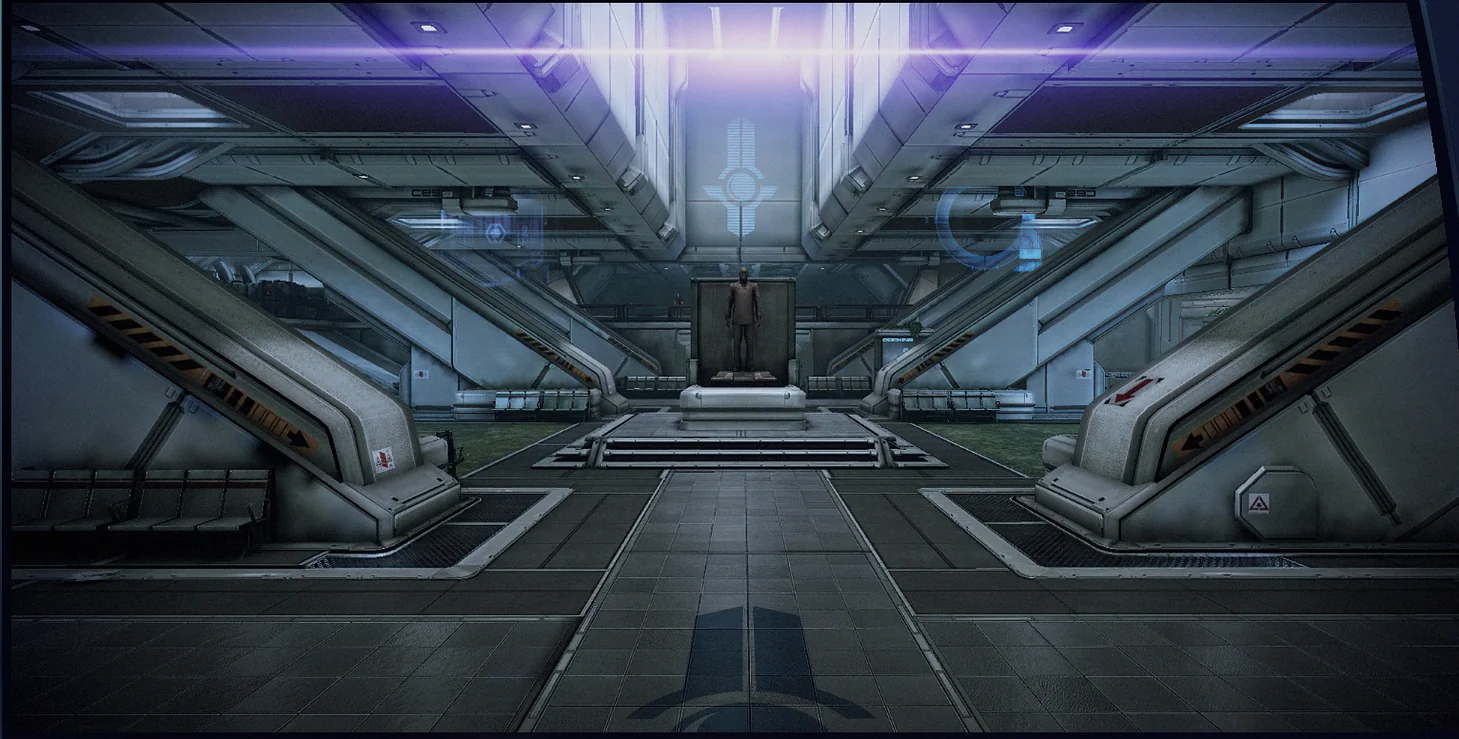
Investigate Artifacts
- Med Kit – 50 XP. As soon as you enter, you can find it on the left side of the entry walkway.
After inspecting the artifacts, examine the statue. Shepard will realize it contains a Prothean Beacon, similar to the ones found on Eden Prime and Virmire. One of your squad members interacts with one of the plaques, causing the statue to crack. Your job then becomes finding three additional plaques to complete the investigation. These are the artifacts you must interact with:
- The Bust of Janiri – Found on the middle-right side of the temple.
- The Biotic Manuscript – Located in the corner directly left of the Athame Statue’s Examine point.
- The Shield of Athame – On the side of the main walkway near where you entered the temple.
After you locate all three, return to the base of the statue and examine it again. This triggers a distinctive encounter featuring a Prothean memory construct called Vendetta. To get a better perspective on the Reaper cycles, choose left-side dialogue options during this encounter.
At first, Vendetta tries to argue against helping you, pointing out that the Reapers are already here. You can respond with:
- “But we need your help” / “Then help us” for +2 Paragon Points
- “It isn’t over yet!” for +2 Renegade Points
Vendetta then claims the Crucible isn’t a Prothean design, and that no previous cycle has ever used it to defeat the Reapers. You can reply with:
- “Give us a chance” for +2 Paragon Points
- “They weren’t me” for +2 Renegade Points
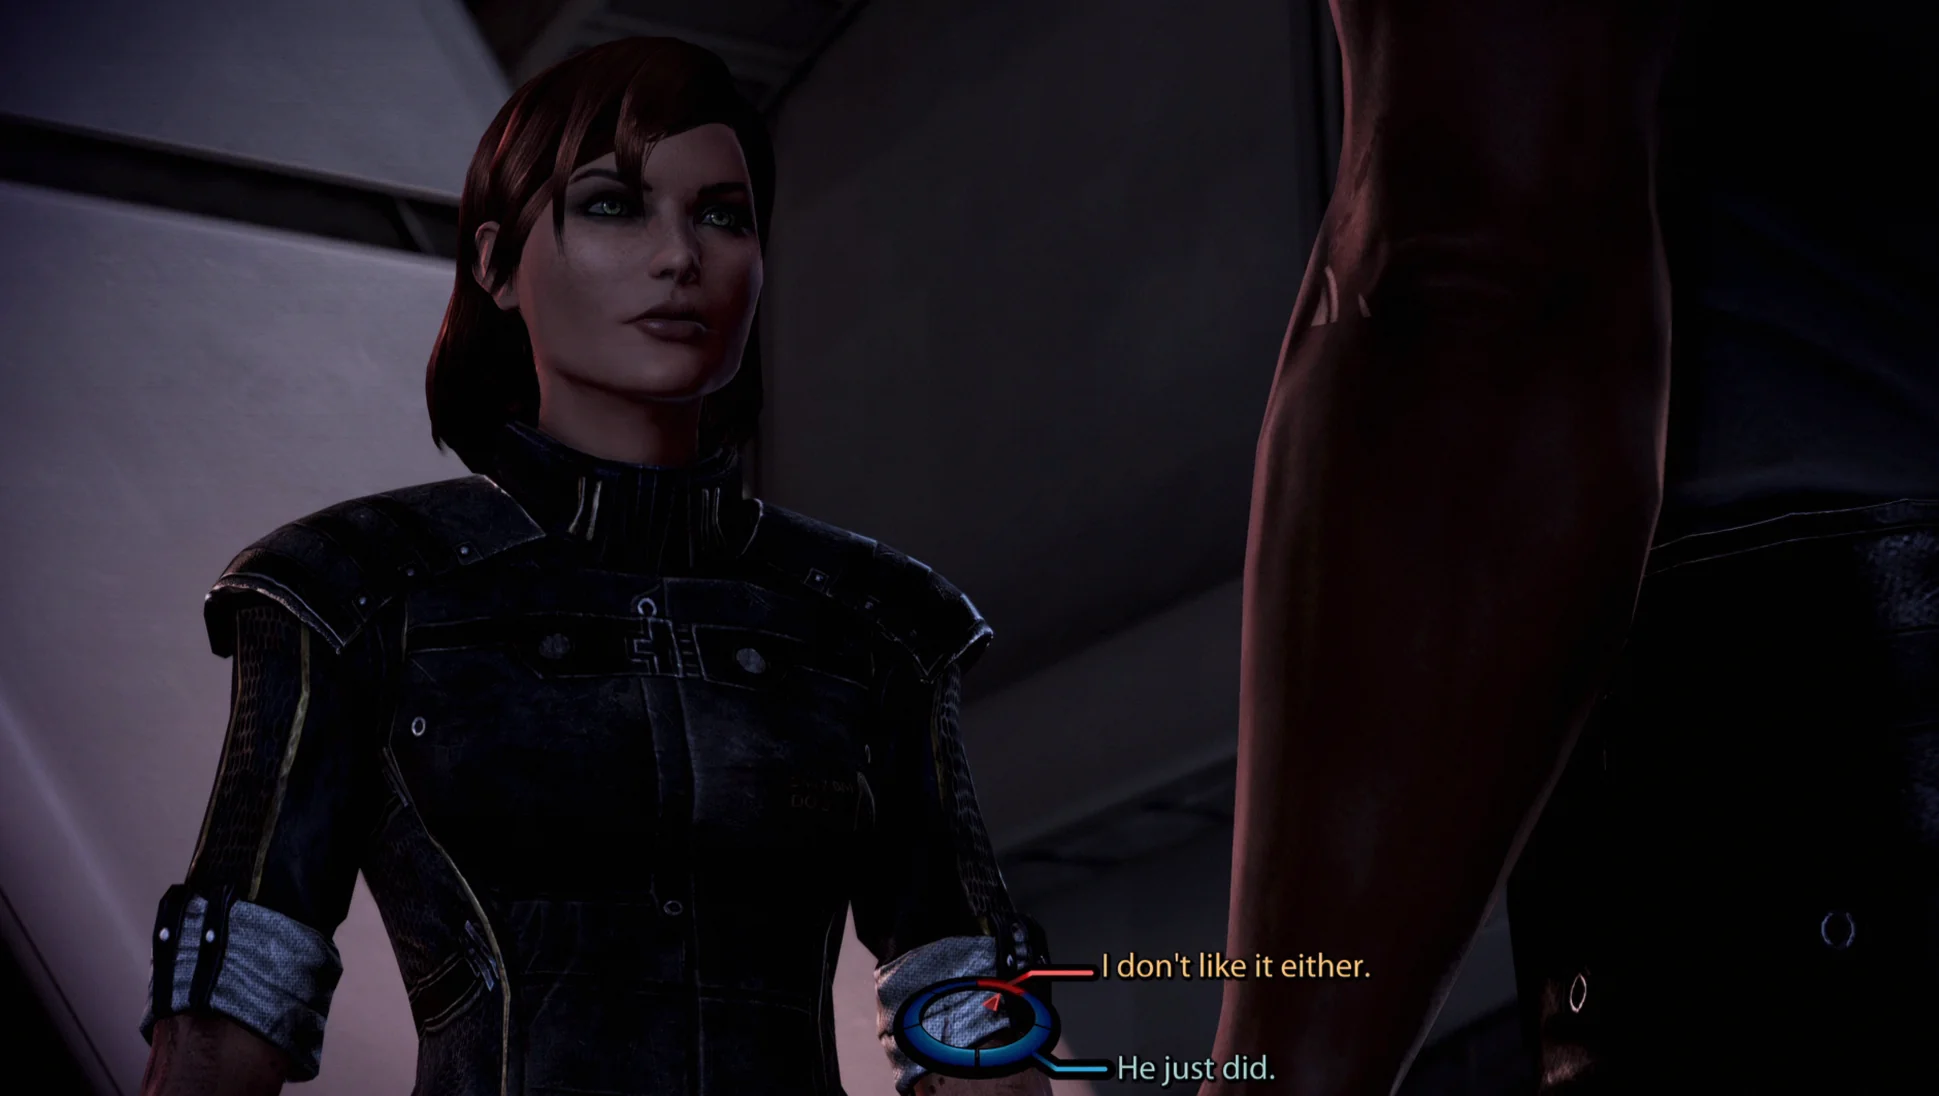
Your meeting is cut short when Kai Leng arrives and connects you to a conversation with the Illusive Man.
This is another extremely important conversation. Just like the one on Mars, what you say here affects events later in the story if you don’t thoroughly work through the dialogue.
To keep your later options open, when the prompt appears, choose “Whose side are you on?”, then select either:
- The “We need to work together” Charm option.
- The “Listen to yourself!” Intimidate option.
You must choose the same morality option you selected on Mars.
Oddly, the 5 morality points awarded are flipped compared to what you might expect: Charm grants Renegade points, while Intimidate grants Paragon points. Still, aside from that inversion, the outcomes are treated normally.
As the conversation ends, you can choose:
- “You’ve lost touch” for +2 Paragon Points
- “I used to trust you” for +2 Renegade Points
After that, you’ll enter a duel against Kai Leng to obtain the Prothean VI.
Fight Kai Leng
As soon as you regain control of Shepard, take cover behind a bench. Keep in mind: you won’t win this fight, and there’s nothing you can do to change the result.
Your actual goal is survival positioning. Stay in cover the entire time so you can avoid the gunship behind Leng. It typically won’t come close, though it can deliver a one-hit kill to you or a squadmate if it does. Focus on firing your weapon and aiming at Leng. If your shields drop, immediately retreat back into cover and shoot again. Leng has Shields, so Overload and Disruptor Ammo are particularly useful. A Sniper Rifle is also a strong choice, especially with the time-freezing Sniper Rifle Concentration Module.
When you bring Leng’s shields down to about a quarter, he retreats and calls in a gunship. You can slow his recovery, but you can’t stop it—so allow the gunship to fully recharge. Once that happens, return to attacking Leng and you can reduce his shields again to nearly zero, though he’ll retreat and summon another gunship.
When his shield drops a third time, a new cutscene starts, signaling the end of the Thessia mission.
Back on the Normandy
Shepard is in a rough state now, along with parts of the crew. After a sad conversation with the Asari Councillor, Shepard retreats to the War Room with the squad. Liara is upset because Cerberus arrived before you did. You can answer with either:
- “No, I should have known” for +4 Paragon Points
- “Not good enough!” for +4 Renegade Points
Shepard is understandably tired of Cerberus getting the upper hand and wants revenge. Specialist Traynor brings a lead: she tracked Kai Leng’s shuttle as it crossed the galaxy, but the signal was cut when it entered the Iera system in the Shadow Sea cluster. As EDI notes, there’s Sanctuary there, and not much else—so with no better information, it becomes your next destination. You can respond with:
- “Great job, let’s make it count” for +2 Paragon Points
- “We’ve got our destination” for +2 Renegade Points
From here, you have several conversation options across the ship:
- CIC – Speak with Anderson on the Vid Comm for +2 Reputation, then talk with Traynor to pick up “N7: Communication Hub,” followed by Joker and EDI.
- Crew Deck – Talk to Tali (+2 Reputation), then Ashley, and Garrus (+2 Reputation) to unlock the Proximity Mine bonus power. If you have Javik, Glyph says Liara is downstairs speaking with him.
- Shuttle Bay – Talk with James for a bit of dialogue.
- Engineering – Visit Allers, speak with Kaidan alongside Engineer Adams, then go to Javik’s room if he’s with you (+2 Reputation).
- Crew Deck – Return to the Crew Deck, talk to Tali again (+2 Reputation), then speak to Liara (+2 Reputation) to unlock the Stasis bonus power. After that, talk with Tali once more (+2 Reputation).
Want more Mass Effect 3 support? The guide points you toward these other pages:
- Legendary Edition Changes
- How-To Guides
- Key Choices and Consequences
- Romance Guide
- Walkthrough
- Side Missions
Up Next: Citadel Excursion 5
Top Guide Sections
- Legendary Edition Changes
- Game Basics
- Tips and Tricks
- How-To Guides