Mass Effect 3 Priority: Rannoch Walkthrough—Reaper Code, Geth/Garious Choices
IGN’s Mass Effect 3 wiki guide page for the Priority: Rannoch mission breaks down how to upload Reaper code, negotiate between the Geth and Quarians, survive every fight, locate collectibles, and choose dialogue that shapes your run’s outcome. It also includes a “do this first” warning tied to side content that can affect the end of the mission.
Before You Start: Checklist and Key Warning
This Priority mission focuses on multiple major beats: getting the Reaper code uploaded, helping broker peace between the Geth and Quarians, clearing all combat encounters you’ll face, collecting everything missable, and selecting dialogue options that fit your playthrough goals.
WARNING
You must complete the Side Missions “Rannoch: Admiral Koris” and “Rannoch: Geth Fighter Squadrons” before starting Priority: Rannoch, because those side quests are removed after you finish this mission. Doing so matters because your choices and progress here influence your chances for the best possible ending.
- Mission Stats
- Get to the Upper Base
- Open the Blast Shield
- Target the Reaper Tech
- The Reaper Destroyer
- The Geth vs the Quarians — How to Make Peace Between Geth and Quarians
- Back on the Normandy
Mission Stats, Rewards, and Build Advice
Mission Rewards
- Mission Credits: 25,000 credits
- Found Credits: 25,000 credits
- Weapons: Geth Plasma Shotgun
- Armor: Kassa Fabrication Gauntlets
- Mods:
- SMG High Caliber Barrel
- Assault Rifle Piercing Mod
- SMG Ultralight Materials
- Assault Rifle Stability Damper
- War Assets:
- Note: For story reasons, Geth and Quarian assets are typically mutually exclusive.
- Geth:
- Geth Corps (300 TMS)
- Geth Fleet (300 TMS)
- Quarian:
- Admiral Daro’Xen (25 TMS, original release only)
- Quarian Civilian Fleet (200 TMS)
- Quarian Heavy Fleet (200 TMS)
- Quarian Patrol Fleet (200 TMS)
- SMG High Caliber Barrel
- Assault Rifle Piercing Mod
- SMG Ultralight Materials
- Assault Rifle Stability Damper
- Geth:
- Geth Corps (300 TMS)
- Geth Fleet (300 TMS)
- Quarian:
- Admiral Daro’Xen (25 TMS, original release only)
- Quarian Civilian Fleet (200 TMS)
- Quarian Heavy Fleet (200 TMS)
- Quarian Patrol Fleet (200 TMS)
- Geth Corps (300 TMS)
- Geth Fleet (300 TMS)
- Admiral Daro’Xen (25 TMS, original release only)
- Quarian Civilian Fleet (200 TMS)
- Quarian Heavy Fleet (200 TMS)
- Quarian Patrol Fleet (200 TMS)
Recommended Loadout
- Team Tactics:
- You must bring Tali if she’s alive. Her Sabotage will be useful again, so upgrade it as much as possible.
- Garrus is a strong pick thanks to Overload and his Armor-Piercing Ammo abilities.
- If Tali died in Mass Effect 2, you can choose two squadmates. In that scenario, EDI is suggested as the replacement.
- Unique Dialogue:
- If your love interest is available as a squadmate, choosing them may unlock unique dialogue.
- You must bring Tali if she’s alive. Her Sabotage will be useful again, so upgrade it as much as possible.
- Garrus is a strong pick thanks to Overload and his Armor-Piercing Ammo abilities.
- If Tali died in Mass Effect 2, you can choose two squadmates. In that scenario, EDI is suggested as the replacement.
- If your love interest is available as a squadmate, choosing them may unlock unique dialogue.
Mission Enemies
- Geth Trooper
- Geth Rocket Trooper
- Geth Hunter
- Geth Prime
Travel and Arrival: Rannoch Setup and Early Combat
- Prerequisite: Complete either “Rannoch: Admiral Koris” or “Rannoch: Geth Fighter Squadrons”.
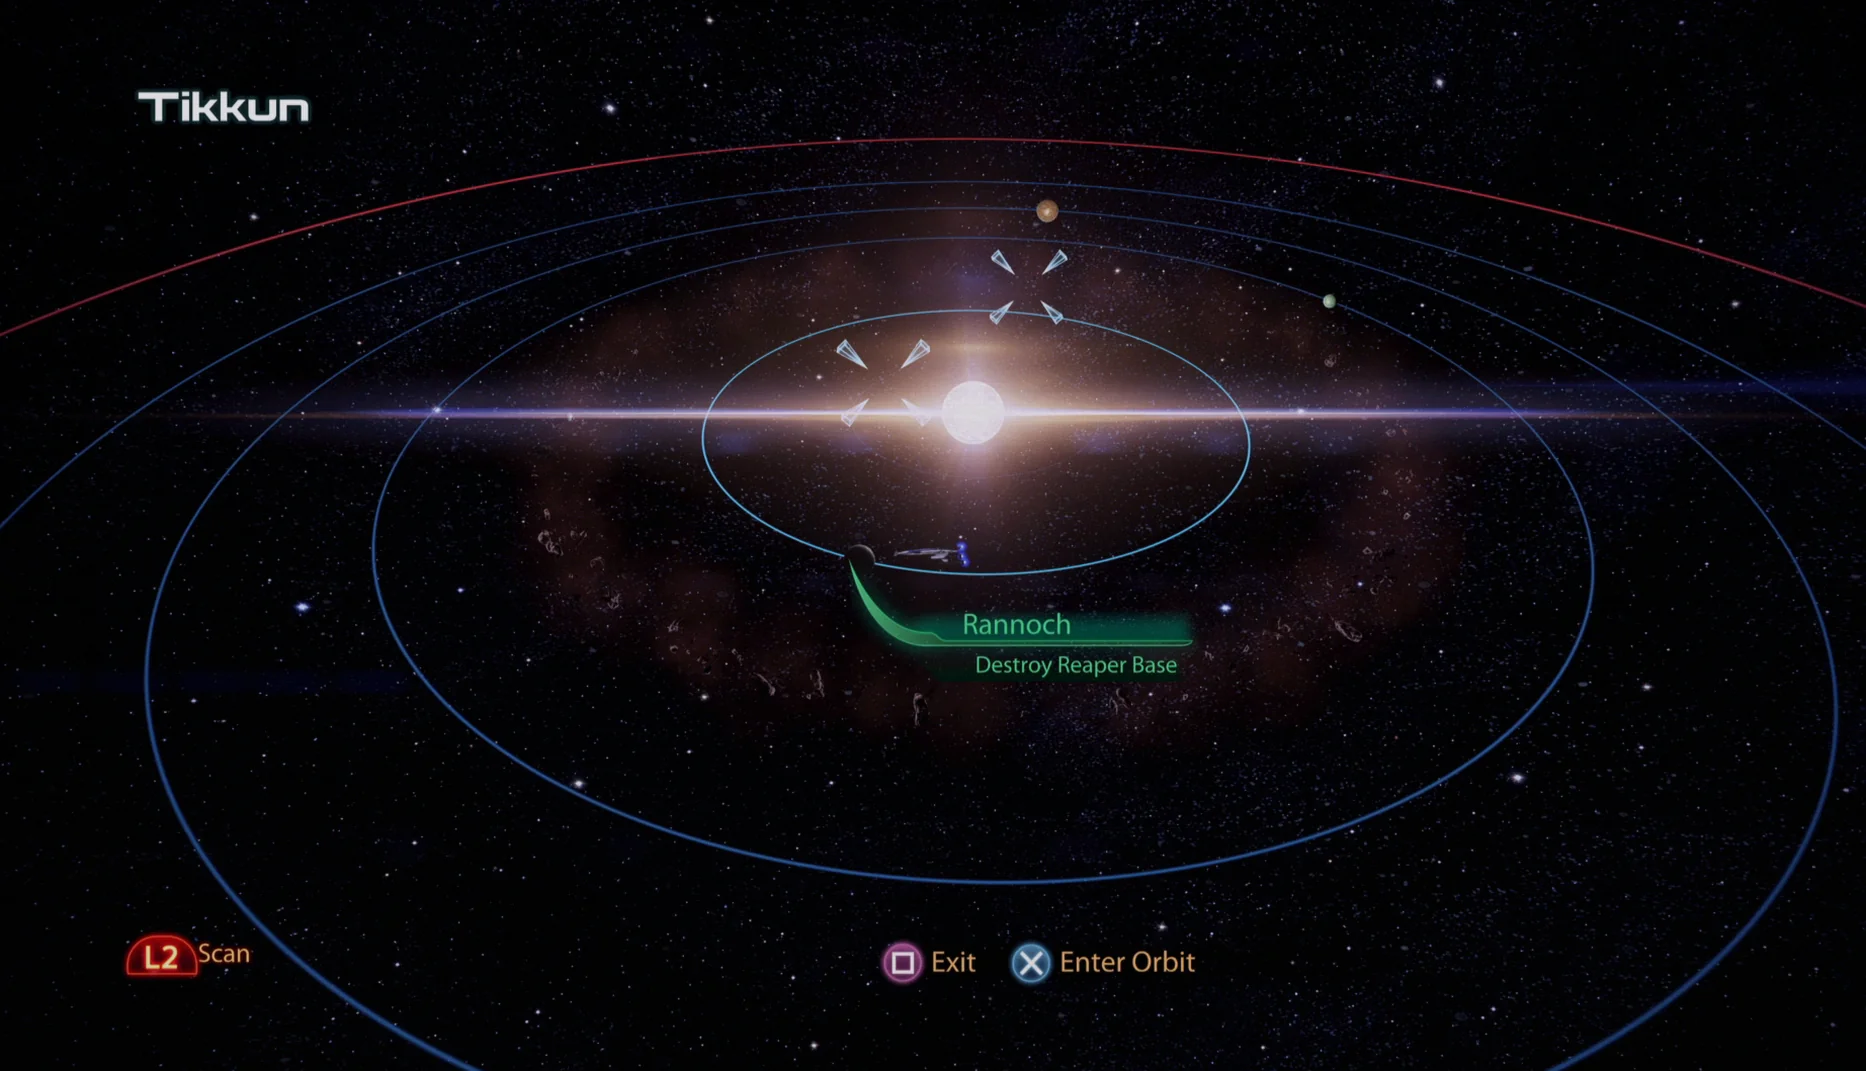
- Location: Perseus Veil — Tikkun — Rannoch
To begin, travel to the Perseus Veil and then to Rannoch through the Tikkun system. Priority worlds will be clearly labeled. Land on the Reaper Base near the equator.
Get to the Upper Base: Opening Scenes, Routes, and Collectibles
While you travel toward Rannoch, you’ll have conversations with your Geth sniper and with your Quarian companion. If that Quarian partner is Tali, you’ll see a major scene the first time you touch down on Rannoch—this is also why the guide recommends not bringing Tali along for Rannoch’s two side missions. You can say whatever you want since there are no Morality Points involved, but if you do have Tali with you, you’ll gain +2 Reputation.
After the opening cutscenes, you land on a steep slope and drop down into a valley that leads to the front gate. Split your squad by sending them to one side while you hold the other. Stay in cover and snipe the many Geth Troopers below. The main “surprise” here is simply the sheer number of Geth Troopers that spawn.
- SMG High Caliber Barrel: As you approach the lower part of the hill, you’ll see the front gate ahead, which closes as you get closer. Walk up to it, then check to your right to find this weapon modification.
The facility’s primary entrance is blocked, so you’ll need to improvise by climbing the side of the base wall. Look to the right of the now-closed entry gate at the bottom of the hill to spot ledges, pipes, and ladders. You can find some ammo on the first ledge.
During your climb, send your squad up one ladder while you use the other to flank the Geth Rocket Troopers on the distant walkway. The guide recommends taking the right-hand ladder so you have a better view of those Rocket Troopers entering the area.
- Assault Rifle Piercing Mod: Climb the right-hand ladder as you ascend the base wall and keep to the right. When you reach the end where the Rocket Troopers were, turn left and leap across the first gap to spot the mod on your right.
- Kassa Fabrication Gauntlets: This is near the weapon mod across the second gap, close to the ladder you used to reach the wall top.
Climb further using the ladder on the left side of where you encountered the Rocket Troopers. At the top, collect ammo and move onto pipes to go upward again. In the next section, Geth appear both above and below you. The higher route is safer because you keep the advantage of elevation, but if you have Sabotage, you can hack a group of Rocket Troopers on the lower path and have them eliminate nearby enemies while you provide backup.
When you reach the end of the two-level hallway, go through the green panel door to continue.
- Reaper Tech — 10,000 Credits: In the small room behind the green panel door, check the right-hand side for a terminal that has it.
Open the Blast Shield: Bay Access and Doorway Clears
Leave the tunnel to find a lone Geth Trooper directly in front of you. Take it out, then move forward along the walkway to the intersection where it stood. Use a View Prompt to look down into the bay where the Reaper tech is located—right as it gets covered by a Blast Shield. Legion helps you work toward opening it.
- SMG Ultralight Materials: At the intersection near the lone Geth Trooper, take the left ramp. The mod sits in the left-hand corner at the bottom.
Now take the right-hand route at that intersection to push deeper into the base, where you’ll face numerous Geth Troopers. Stay in cover and snipe them; Sabotage can temporarily capture entire groups in this cramped area and turn them against their allies.
- Assault Rifle Stability Damper: Early on the right-hand path, find a low square block that you can use as cover. To the right of it is an alcove-like area holding this weapon mod.
Geth will appear both directly ahead on the walkway and across a chasm to your left, as called out by a squadmate. Deal with the Rocket Troopers first because they’re the immediate threat, then finish the walkway area once all Geth are cleared.
- Geth Plasma Shotgun: When you reach the end of the walkway where the green panel door is, look left. The weapon is on containers beside a terminal.
- Data — 5,000 Credits: On the terminal next to where you found the Geth Plasma Shotgun.
- Data — 10,000 Credits: Continue through the green panel door and quickly locate another terminal with this at the U-turn.
- Med Kit — 50 XP: On the left side of the terminal where you found the second Data.
Geth Plasma Shotgun Segment: Door Override and Survival Waves
The Geth Plasma Shotgun is described as one of the game’s best shotguns. It fires powerful, accurate blasts at long range, which makes it particularly effective when used by squadmates. You can also charge shots to increase damage further, enabling near-instant kills on almost any enemy with a single blast.
In the next area, your waypoint points to a Door Override console. Clear the room of Geth first—stay near where you entered so you don’t get flanked. Once the area is quiet, approach the console and activate it. Afterward, you’ll need to survive a wave featuring Geth Rocket Troopers and Geth Pyros.
The Pyros are oddly vulnerable to fire. Take advantage by shooting their fuel tanks with Incendiary Ammo or other fire-based powers. After hitting a second console, a Geth Prime arrives alongside two Rocket Troopers. Try to catch them in a Sabotage setup inside the shaft or soften them with a grenade barrage.
- Med Kit — 50 XP: Before you head up the lift to the upper floor, check the corner to the right of the lift for this med kit.
Target the Reaper Tech: Laser Use and the Dormant Reaper Waking Up
At the top of the elevator you’ll encounter three Geth Primes in a relatively tight space, plus Geth Turrets in the center of the room. As you move, stay in cover or take targets out as needed. Fortunately, the area includes three Geth Spitfire heavy weapons: one near the entrance, one by a door on the left, and one on crates to the right.
The Spitfires won’t fully solve your Geth problem, but when paired with Sabotage or explosives that keep Primes from advancing, they can be a major help. Make sure you remain protected—if you get hit, the Spitfire stops firing and you’ll have to restart it.
Once the Geth Primes are down, walk to the balcony at the edge of the outer area (toward the sunset). Stand on the upper ledge to trigger a cutscene where you pull out the Targeting Laser.
Your objective is not the distant “Base” marker. Instead, you must target an open blast door below the ledge you’re standing on. Aim from the ledge down at the red light and hold the FIRE button (typically the right trigger) to call in an orbital strike using the Normandy.
What you actually hit isn’t just Reaper tech—it’s a whole dormant Reaper, and it’s now very much awake. Sprint left around the Reaper’s chamber to escape the death ray. This triggers a cutscene where you scramble to a turret mounted on a Geth speeder. You can shoot the Reaper if you want, but the guide notes it’s completely unnecessary and won’t harm it.
The Reaper Destroyer: Orbital Strikes, Laser Positioning, and Final Shot
Eventually, you’ll pull over and fight the Reaper Destroyer directly. The guide calls this part more unintuitive than it looks, and provides a detailed breakdown of how the section works:
- To trigger an orbital strike, aim at the Reaper’s firing chamber when it has the blue circle around it, then hold the FIRE button.
- After the first strike, the Reaper shifts attention to Shepard and fires back, so you’ll need to balance firing the laser with dodging out of the beam’s explosive path.
- A common error is using the left trigger to zoom for aiming. DO NOT USE THE LEFT TRIGGER. It’s not required for the Targeting Laser, and more importantly it slows Shepard’s movement, making it almost impossible to sidestep the Reaper’s laser.
- The Reaper’s laser beam doesn’t track you. Once it starts firing, move far away.
- You can still lock onto the target while moving, but the lock will be slower until you stop again.
- You don’t need to complete the entire target lock without interruption: releasing the FIRE button pauses the lock and waits for you to resume when you’re ready. Letting go can help you dodge faster.
- The laser beam creates explosions as it passes through, so you need to be much farther away than you might expect to avoid getting hit.
- On the cliff you don’t have unlimited room to maneuver; side walls limit you. Alternate moving left and moving right with each passing laser beam.
You need four strikes total, including the initial one, and each time the Reaper closes distance further. After the last strike lands, you enter a slow-motion segment for the final shot—aim, focus, and watch the result.
At that point, the Destroyer is downed, but it isn’t completely finished. It speaks to Shepard. The guide recommends choosing the middle option on the left: Shepard asks why the Reapers are killing everyone, and you receive hints about what’s going on.
This is how the conversation can branch:
- Choose “Help us understand” to get no Morality Points, but gain slightly more hints about the Reapers than the other two choices.
- Choose “We’ll destroy you eventually” to earn +2 Paragon Points.
- Then pull the Paragon Interrupt to put the Reaper to rest for an additional +5 Paragon Points.
- Choose “You’re arrogant for a machine” to earn +2 Renegade Points.
- Then pull the Renegade Interrupt to violently silence the Reaper for an additional +5 Renegade Points.
- Pull the Paragon Interrupt after this to verbally lay the Reaper to rest for +5 Paragon Points more.
- Pull the Renegade Interrupt after this to explosively silence the Reaper for +5 Renegade Points more.
The Geth vs. the Quarians: How to Broker Peace
After you destroy the Reaper, another major story check determines the fate of many. This time, you’re trying to convince the Quarians not to attack the Geth. At first, you’ll see a wheel that looks like it decides your path, but the real decision happens afterward: the Charm/Intimidate options on the left and the two white options on the right.
The two white options on the right always exist, and they work like this:
- “[Allow the upload]” / “[Upload the code]”: The Geth return online and wipe out the Quarians, then your Quarian partner commits suicide. Even a loyal, romanced Tali can still take her own life if you choose this, and the Paragon Interrupt won’t save her.
- If your Geth Sniper is Legion, this grants +15 Paragon Points.
- If your Geth Sniper is the Geth VI, this grants +15 Reputation.
- “[Stop Legion]” / “[Let geth die]”: Your Geth Sniper attacks you, and you get three optional Renegade Interrupts to shoot the Geth Sniper. The Geth Sniper dies either way. Then the Quarians destroy the Geth fleet and wipe out the race entirely.
- If your Geth Sniper is Legion, this grants +15 Renegade Points.
- If your Geth Sniper is the Geth VI, this grants +15 Reputation.
The Charm/Intimidate choices let you attempt to argue that both wars were entirely the Quarians’ fault and that stopping their fire ends the conflict. The guide stresses this is one of the toughest checks in the trilogy because it requires passing two checks based on decisions you made earlier.
First, you must unlock the Persuasion options. You have to meet all four requirements or you won’t get access:
- Fill 80% of the Reputation bar.
- Tali must be alive and present.
- Legion must be alive and present (the Geth VI as a replacement does not count).
- Complete the Side Mission “Rannoch: Geth Fighter Squadrons”, since it provides the context for why the Quarians are to blame—the foundation of Shepard’s argument.
Unlocking the options isn’t the only hurdle. You also need enough influence, both in the moment and diplomatically, for the plea to actually succeed. Like “Priority: The Citadel 2,” this is determined by your past actions and points. The listed actions are:
- Mass Effect 2 actions:
- +2 Points for not presenting the evidence against Tali’s father during “Tali: Treason” in Mass Effect 2.
- +2 Points for destroying the heretic geth in “Legion: A House Divided” in Mass Effect 2, which weakens the Geth fleet.
- +1 Point for using a Persuasion option to resolve the post-Loyalty argument between Tali and Legion in Mass Effect 2.
- Mass Effect 3 actions:
- +1 Point for completing “Rannoch: Admiral Koris,” proving your loyalty to the Migrant Fleet.
- +1 Point for saving Admiral Koris in “Rannoch: Admiral Koris,” where he backs Shepard.
- +2 Points for not presenting the evidence against Tali’s father during “Tali: Treason” in Mass Effect 2.
- +2 Points for destroying the heretic geth in “Legion: A House Divided” in Mass Effect 2, weakening the Geth fleet now.
- +1 Point for using a Persuasion option to resolve the post-Loyalty argument between Tali and Legion in Mass Effect 2.
- +1 Point for completing “Rannoch: Admiral Koris,” proving your loyalty to the Migrant Fleet.
- +1 Point for saving Admiral Koris in “Rannoch: Admiral Koris,” where he will back Shepard now.
If you earn 5 points on this second check, your plea succeeds. The result is a ceasefire that enables peace between the Quarians and the Geth, allowing you to bring both fleets to the war effort. You also receive the following Morality Points:
- If “[Rally the fleet]” succeeds, you get +15 Paragon Points.
- If “[Warn the fleet]” succeeds, you get +15 Renegade Points.
Back on the Normandy: Vid Comm, Interviews, and New Party Notes
Once the Reaper segment is done, you return to the Vid Comm room aboard the Normandy. You’ll speak with the Asari Councillor, who wants to discuss new information from her government. Shepard offers to meet her at the Citadel to handle it.
You’ll also be able to speak with Admiral Hackett. The guide advises asking about “Allied forces” to check on the Asari and Salarians. If the Side Mission “Tuchanka: Bomb” has expired, asking about “Krogan and turians” will provide new information as well. Additional topics you can ask about include “Reaper progress” and “Why pick me?”
Quarian and/or Geth War Assets are also added to Shepard’s cause. The guide lists the following notes:
- If you rewrote the Geth Heretics in “Legion: A House Divided” in Mass Effect 2, the Geth Fleet gets boosted by 150 TMS.
- If you deleted the Geth Heretics in “Legion: A House Divided” in Mass Effect 2, the three Quarian fleet assets are reduced by a total of -150 TMS.
- Admiral Daro’Xen (only available in the original release) is lost if you chose to wipe out the Quarians.
- The Geth Prime Platoon from “Rannoch: Geth Fighter Squadrons” is lost if you chose to wipe out the Geth.
By checking your Private Terminal, you can also do another interview with Diana Allers about what happened. Talk to Allers in Engineering first, then invite her up to the captain’s cabin. Choosing one of the Persuasion options there increases the EMS of the race you discussed—Quarians if they’re alive, or Geth if either they or both races are alive—and awards +5 Reputation.
This is also where, if you’ve been flirting with Allers, you’ll see the romance scene. The guide notes it won’t endanger any other romance options in the game. However, if Liara is your Serious Romance partner, she won’t be too impressed, since she’s the Shadow Broker.
After that, it’s time for your usual Normandy rounds to catch up with everyone:
- CIC: Speak with Traynor, Joker, and EDI. If Ashley is alive, you’ll receive a message from her asking to meet at the Citadel.
- Crew Deck: Speak with Ashley, Liara, Garrus, and Chakwas if Tali died. If Kaidan is alive, he’s in the bar lounge with James.
- Engineering: Speak with Javik, Gabby and Ken, Tali in the drive core, and Allers.
- Shuttle Bay: Speak with James here if Ashley is your Virmire Survivor.
If you want more Mass Effect 3 help, the guide points you to additional pages:
- Legendary Edition Changes
- How-To Guides
- Key Choices and Consequences
- Romance Guide
- Walkthrough
- Side Missions
Up Next: Act 4 — Cerberus and Reapers
Top Guide Sections
- Legendary Edition Changes
- Game Basics
- Tips and Tricks
- How-To Guides


