Mass Effect 3 Attican Traverse: Krogan Team Guide—Items, Fights, Choices
This Mass Effect 3 guide page breaks down the Attican Traverse: Krogan Team side mission set on Utukku, focusing on where to collect every item, how to get through the tunnel fights safely, and which decisions swing your outcomes. The mission is centered on tracking down a missing Krogan scouting team that vanished after pushing past an old Rachni Relay—along with the fallout of what you ultimately find.
If you’re trying to jump straight to a specific part of the walkthrough, the page is organized to cover mission stats, travel to Mulla Xul, finding the tunnel entrance, exploring the tunnels, locating the central chamber, the fate of the Rachni, and what happens once you’re back aboard the Normandy.
Mission Stats
Mission Rewards include 2,000 XP, 12,500 credits (listed both as Mission Credits and Found Credits), and a M-300 Claymore weapon reward. You also receive an Ariake Technologies Shoulder Guard armor piece, plus several mod options: a Pistol High Caliber Barrel, a Pistol Piercing Mod, a Shotgun Shredder Mod, a Shotgun Spare Ammo item (shown as a page that doesn’t exist on the guide), and an SMG High Caliber Barrel.
On top of that, the mission grants War Assets with outcomes tied to earlier decisions from Mass Effect 2. The guide notes that the middle War Asset depends on your actions there, while the other two are mutually exclusive. The War Asset options listed are Aralakh Company (25 TMS), plus two other alternatives: one labeled Tap to Reveal (25 TMS) and another labeled Tap to Reveal (100 TMS). (The page also redundantly repeats the item/mod groupings in additional blocks, including the same shoulder guard, mod list, and the same War Asset set.)
Recommended Loadout
For squad composition, the guide strongly recommends Garrus if you have him, since his Armor-Piercing Ammo and Proximity Mine powers complement a sniper-focused approach. Javik is another solid pick thanks to his biotics, including his own grenade; if you don’t have Javik, the page suggests using Kaidan or Liara as near-equivalent biotic support.
The guide also mentions timing: if you postpone the mission until after Priority: Perseus Veil (which it says not to do), then Tali becomes a good option if she’s available, specifically for her Defense Drone. It further highlights “Unique Dialogue” possibilities: Javik can provide special insight into the enemy’s background, while Garrus may have friendly relations with the leader of Aralakh Company if that person survived Mass Effect 2.
For Shepard’s personal loadout, the page calls out the From Ashes DLC option: the Particle Rifle is valued for replenishing ammo. It can be used to clear obstacles, helping you conserve M-451 Firestorm ammo for actual enemies—at least on easier difficulties. It also emphasizes the map’s open sightlines, recommending Sniper Rifles as particularly effective, while Shotguns are useful for dealing with Husks encountered during the mission.
Mission Enemies
The guide lists the primary enemy roster for this side mission as: Husk, Ravager, Swarmer (shown with a missing page indicator in the guide), and Cannibal.
Travel to Mulla Xul
- Prerequisite: Complete “Priority: Sur’Kesh”.
- Location: Ninmah Cluster – Mulla Xul – Utukku.
Although the mission becomes available right after finishing “Priority: Sur’Kesh,” the guide explains that your Krogan leader—either Wrex or Wreav—will ask you to meet in the War Room first to discuss the situation. One of their teams was scouting past the old Rachni Relay and didn’t return. Shepard is then tasked with meeting Aralakh Company, Urdnot’s best unit, and investigating what happened.
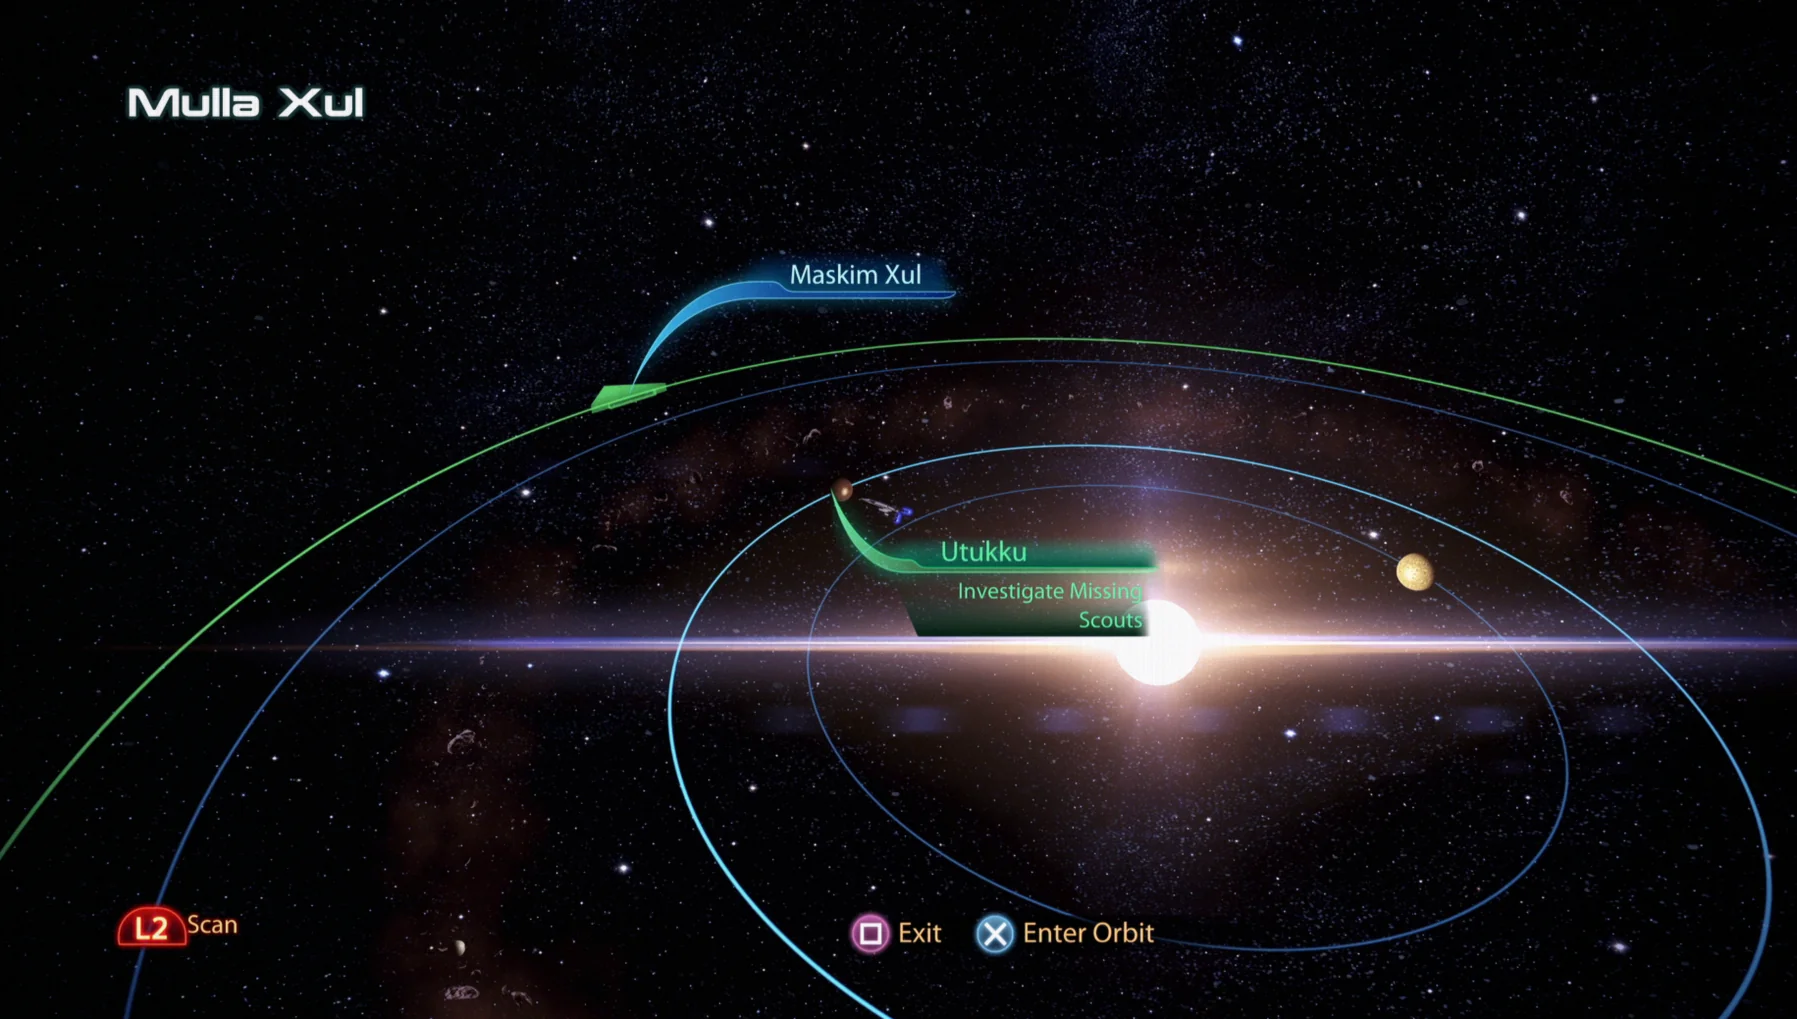
To start the job, travel to the Ninmah Cluster and enter the Mulla Xul system, which places you at Utukku, the claimed location of the missing scouts.
Find Tunnel Entrance
After a short sequence in the shuttle discussing the plan, you land and meet Aralakh Company’s leader. The guide says this is normally a character named Urdnot Dagg, but if Grunt was awakened in Mass Effect 2 and survived the Suicide Mission, then he becomes the Company Leader instead. It also notes that the leader will comment on whether you completed his Loyalty Mission, and that detail matters later in the run.
This landing phase also gives you Morality Points. The exact dialogue shifts depending on which leader you’re dealing with, but the upper-right choice grants +2 Paragon Points, while the lower-right choice grants +2 Renegade Points.
Once you’ve listened to the Company Leader’s advice, explore the immediate area to pick up loot. Inside the building on your left, you can claim the M-300 Claymore—it’s on the bed directly across from the entrance. In the same building, farther in, you’ll find the Pistol High Caliber Barrel sitting on another bed. There’s also Spare Parts worth 1,625 credits located inside the same structure, on PC tower-like boxes near the entryway.
M-300 Claymore
The guide pauses here to explain the Claymore’s tradeoffs: its “Clayme to Fayme” shot is described as the strongest single shot in the entire game, and it’s especially effective against shields. However, it’s also extremely heavy, fires only one shot per reload, and launches pellets rather than a single slug. The page recommends using it only if you’re comfortable working around those limitations.
From there, move down the hill to reach the lower camp area perched near the cliff edge. More rewards are waiting. In the back of the left-hand building—within the same room as a Weapon Bench—you’ll find an SMG High Caliber Barrel. In the right-hand building, Spare Parts worth 875 credits are placed on PC tower structures behind a large crate and a pair of Krogan.
Outside the right-hand building, you’ll encounter the Aralakh Company Leader. The guide recommends talking to them now to learn more about the team—especially if the leader is Grunt, since he’ll update you on what he’s been doing since Mass Effect 2.
Next, head into the building the Company Leader is standing outside of. The guide warns that the weight of Shepard and the squad is enough to crush the structure down into the hole below, cutting you off from Aralakh Company.
Explore Tunnels
Proceed into the caves. You’ll come across a scout’s body, and following the Company Leader’s advice will let you loot an M-451 Firestorm.
M-451 Firestorm
The Firestorm is described as a former downloadable-content heavy weapon from Mass Effect 2, functioning as a flamethrower that deals solid damage. Mechanically, it behaves like the Particle Rifle from the From Ashes DLC: sustained fire builds a large damage boost after roughly a second of continuous use. Its short range and “single-target” quirk mean it’s best used for clearing webbing and egg sacks in the Mulla Xul tunnel network.
After grabbing the Firestorm, burn away the webbing blocking the tunnel entrance in front of you. The guide emphasizes that this is extremely effective and adds a practical note: if you swap weapons, the Firestorm drops at your feet, and you can pick it back up again.
You’ll then enter a tunnel drenched in darkness. With only a flashlight to guide you, navigate the area and destroy obstacles such as Spore Pods. The guide describes Spore Pods as biomechanical egg sacks that pop when you get too close, dealing damage.
It also notes that the Firestorm isn’t as strong against Spore Pods as it is against webbing. If you run out of fuel, other Firestorms are positioned among the Krogan corpses as you push deeper—one is behind a wall of webbing at the second cluster of Spore Pods.
KBABZ Tip
Before stepping into the bright open section, check the rocks straight ahead for a Reaper-looking device. This is called a Barrier Engine, and the guide warns it’s particularly annoying. Destroying it early makes the next encounter much easier.
The moment you exit the pitch-black tunnel, the guide says you’ll collide immediately with a swarm of Husks and a new enemy type: Ravagers. Ravagers have an armored exoskeleton and long-range cannons that punish you hard if you linger in the open. Their pink tumors also release Swarmers and create an acid pool that harms Shepard if you step into it.
This area also contains a Reaper Barrier Engine, which the guide compares to Cerberus Shield Pylons—but with an added layer of biotic barriers. While Garrus’ Armor-Piercing Ammo works against barriers, the guide insists the better move is to destroy the Barrier Engine itself.
- Shotgun Shredder Mod – After the fight, return to where you entered from and look forward. Head left to locate a dead Krogan; the mod is beside him.
With the presence of Rachni confirmed, your objective becomes locating the nest and removing its source. The guide tells you to push through the thick cluster of Spore Nodes (using the View Prompt as you go) until you reach an important-looking Reaper Node. Even though it’s guarded by a Barrier, the Firestorm nearby works well, and the metal wall retracts so you can keep moving.
Unfortunately, a cave-in blocks your route back out through the way you came in.
Locate Central Chamber
You’ll return to quiet, dark tunnel navigation. The guide describes two routes forward—an elevated path and a lower waterlogged one—and says they reunite later. It recommends the left-hand waterlogged path because it’s easier to spot where it reconnects with the elevated route.
- Reaper Tech – 3,750 credits. When the two paths merge again, look left for webbing, destroy it, and loot the tech from the back wall.
Continue forward until you enter the next chamber, where you’ll be attacked by a lone Husk.
- Krogan Corpse – After you kill the Husk, you’ll spot two more webbing walls on the left-hand wall. Destroy the closer one to find a Krogan corpse behind it. Examining the body reveals a dying note, starting the side mission “Citadel: Krogan Dying Message,” which you can hand in on the Citadel.
Ahead, you’ll find a drop that’s also a chance to preemptively shoot out a Barrier Engine perched on nearby rocks. Do it to make the upcoming fight smoother. The guide adds that there’s a second Barrier Engine ahead on the left that you can also remove early.
In the next area, your squad senses immediate danger and they’re right. Husks, Cannibals, and Ravagers pour in and begin attacking. The guide urges you to eliminate Barrier Engines first so enemies can’t gain fortification from barriers that make them harder to kill. It also notes the number of enemies is a sign you’re getting closer to the nest.
- Shotgun Spare Ammo – At the second Barrier Engine location, follow the left-hand wall to reach the top of a slope. The guide says it’s next to a Krogan corpse.
After that, you descend a drop. The game auto-saves, and you receive another update from Grunt.
- Reaper Tech – 3,125 credits. After dropping down, clear the Gestation Pods on your left to find this behind them.
Keep moving through the next set of Gestation Pods; the guide warns they explode and can spawn Swarmers if you get too close. Still, watch the left-hand wall for another Firestorm beside a Krogan corpse. The guide suggests it helps with destroying the pods if you don’t have a Particle Rifle equipped.
- Ariake Technologies Shoulder Guard – After picking up the Firestorm mentioned above, jump across a gap into a waterlogged area. Ahead is a ramp next to a waterfall, and the mod is placed by another Krogan corpse.
Push ahead until you can spot Aralakh Company on the right side, using a View Prompt. Their leader will tell you they’re blocked and need help. Destroy the webbing, then drop down to the area where the Reaper Node is so you can support Aralakh Company.
After the cutscene ends, you can collect the final items in this section. There’s a Med Kit worth 50 XP directly ahead after the cutscene, beside a Krogan corpse. Next to that med kit is a Pistol Piercing Mod. Finally, there’s another Reaper Tech worth 3,125 credits at the start of the next tunnel: look right to find a cluster of Gestation Pods and destroy them to retrieve the tech from the right-hand corner.
The guide then instructs you to examine the narrow passage and press deeper into the Rachni central chamber. Once Shepard enters, metal Reaper walls rise up and block the route. To proceed, look up and to the left for a Power Node. Destroy it to lower one side of the barricade, though you still face heavy resistance.
The overall objective is to keep fighting through Reaper defenses while disabling Reaper Nodes until you can reach the core node. During this, you’ll fight Reaper forces including plenty of Ravagers and Husks. The page advises watching for nearby Firestorms close to Reaper Nodes that can help swing fights in your favor, as well as Barrier Nodes that strengthen defensive capabilities.
Once the third Reaper Node in the area is destroyed, you’ll meet the unwitting source of the Ravagers and Swarmers.
Fate of the Rachni
The identity of that source depends on your Mass Effect 1 choices. If you spared the Rachni Queen, she’s the one present—captured by the Reapers and forced to breed Ravagers and Swarmers for their army. If you killed the Rachni Queen, then the Rachni Breeder appears instead, explicitly stating she isn’t a queen and that she may be able to control her future children.
Both figures claim to hate the Reapers and offer to assist Shepard’s fight. However, the Breeder is described as far more unstable about it. The guide says you can earn Morality Points during this conversation, with the exact wording changing based on who you’re talking to:
- Choosing “It’s over now” / “The Reapers are gone” gives +2 Paragon Points.
- Choosing “You’re a puppet” / “You’re a danger” gives +2 Renegade Points.
After further discussion, Aralakh Company’s leader interrupts and makes it clear that if Shepard stays any longer, the company will die. At that point you must choose between the Rachni and Aralakh Company.
- If you let the Rachni die, you gain Aralakh Company as a War Asset worth 25 TMS, but lose the Rachni’s help.
- If you spare the Rachni, you gain Rachni Workers as a War Asset worth 100 TMS, but lose Aralakh Company.
The guide adds an additional conditional detail: if your Rachni is the Rachni Breeder, then there’s a “Tap to Reveal” element that appears on the page.
Whichever side you choose, you then execute a frantic escape from the tunnels while the Aralakh Company leader holds them off. The finale has multiple possible outcomes. If the Company Leader is Urdnot Dagg, he always dies at the end of the mission. If the Company Leader is Grunt, survival depends on whether you completed his Loyalty Mission, “Grunt: Rite of Passage,” in Mass Effect 2.
- If you completed that Loyalty Mission, Grunt survives and meets Shepard at the shuttle. The guide notes Grunt is treated as his own separate War Asset from Aralakh Company and is worth 25 TMS.
- If you didn’t complete the Loyalty Mission, Grunt dies, and Shepard departs without him.
Back on the Normandy
After debriefing Admiral Hackett about what happened on Mulla Xull, you’ll repeat the process with your Krogan leader. The guide indicates you can earn more Morality Points here based on who’s leading and what you did with the Rachni on Utukku.
- If Wrex is the Krogan Leader: choose “It’s over now” for +2 Paragon Points, or “It wasn’t pretty” for +2 Renegade Points.
- If Wreav is the Krogan Leader and you decided to save the Rachni on Utukku: choose “Excuse me?” for +2 Paragon Points, or “You’re a coward” for +2 Renegade Points.
The page also repeats the choice blocks in additional nested and duplicated sections, but the net result remains the same: you earn +5 Reputation and +5 Renegade Points for completing the mission regardless of which option you pick.
If this was your first main mission completed after “Priority: Sur’Kesh,” you’ll also be approached by your STG Doctor, who claims to have developed a cure. Depending on your choices, you can earn up to +4 Paragon Points or +4 Renegade Points and unlock “Priority: Tuchanka” as well—though the guide emphasizes you can still ignore it if you want.
Finally, the guide lists the usual “Normandy rounds,” where you check in with key crew members. It includes visiting Anderson in the CIC area (granting +2 Reputation), talking to your Krogan leader, checking in with Traynor to pick up “N7: Cerberus Abductions,” and speaking with Joker and EDI. In the Crew Deck, you talk to Garrus in the Port Observation deck, visit Chakwas and Adams in the Crew Quarters, spend time with Liara (who provides +2 Reputation and the Warp bonus power), check her Broker terminal, overhear Mordin singing in the Med Bay, and ask your STG Doctor about “The Shroud.” It also directs you to talk to Javik in Engineering, stop by Gabby and Ken (and talk to Ken), and swing by Allers, then talk to James in the Shuttle Bay.
If you want more help for Mass Effect 3, the guide points you toward sections covering Legendary Edition changes, how-to guides, key choices and consequences, romance content, walkthroughs, and a side missions hub.
Up Next: Tuchanka: Turian Platoon
The page also includes links to top guide sections such as Legendary Edition changes, game basics, tips and tricks, how-to guides, and a general “Was this guide helpful?” prompt, followed by an “In This Guide” section.