Mass Effect Bring Down the Sky: Interactive Map Locations and Rewards

If you’re working through the Mass Effect mission Bring Down the Sky, this guide-style walkthrough breaks down where to go, what to grab, and which Paragon and Renegade options to take—so you can finish the DLC’s main objectives and side assignments while maximizing rewards.
Key takeaways
- The DLC can be a major source of XP, loot, and Morality Points, but it’s also known for being challenging.
- On the original Xbox 360 / PS3 / PC release, players often wait until around Level 30 to reduce the impact of the Mako kill XP penalty.
- Legendary Edition removes the Mako kill XP penalty, so the “wait until later” approach isn’t necessary.
- The final rewards scale with Shepard’s level, with Level 50 guaranteeing the highest item tier (Level X).
- The walkthrough assumes a south-to-north route through the Fusion Torches, since the interior layout depends on the order you enter them.
- To get the Omni-tool reward, you must pass a Persuasion check; armor rewards are always Colossus armor.
Task Search
This page is part of a Mass Effect wiki guide focusing on the Bring Down the Sky mission. It covers how to locate all items, complete every side quest available in the area, and make the best moral choices for Paragon and Renegade outcomes.
Looking for something specific? The guide lists jump points for Essential Stats, planning steps, travel to the location, each of the three Fusion Torch phases, the main facility, and the post-mission conversation sequence, plus a closing “So What Next?” section.
Checklists
- Survey Station 3
- Body of T. Slajs
- Transmission Tower
- Disable Fusion Torch A
- X57 Radio
- Survey Station 1
- Avoid the Blasting Caps
- Disable Fusion Torch B
- Explosives Cache
- Disable Fusion Torch C
- Survey Station 2
- Head to the Main Facility
- Ending Conversations
Essential Stats
- Persuasion Points: 2 Charm / 2 Intimidate
- Minimum Decryption: Hard Decryption
- Minimum Electronics: N/A
Before We Begin
Bring Down the Sky is described as a valuable DLC because it offers plenty of XP, loot, and Morality Points—but it can also be difficult. Before you start, there are several version-dependent considerations and reward-planning notes.
- If you’re playing the original Mass Effect 1 release on Xbox 360, PS3, or PC, many players use a “step out for the finishing strike” approach to avoid the Mako kill XP penalty. If you want to keep doing that, the guide recommends saving this DLC until you’re around Level 30, since you’ll face multiple Heavy Turrets that fire rocket attacks faster than in other parts of the game.
- Legendary Edition players don’t need to worry about the Mako kill XP penalty, because it’s removed in that version.
- No matter which version you’re on, if you care about earning Morality Points early (and you aren’t following an Uncharted Worlds roadmap), start the content as soon as possible.
- At the end of Bring Down the Sky, you choose extremely valuable equipment, including a set of armor or an Omni-tool. These rewards scale to Shepard’s level, so if you want the best possible gear, the guide advises saving the final choice until Shepard is Level 50, which ensures the rewards are at Level X.
Travel to Asgard
- Location: Exodus Cluster – Asgard – Asteroid X57
The DLC takes place in the Exodus Cluster, just south of the Horse Head Nebula where Noveria is located, and the mission area is labeled with an Asteroid X57 marker. Travel to the Asgard system, then go to Asteroid 57 near Terra Nova, the first planet in that system.
There are no discoveries to make in this portion of the trip.
Recommended Squad
- Since you’ll be dealing with organic enemies with many talents, the guide recommends bringing Garrus and Wrex for their damage-focused strengths. Ashley plus Wrex is not recommended unless Shepard has Hard Decryption available.
As noted earlier, the level includes a clear golden route that leads you to each Fusion Torch. However, this walkthrough also covers two side quests—“X57: Missing Engineers” and “X57: Avoid the Blasting Caps”—plus other collectables you can find around the map.
One key detail: the interior layout of each Fusion Torch depends on the order you enter them. The first Fusion Torch you enter will have the same layout every time, regardless of where that Torch was on the map. The guide assumes you’re progressing from south to north.
Survey Station 3
Asteroid 57 has plenty to do, so the guide starts with side exploration. Drive a bit to the west and look for a question mark icon on your minimap. Follow it up the hill to reach Survey Station 3, a small container room.
- Technician Kit – At the base of a rusty transmission tower in front of the container room.
- Body of G. Mendel – Just outside the container room near the entry ramp.
- Aid Station – On the container room’s wall, positioned just above a bed.
- Station Log – A laptop on a desk near the Aid Station.
Body of T. Slajs
If you used the Station Log in Survey Station 3, you’ll have received a clue about another missing engineer named Slajs. To locate the body, return to the Mako and open the map. The route described is to drive due north along the top of a tall ridge on the west side of the area, then continue to the flatter section in the middle, and finally to the second ridge north of that.
On the second ridge, you’ll find a wrecked red vehicle called a Grizzly.
- Body of T. Slajs – Lying beside the Grizzly vehicle.
- Technician Kit – Close to the Body of T. Slajs.
Transmission Tower
Next, drive to the southeast toward the map marker labeled “Transmission Tower.” It’s located northwest of the southern-most Fusion Torch. When you arrive, repair the Transmission Tower to add the locations of all three Survey Stations to your map.
Disable Fusion Torch A
Now drive to the first Fusion Torch, labeled with a “1” on the map earlier in the guide. As you approach, the minimap shows it’s defended by six Heavy Turrets: four around the building, one nearby, and a sixth on the far side of the valley. Retractable wall cover protects them, allowing the turrets to fire once you’re in range.
You can drive past the defenses and go straight to the building that controls the Fusion Torch, but the guide recommends destroying the turrets anyway because they grant substantial XP. Non-Legendary players should aim to deliver the killing blow on foot to get the most out of those gains.
After wiping out all Heavy Turrets, enter the building near the Fusion Torch. Opening the main-room door triggers the first encounter with Batarians and their War Beasts known as Varren. Varren will rush you immediately, so the guide emphasizes shooting them down first.
From there, hit the fuel tank on the opposite side of the room, then press inward to eliminate the Batarians, who behave like typical humanoid soldiers while also using mild biotic abilities.
While you’re in the area, pick up these loot items:
- Grenade Storage Box – In the lower side-room, on shelves near the table.
- Storage Locker – On the west wall of the lower side-room near a bunk bed.
- Secure Crate – In the north-east corner of the upper side-room near the entry door.
Once the loot is collected, head to the upper side-room and look for the Torch Control. Hack it to trigger a brief scene involving someone from X57’s engineering team at the main facility. After the cutscene, exit the building and you’ll meet Simon Atwell in the lobby.
To maximize the conversation’s information, prioritize dialogue options on the left side of the dialogue wheel. Avoid choosing “I understand the situation” and other options on the right side.
During the discussion about Batarians, you can earn Morality Points:
- Choose “They’re not all like this” for +2 Paragon Points.
- Choose “Why wouldn’t they?” for +2 Renegade Points.
When the conversation ends, Simon assigns “X57: Missing Engineers” and “X57: Avoid the Blasting Caps.” The guide handles those as the route continues.
X57 Radio
After completing that area, get back into the Mako and drive up to the top of the mountain directly east of the Fusion Torch. At the summit, you’ll find a small container room containing the X57 Radio.
- Aid Station – On the wall, visible on the right as you enter the container room.
- Logs – A laptop on a desk in the room’s back corner.
- Radio Controls – Two inactive hologram projectors at the back of the room. Activate them to hear Mass Effect elevator music.
Survey Station 1
Open the map and find the marker for Survey Station 1 in the south-east corner. Pin it, then drive out and park by the container room so you can collect everything inside:
- Secure Crate – Average decryption. Located next to the container room’s end, opposite the entry door.
- Aid Station – On the wall of the container room beside a server.
- Body of C. Hymes – On the floor next to the Aid Station.
- Station Locks – On a table next to the Body of C. Hymes.
Avoid the Blasting Caps
Now head to the middle Fusion Torch toward the center of the map. From Fusion Torch A, it’s a straightforward drive north through the valley, but you’ll face additional Heavy Turrets as you get close. Keep Simon’s instructions in mind and park outside the circle of yellow beacons—those beacons mark a zone with proximity mines. Eliminate the Heavy Turrets before approaching the building.
The guide adds that four Batarians guard the building’s entrance, including a Rocket Trooper. On higher difficulties, remove them carefully because their positions are sunk into the ground and provide solid cover. A recommended sniping position is on the south bank where one Heavy Turret stood. Park the Mako safely, move toward the facility to draw the Batarians out, then use the Mako as cover to pop up and shoot the Rocket Trooper, followed by the remaining three.
For the next approach, the Mako is too large and awkward to move through the minefield without triggering explosions. You’ll have to go on foot. The mines appear as orange X markers on your minimap, and you can use the proximity meter beside the minimap to get warning if you’re too close. The guide lists two good entry approaches (as shown in the map):
- West-south-west – From the orange Mako marker. You’ll slide past two mine pairs while climbing a hill, and you can use those structures as cover to shoot the entrance Batarians.
- East route – From the blue squad marker. Walk up the hill behind the building and toward the Batarians, but you’ll need to drive around the mines first.
Once you pass the mines and reach the front door, use the Blasting Cap Controls to disarm the explosives and complete the assignment. Then you can go indoors.
Disable Fusion Torch B
Inside, you’ll run into more Batarians supported by Rocket Drones. The recommended tactic is to move to the upper balcony where the Batarian Engineer stands, preventing him from spawning additional Rocket Drones. The Engineer is also dangerous because he can hack your weapon, causing the next shot to overheat instantly and lock the weapon for ten seconds or more.
After the room is clear, check for loot:
- Crate – Next to a thin column on the south side of the main room, near a raised area reached via a ramp that offers cover.
- Storage Locker – On the west wall of the lower side-room.
- Medical Kit – On the upper balcony on the northern edge where drones spawn.
- Secure Crate – Average decryption. Near the Medical Kit, hidden behind a red box.
Once you’re done looting, head back to the upper side-room and use the Torch Controls to continue the story.
Explosives Cache
From here, move to the north-east corner of the map. Along the way, you’ll find small structures marked with question marks on the minimap near the eastern edge.
Enter the container room in that area to find:
- Aid Station – To your right upon entering, on the middle divider wall.
- Station Logs – A laptop on the opposite side of the divider wall. Reviewing it reveals the location of an Explosives Cache to the north on your map.
Open your map, pin the Explosives Cache icon in the north-east corner, then drive over. It’s a small container room shack. Inside, collect:
- Grenade Storage Boxes x8 – Located on shelves inside the container room. Each box has 2 grenades, totaling 16. However, Shepard can only carry 5 grenades at once, so don’t open everything immediately or you’ll waste potential pickups.
Disable Fusion Torch C
Return to Fusion Torch B, then head west over the hill to reach the third and final Fusion Torch. Clear all Heavy Turrets as you approach, then go inside.
The fight continues with Batarians and Varren again, but this time the room uses a U-shaped layout. The guide recommends using that structure to funnel Varren into a more controllable shooting area, then circle around the corner to eliminate their masters.
After the combat, loot the building:
- Storage Locker – On the west wall of the lower side-room between two inactive Storage Lockers.
- Grenade Storage Box – Under the bunk bed to the right of the Storage Locker.
- Secure Crate – Average decryption. In the south-east corner of the upper side-room.
When you’ve collected everything, return to the upper side-room and use the Torch Controls. This action saves X57, but you still must handle the Batarians afterward. The next confrontation begins as soon as you descend to the lower floor, where you’ll face Balak’s second-in-command.
On arrival to the lower level, Charn approaches and wants to negotiate. The guide outlines these conversation options:
- If you have 2 Charm, pick “Forget Balak” to convince him to leave and earn +8 Paragon Points.
- If you have 2 Intimidate, pick “Don’t be stupid” so he leaves; the guide notes this also grants +8 Paragon Points, despite the renegade-leaning phrasing.
- If you choose “[Attack Him]” at any point (or shoot during or before the conversation starts), you’ll fight Charn and his men, earning +9 Renegade Points plus XP and Credits from the Batarians and Varren you’ll have to defeat on the way out.
Once your choice is made, exit the building to keep exploring Asteroid 57.
Survey Station 2
Before heading to the main facility, there’s one more side assignment to complete. Travel north through the valley, then when you reach the stop point, go west toward the Survey Station 2 marker on the map (pin it if you need to). It’s another container room. In this room, interact with two objects:
- Hardened Crate – Hard decryption. Located in the container room’s left corner at the foot of a server.
- Aid Station – On the wall inside the container room on the opposite side of the server.
- Station Logs – A laptop on the desk beside the Aid Station. Checking it spawns three Defense Drones that you must fight, and the guide stresses that this step is mandatory for the side quest.
Destroying the three Defense Drones can be risky because you’ll be largely exposed. The only cover available is inside the container room: two large boxes, a nearby claw, or the Mako itself. You can also use the Mako’s weapons on the drones if you want.
After the drones are down, check the east side of the container room for footprints to Example, which apparently lead east. Get into the Mako, backtrack slightly east, and look for the Body of R. Montoya in a low area on the right. Examine the body to learn the story and pick up additional loot.
If you followed the walkthrough in order, this is the last person you need to complete “X57: Missing Engineers.”
Head to the Main Facility
Now return to the north end of the valley and travel east up the valley to the Main Facility. The entrance is guarded by three Heavy Turrets, but unlike earlier fights, these turrets move up and down on rails, making them harder to hit. On foot, the guide strongly suggests using the Mako as cover.
Once all three turrets are destroyed, go inside the facility.
After entering, move into the lobby. Before the fighting begins, search the lobby for:
- Aid Station – In the entryway facing inward; it’s on the wall to your left.
- Grenade Storage Box – On a small raised platform immediately next to the Aid Station.
Proceed up the stairs into the main atrium, where there’s a large amount of Batarian resistance.
Inside, you’ll battle Batarians spread across the room plus multiple drones. The encounter is frustrating because your minimap doesn’t cover the entire space, meaning you’ll spend extra time tracking down the final few enemies before you can push forward.
The atrium is divided into two levels, and neither is ideal tactically. On the lower floor, you’re exposed to enemy fire from above. On the upper floor, there’s more cover, but the railing is tall enough to block your shots against enemies on the lower level when they’re too close.
To make things worse, Batarian Engineers will push your weapons into overheat for ten seconds or more and can sabotage multiple guns in sequence. Be ready to swap equipment so you can keep firing with something.
There are also helpful items you can grab during the fight:
- Grenade Storage Box – On top of a tall planter in the lower-most area of the lower level.
- Aid Station – On the west wall of the medical room on the upper level.
- Aid Station – On the south wall of the medical room on the upper level.
When every enemy in the atrium is defeated, a final Batarian spawns in the container room at the southern portion of the lower floor. Kill him to trigger an important cutscene.
Balak appears, the person behind the terrorism. The guide notes that left-side dialogue options usually tease out more information, but the conversation ultimately funnels into two major choices: attack him or let him go to save hostages.
- If you choose “[Let him go to save hostages]”, you receive +24 Paragon Points. Hostilities continue with constantly spawning Defense Drones, and you’ll have between two and ten minutes (depending on difficulty) to locate and disarm three Explosive Charges, which are marked in yellow on the map earlier. Disarming all three ends the fight.
- If you choose “[Attack him]”, you receive +25 Renegade Points and must fight Balak, two bodyguards, two Varren, and two Defense Drones. You can’t progress until you eliminate all of them.
Ending Conversations
Balak
If you attacked Balak earlier, the fight ends and you’ll enter another conversation with him. He’s badly wounded and will eventually die. You can choose upper-left dialogue options to learn more about his viewpoint, or lower-left options to push the scene toward his painful, slow death.
In all cases, Balak is removed from the story, but there are three different ways to end the sequence:
- Select “[Kill him]” at any time to kill him immediately, with the guide noting you won’t gain additional Renegade points from that method.
- Select “[Leave him for the Alliance]” to have him later placed in Alliance custody and tried for his crimes.
- Select “[Leave him to die]” to walk away and let him die slowly, which the guide says will open up some Renegade points in the next conversation.
Simon Atwell
After Balak’s departure, you’ll reunite with Simon Atwell. He confirms that you saved Terra Nova and his extended family. As before, the guide emphasizes that left-side dialogue options yield more information.
Specific choices depend on what you did with Balak:
- If you let Balak go, choose “I’m not like him,” then “Only temporarily” to earn +2 Paragon Points.
- If you sacrificed the hostages and then left Balak for the Alliance, choose “No one could have done better,” then either “Damn right I am” or “As hard as possible” to earn +2 Renegade Points.
Simon then expresses gratitude and offers one of six rewards: Quarian Armor, Light Armor, Medium Armor, Heavy Armor, or an Omni-tool. Key reward notes:
- The Omni-tool is locked behind a Persuasion check, so you’ll need enough Charm/Intimidate to unlock it. The guide states that neither Charm nor Intimidate choices here grant Morality Points.
- The armor options are always Colossus armor, which the guide describes as the best armor in the game due to top-tier shields and damage/tech/biotic protection. It also highlights that Quarian Armor is especially rare in the first game.
- Item level works like loot, so the item tier is tied to Shepard’s level. To receive Level X, Shepard must be Level 50 by the time the atrium fight is finished.
Finally, if you’ve found all three of Simon’s missing engineers, select “About your three engineers” to confirm their fates and complete the assignment. If you haven’t completed that task, you can always return later and speak to Simon again at the building’s lobby desk.
Kate Bowman
Next, open the door on your right to free the hostages. If you spared them by letting Balak go, you’ll talk to Kate Bowman, and the conversation grants XP and Credits. If you didn’t free them, the guide states they’ll be charred corpses and won’t provide anything.
You can continue earning extra dialogue by exiting the room and going to the far left, where Kate mourns her brother.
You’re now finished. If you haven’t found all three engineers, the guide advises heading to the “X57: Missing Engineers” page to learn where they are. After that, return to Simon in the lobby to wrap up the assignment. You can leave and come back to Asteroid X57 at any time.
So What Next?
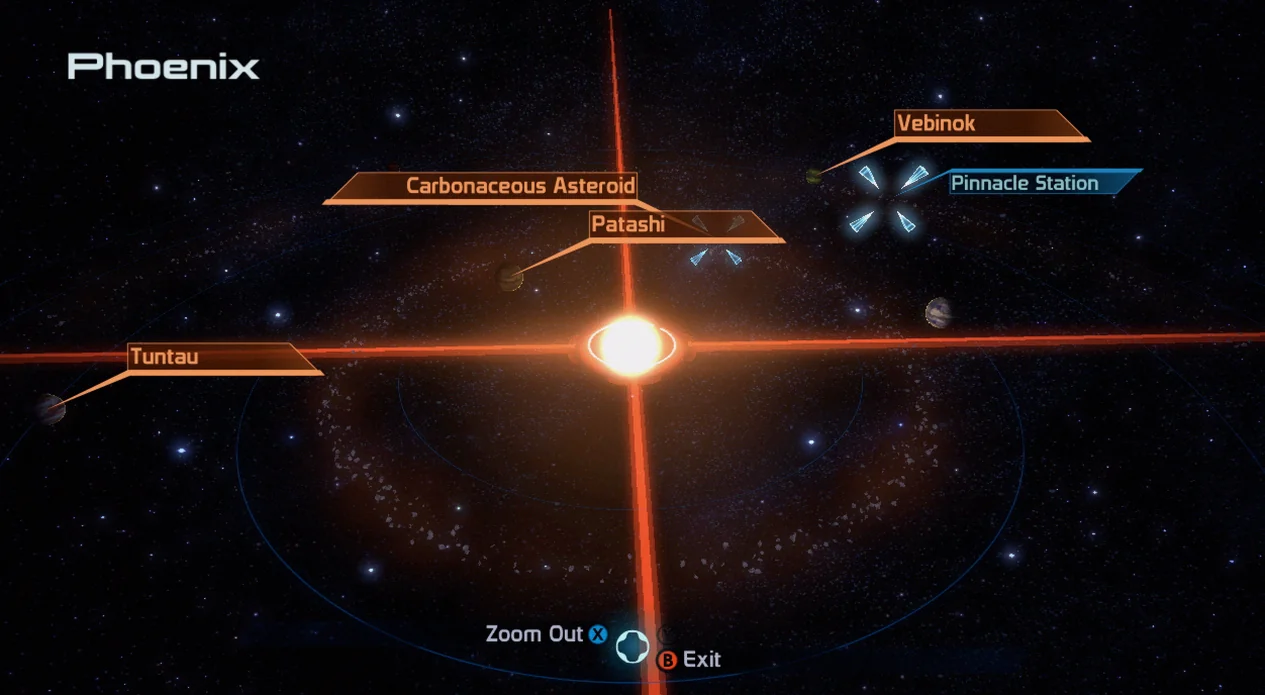
After following this guide, your next step depends on whether you have Mass Effect 1’s other DLC, Pinnacle Station.
- If you’re playing the original release on Xbox 360 or PC, and you have the Pinnacle Station DLC installed, do that next.
- If you’re playing Legendary Edition, on PS3, or otherwise don’t have Pinnacle Station, the guide recommends going to the “Post-First Mission World” page next.
If you want more Mass Effect help, the guide points to additional pages, including Legendary Edition changes, how-to guides, key choices and consequences, romance options, walkthrough content, and side quests.
- Legendary Edition Changes
- How-To Guides
- Key Choices and Consequences
- Romance Options
- Walkthrough
- Side Quests
Up Next: Missing Engineers
Top Guide Sections
- Legendary Edition Changes
- Basics
- Tips and Tricks
- How-To Guides