Black Ops 7 Kowakujo Easter Egg Guide: Coin Purse to Key Accomplices
One big part of the Kowakujo main easter egg centers on uncovering three accomplices tied to the Shogun’s murder. To get them to show up, you’ll need to secure a set of specific items—starting with a Coin Purse. Below is a full, step-by-step walkthrough for collecting everything required to push this long-running easter egg toward its final cutscene.
This is the complete walkthrough for the primary Kowakujo quest easter egg in Black Ops 7 Zombies, including the steps you’ll need to reach the end cutscene.
If you’re missing any of the items listed below, make sure you’re working through the earlier stages of the Kowakujo easter egg guide first, since each phase depends on the prior one.
How to Get the Coin Purse in Kowakujo
First, you’ll need a key piece of evidence: the Coin Purse. To find it, you must check every Mystery Box location on Kowakujo until you locate one that has a wooden tag sitting next to it (the tag is shown in the reference image mentioned in the original instructions).
Once you find the spawn point with the tag, the Mystery Box has to be at that exact spot. You can move it there by spinning the Mystery Box until Mr Peeks teleports it to the tagged location, or by using a Fire Sale Power-Up. If you want to force a Fire Sale to appear with Immolation Liquidation, that also works.
Next, throw the Maneki-Neko Tactical Equipment you crafted earlier in the easter egg. (You can build one from the workbench via Vulture Aid for 500 Salvage.) As soon as you toss the Maneki-Neko at the Mystery Box, open the box for 950 Essence, then immediately interact with the wooden tag. Doing this correctly makes the Mystery Box reward you with the Coin Purse instead of a weapon.
With the Coin Purse in hand, return to the previous area (Outer Ward). Stand near the Rampage Inducer to trigger a spectral Coin Purse. When you interact with the ghostly item, a cutscene will play—signaling you can move on to the following steps.
How to Find the Gardener in Kowakujo
To summon the Gardener, you’ll need to grab the Bucket, which is located on a shelf in the Tea Garden. Pick up the bucket, then look to your left to find a small pond. Interacting with the pond fills the Bucket with water, but running, jumping, or taking damage will spill it, so take your time.
You then need to carry the filled Bucket to the Flower Garden. There are three ground spots you can interact with to grow flowers. The original guide references images for the exact placement, but the descriptive locations are:
- By a stone just in front of the Armor Wall-Buy.
- In front of the Ammo Box on the edge of the stone path.
- In front of the Ghostly Riflemen Trap, by the flower bed, by the red bridge.
After you water all three locations, the Gardener will spawn. You’ll know it’s complete because the dirt patches you interacted with will show an animation. Now you need to kill him: shoot one of the three grown, glowing plants to strip his immunity, then shoot the Gardener until he’s dead.
Defeating the Gardener grants the Gardener’s Note and the Gardener’s Shears. The Shears are the major evidence item you’ll use for the accomplice portion of the murder setup.
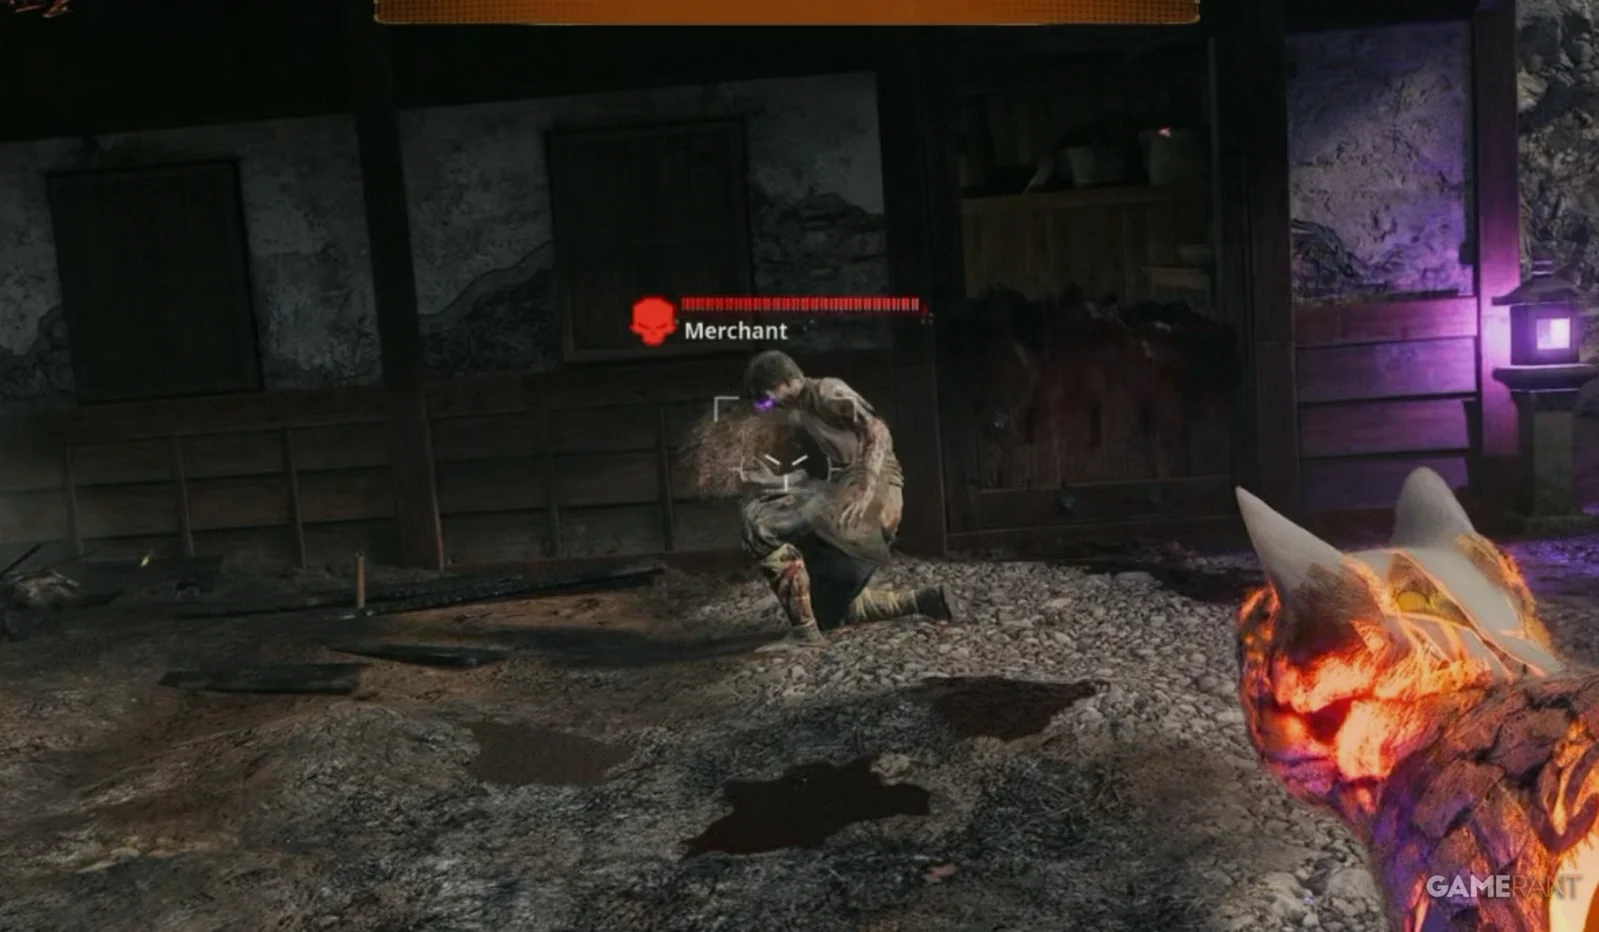
How to Find the Merchant in Kowakujo
For the Merchant, head into the Kitchens. Opposite the Arsenal, you’ll spot a shelf holding a box of fruit. Melee the fruit box to make one of the fruits drop to the floor. Then, leave the area, start a fresh round, and return to that same location at the end of the round when there are fewer zombies.
At that point, you’ll find a zombie holding the fruit in its mouth. Your job is to lure that zombie toward the Staging Area. Once the fruit zombie is standing in front of the north building in the Staging Area, you can kill it to trigger the Merchant spawn.
There’s no special gimmick for the Merchant beyond normal combat. You simply need to defeat him like any other zombie, though he has a large health pool, so it’s smart to bring enough ammunition to finish the job.
When you kill the Merchant, he drops the Mercantile Abacus—the accomplice evidence you need for the next part of the mystery.
How to Find the Noble in Kowakujo
To locate the Noble, you’ll need three Decoy Grenades. You can obtain them for free after the Ghostly Riflemen Trap finishes, or you can craft them at any Crafting Table. Once you have the grenades, go to the Training Area and look up at the east building.
You must throw a Decoy Grenade into each of the three windows. If you do it quickly enough, those windows will open, and the Noble will wake up inside—then begin throwing grenades at you.
When the Noble throws a grenade, you need to pick it up, cook it, and throw it back at him before it detonates. The Noble will move between the three windows, so your timing matters. If you line up the explosion correctly as he passes, after roughly three grenade throws he should be defeated.
When the Noble dies, he drops the Noble’s Hat, which is the final evidence piece required. After you collect each item, bring them to the Meditation Room to place the evidence down and unlock the next stage.
Once you’ve gathered all evidence components, you can solve the murder mystery. Use the remaining steps in the guide to make the solution process easier.


