Mass Effect 2 Dossier: Tali on Haestrom Guide—Combat, Routes, Choices
Mass Effect 2’s Dossier: Tali on Haestrom is a compact but demanding run featuring tight traversal, several waves of Geth (including Hunters and Rocket Troopers), and multiple dialogue checkpoints that can affect your Paragon/Renegade totals. This guide page walks you through the mission’s combat routes, collectible hunting, and the choices you’ll need to make to keep your playthrough on track.
Checklists
This walkthrough page covers the Dossier: Tali assignment on Haestrom, including how to get through every combat encounter, where to locate all collectibles, and which dialogue options to select during your run.
- Before We Begin
- Mission Rewards
- Travel to Dholen
- Look for Tali
- Find Demo Charges
- Contact Quarians
- Get to Tali
- Back on the Normandy
Before We Begin
Before you even step into Haestrom, there are two important things to know.
First, there’s a weapon tied to your difficulty setting: the Geth Pulse Rifle. It only shows up at the very end of the mission if you’re playing on Hardcore or Insanity. To unlock it, you must complete the full level on one of those difficulties. If you enter Haestrom while you’re not set to Hardcore or Insanity, the rifle won’t be present when you reach the end. Also, it’s not an automatic pickup—if you don’t physically grab it, you can still miss it.
Second, you can unlock a lot of special dialogue by bringing the Squad Mate from “The Reaper IFF Mission.” Just be careful: doing so could interfere with getting the best outcome if you’re planning to Romance Tali later in the game. If that’s your goal, hold off on this assignment and “The Reaper IFF Mission” until the very end, while you handle the Project Firewalker DLC assignments in parallel.
Mission Stats
Video Guide
Mission Rewards
- Experience: 1,000 XP
- Weapons:
- Geth Pulse Rifle (Hardcore and Insanity only)
- M-9 Tempest
- Research:
- Assault Rifle Damage
- Heavy Pistol Damage
- Mission Credits: 30,000 credits
- Found Credits: 39,000 credits
- Resources: 2,000 Iridium
- Geth Pulse Rifle (Hardcore and Insanity only)
- M-9 Tempest
- Assault Rifle Damage
- Heavy Pistol Damage
As the numbers above show, this mission is one of the rare cases where the Mission Credits total doesn’t match the maximum possible Found Credits.
Travel to Dholen
- Prerequisite: Complete “Horizon”.
- Location: Far Rim – Dholen – Haestrom
To start Dossier: Tali, travel to the planet Haestrom. First, reach the closest Mass Relay from wherever you currently are, then head to the Far Rim at the northeast edge of the galaxy. From there, you’ll be taken to a small system called Dholen, dominated by a massive red star that’s nearing a nova.
If you choose to mine it, Haestrom is one of the Rich planets you can harvest from. Haestrom itself sits just south of the Mass Relay (and yes—there aren’t actually cardinal directions in space). This planet is a Geth stronghold, and Tali has already infiltrated it—she’s the person you’re going to locate here.
Recommended Loadout
- Squad Tactics:
- Because you’ll face plenty of synthetic enemies across wide, open areas, Garrus and Zaeed are strongly recommended.
- Unique Dialogue:
- If you care more about extra dialogue flavor, bringing Grunt and/or Kasumi can give you some entertaining remarks.
- Because you’ll face plenty of synthetic enemies across wide, open areas, Garrus and Zaeed are strongly recommended.
- If you care more about extra dialogue flavor, bringing Grunt and/or Kasumi can give you some entertaining remarks.
Look for Tali
NOTICE
If you want the Pulse Rifle reward at the end of this mission, you MUST set your difficulty to Hardcore or Insanity before you do anything on Haestrom. Changing it too late means the rifle won’t appear when you reach the finish.
When you land, you’ll spot a small critter being cooked by sunlight. Use that as your warning: try to stay out of the light when possible, since the star dominating the sky is failing and has fried the planet’s magnetic field.
From the drop point, move forward and down the ramps. Sprint through the sun toward shaded sections. There aren’t any enemies in this stretch, but building this habit early matters. Also note: Mass Effect 2 doesn’t give you a sprint meter like the first game, so you won’t know how much sprint you have until you test it yourself.
At the bottom of the ramp, you’ll run into a massive blast door straight ahead that won’t open even if you examine it. Instead, use the smaller door on your right. Inside, you’ll find a distress signal stating that Tali is using a computer near a fallen Quarian.
- Med Kit – 100 Credits. Located on the stone block to the right of the computer running the message.
- Damaged Geth – 3,000 Credits. Found on the red Geth body to the right of the entry door.
Turn your attention to the left side of the Quarian computer to locate the Gate Controls. From there, you can open the facility gate and head into the first combat zone. Time to shoot Geth—practically “like it’s 2183.”
After that, circle around outside and pass through the blast door you’ve now opened. Once you’re on the other side, run forward through the sunlight and quickly get to cover. A Geth dropship will arrive and unload more enemies. The early wave is manageable—stick to cover, avoid direct sunlight (the sun doesn’t impact Geth Shields), and trim their numbers as you advance. Disruptor Ammo can be a major help if you have it.
If you’re carrying a Sniper Rifle, look for the ramp that leads to an upper corridor on the right side of the area. This funnels many Geth toward the far end of that hallway, letting you pick them off with far less trouble—as long as you still have ammo. No matter which route you took, pushing toward the blast doors on the far side will bring in a large group of Geth Rocket Troopers. Peek out carefully so you don’t get knocked out of cover and erased.
Once the area goes quiet, head back up to the elevated corridor mentioned earlier to collect loot.
- Medical Station – 100 Credits. In the middle of the elevated corridor on the right side. There’s a doorway in the center that leads to a ramp; the Medical Station is at the top of that ramp.
- Customized Heavy Pistol – Heavy Pistol Damage. From the Medical Station, go down the ramp all the way to the bottom to find it beside a dead Quarian leaning against the wall.
- 400 Refined Iridium – Return to the elevated corridor, then move to the far end closest to the exit of this combat area. Turn left, go down the ramp, then proceed straight to an L-shaped drilling machine. The Iridium is on the machine.
You’ll find more Iridium on these drilling machines later on, so keep scanning every machine you pass.
With the loot collected, move toward the final blast door of this section. When you reach it, it’s locked—so shift right along the wall until you spot a small opening where Geth appear to be practicing shots. Eliminate them fast before they realize what’s happening.
- Damaged Geth Hunter – 6,000 Credits. Ignore the Quarian Radio at the far end and instead look to the right-hand wall. You’ll see a Geth Hunter body flashing in and out of an invisibility cloak.
- Tempest SMG – Found on a dead Quarian a bit closer to the Quarian Radio than the Damaged Geth Hunter.
M-9 Tempest
The M-9 Tempest upgrades your starting M-4 Shuriken with higher damage and a faster firing rhythm, but you trade away some accuracy—especially if you hold the trigger down too long. In practice, it’s best suited to squadmates. They don’t struggle with accuracy the way Shepard can, and they fire more shots than the Locust used in the Kasumi DLC.
Pick up the Quarian Radio to begin a conversation with Kal’Reegar. He fills you in on what he knows, and the situation becomes clear: they’re here to ensure Tali can escape the planet safely. Early in the dialogue, you can choose:
- “I’m here to help” for +2 Paragon Points.
- “They’re all dead” for +2 Renegade Points.
Kal wants to cooperate, but a dropship blocks your route forward by crushing the path with a Collapsed Pillar. You’re urged to locate explosives to push through the debris. Near the end of the exchange, select:
- “What’s your current status?” for +2 Paragon Points.
Find Demo Charges
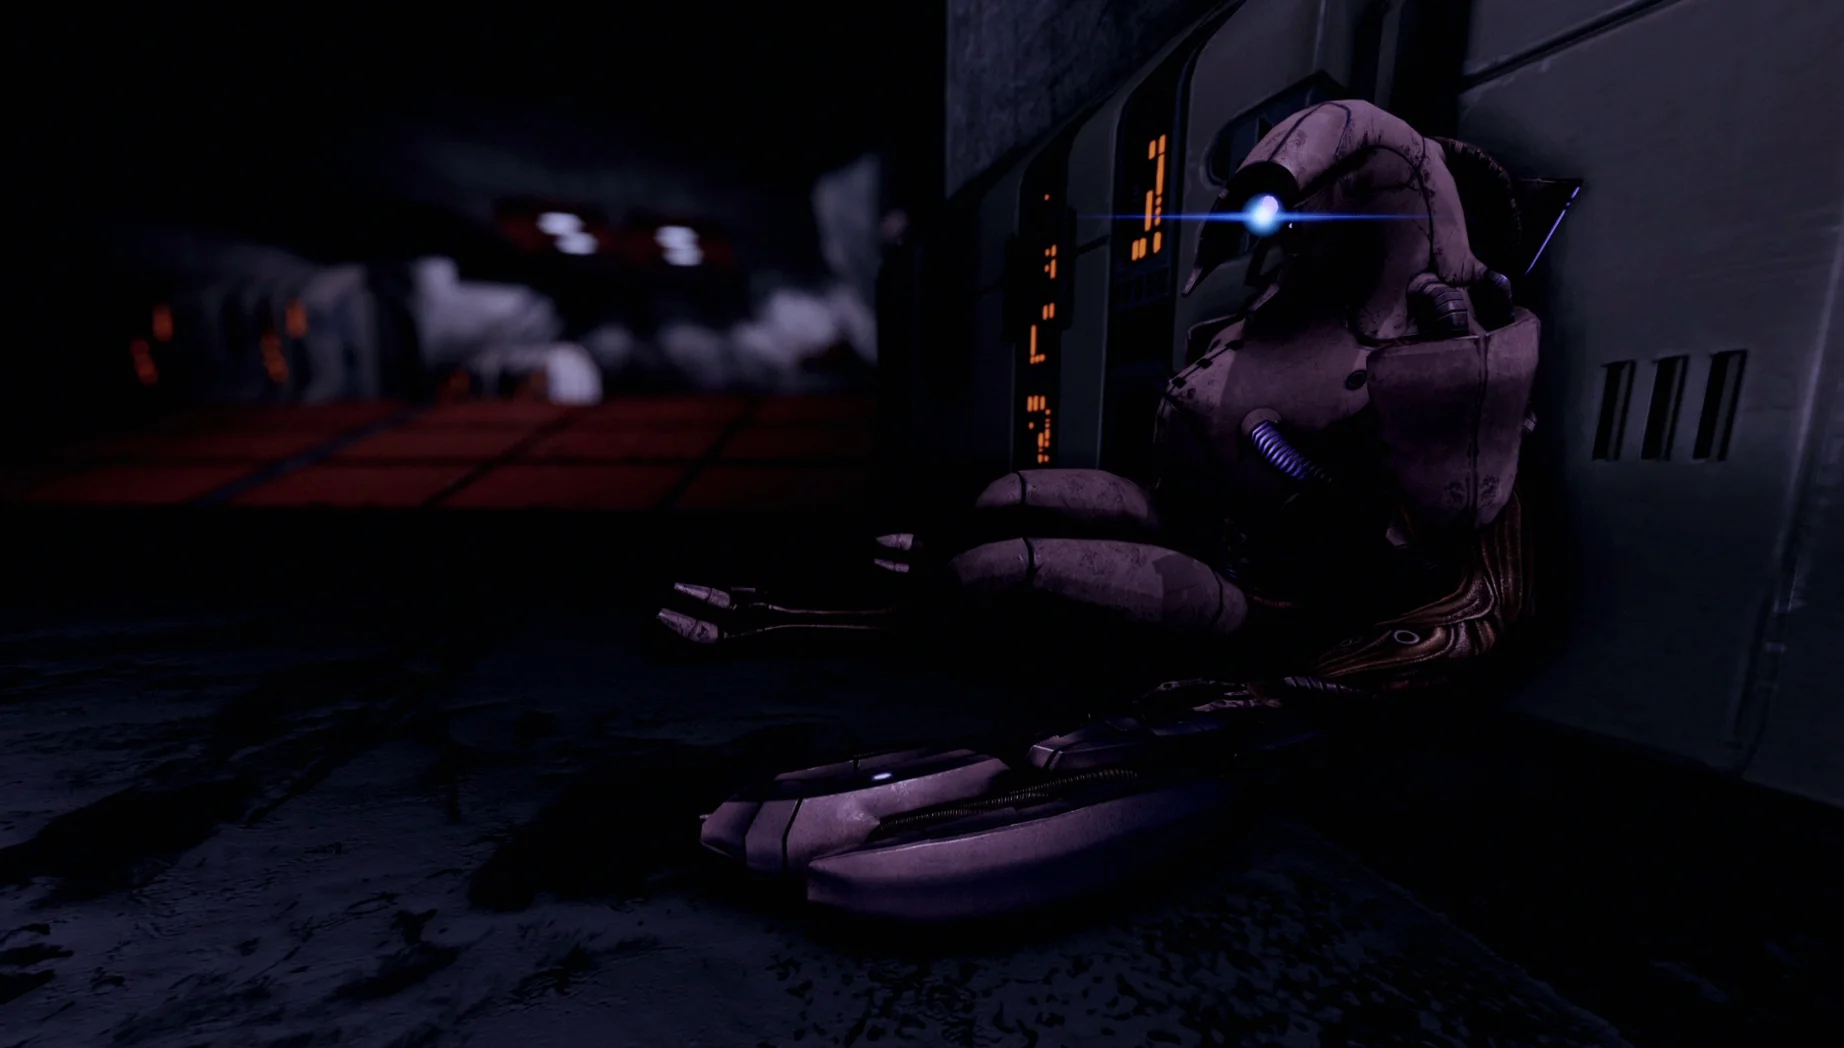
The explosives you need are split between two different locations, but they’re close to each other in the next portion of the area. This is also your first encounter with a Geth Hunter—nearly invisible until it’s right in front of you, where it can shotgun you. Prioritize these enemies.
Once you wipe out the initial group, your first stop is a room on the left. As you approach, Geth Troopers begin firing at you. When you enter, more enemies spawn. Your advantage here is that the Geth have to pass through the doorway first, letting you thin the weaker targets like a bottleneck. When that wave is cleared, go into the room and read Tali’s Journal, but leave the Demolition Charge on the desk alone for the moment.
- Medical Station – 100 Credits. Take the ramp near the desk; it’s at the top.
- Med Kit – 100 Credits. Check behind the crates from where the Demolition Charge sits.
As soon as you pick up the Demolition Charge, Geth reinforcements move in to block your exit route. Retreat to cover in the back of the room. One of the enemies you’ll face here is a Geth Prime—an extremely dangerous foe. It behaves like a YMIR Mech, except it doesn’t fire rockets and it moves faster. Because of its high defenses, treat it as a high-priority target.
When the fight ends, leave the room and head left toward the next Demolition Charge. Expect multiple Geth waves as you descend toward a quarry room at the far end. The closer you get, the more attackers show up, including Geth Destroyers—flamethrower specialists with solid protection. The sunlight is limited here, so you can dodge more easily, and cover is plentiful. After you clear them out, move to the far side of the area, enter the room, turn left, and grab the second Demolition Charge.
- Medical Station – 100 Credits. On the wall to the left of the Demolition Charge.
- Power Cells – 100 Credits. On the concrete block to the left of the Demolition Charge.
When you exit the room, you’ll be attacked again. This time, you may run into Rocket Troopers on an elevated walkway. Use distance and cover to make sniping them easier. There’s also an optional left-side detour: moving left with your back to the explosives lets you find a ramp up to the second floor. From there, you can open the shutters to create crossfire that makes Rocket Troopers simpler to eliminate.
Once you clear the enemies, you’ll have room to explore.
- 400 Refined Iridium – Enter the room entrance to find another L-shaped drilling machine with this Iridium on it.
- Medical Station – 100 Credits. From the Iridium, turn left and climb to the top of the ramp to find it.
- Tali’s Journal – From the Medical Station, head outside to the upper walkway and cross to the opposite side.
- 400 Refined Iridium – Return to the Collapsed Pillar where you’re about to use the Demolition Charges, then check the brown drilling machine near it for more Iridium.
Now it’s time to go back to the Collapsed Pillar: plant the explosives, then retreat to a safe distance before it detonates.
Contact Quarians
With the Pillar broken into two sections, head inside to discover a Quarian holdout that’s been wiped out. You can still melee the crawling geth if you want a small act of revenge. Don’t forget Tali’s Journal on the computer.
- Damaged Geth – 6,000 Credits. Resting at the base of the short ramp on your right.
- Disassembled Geth Rifle – Assault Rifle Damage Research. Take a U-turn up the short ramp on the right to find this on a table.
- Damaged Geth – 3,000 Credits. Located at the closed door in the upper section where you found the Disassembled Geth Rifle.
- Ancient Wall Safe – 6,000 Credits. To the right of the terminal where Tali is trying to reach base camp (this is the building you’re currently in).
Next, activate the Communications Console to speak with Tali, who is in a different building inside the quarry. She requests your help, and naturally you’ll do what you can to assist.
- When the dialogue begins, choose “No one else is left” for +2 Paragon Points.
In the next Dialogue Wheel, you can choose:
- “I came to help” for +2 Paragon Points.
- “I’m recruiting you” for +2 Renegade Points.
No matter which option you pick, you’ll still need to eliminate Tali’s geth problem so she can complete her objective and join your squad.
Tali will remotely open the sealed door on your left.
- Medical Station – Available through the door Tali opens. It’s to the right of the ramp doorway.
Eventually you’ll emerge from behind concrete pillars while Geth drones observe you. You’ll have to fight two powerful Geth Primes while those drones constantly pester you. Unfortunately, the drones periodically return until both Primes are destroyed. A pistol and an upgraded Overload ability can be a strong way to clear them quickly.
Be ready to kill several dozen enemies. Many fall after taking only small amounts of damage, but they can still deal a surprising amount of harm to anyone caught unprepared. They coordinate well and are fairly aggressive. Don’t let their bulk fool you—your best early strategy is to hold still for a moment, engaging the few Geth that appear, and more importantly drawing the drones toward your position so you can take them out in a concentrated push. If you can, snipe the first Geth Prime, then shift using the right-most route to stay away from the sun.
Once everything is finished, head to the exit door across the far side. This large section doesn’t contain additional rewards, loot, or collectibles. Still, once you pass through the door you’ll find:
- Ancient Wall Safe – 6,000 Credits. After you exit the large area, turn right and look on the right-hand side of the door frame.
Use the Security Console to remove the Security Lockdown, then continue onward.
Get to Tali
As soon as the lockdown lifts, you’ll see a huge Geth construction—an enormous Colossus—inflicting heavy damage just outside Tali’s position. Shepard can just barely evade its attacks. Needless to say, bringing down the Colossus becomes your top priority.
- Med Kit – 100 Credits. At the bottom of the final ramp, where the Quarian in red is crouched for cover.
At this point, you’ll run into Kal’Reegar. He’s the last remaining member of Tali’s squad and has a ruptured suit from trying to reach her.
- Choose “Is she safe?” for +2 Paragon Points.
Later in the conversation, Kal suggests using his rocket launcher to draw the Geth’s attention so Shepard can take advantage. If you understand Quarians at all, you know that’s a bad plan—Quarians have very little armor. The conversation also reveals your path forward:
- Pick “No. Stay down” for +2 Paragon Points, then use the Paragon Interrupt to make sure he remains in cover and gain +15 Paragon Points more.
- Or say “Sounds like a plan” for +15 Renegade Points, which results in Kal joining your fight.
The next battlefield has three routes toward the Colossus, and each comes with drawbacks that match Kal’s earlier explanation.
- The right path gives you a sniper perch, but it’s heavily exposed to sunlight. At the far end, reinforcements can attack you from behind, and—oddly—the Colossus doesn’t regenerate while you’re on this route.
- The middle route offers plenty of cover, but you can get trapped between Geth on both sides. It also leaves you vulnerable to the Colossus, which can knock you out of cover.
- The left route provides shade and cover, but you can be attacked from both the front and the back. The good news: it leads to Power Cells you can use to refill your Heavy Weapons.
The recommended approach mixes two of them: start with the middle route to clear out the Geth in your way, especially Destroyers with their flamethrowers. Once only regular Geth remain, move up the elevated walkway toward the right side to prevent getting surrounded from that direction. When you get to it, switch to your most accurate weapon and begin firing.
When you reach the end of the elevated walkway, reinforcements arrive. Because the end position has extremely poor cover for shooting backward, the better move is to backtrack down the walkway and return toward the boxes near the ramp, where you can handle the new arrivals more comfortably. Keep crouched, since this route has no shade unless you’re behind the railing.
After dealing with the Geth footsoldiers, return to the far end of the walkway and take cover near the top. This reduces the Colossus’ height advantage. The wide railing gives you space to avoid its pulse rockets. When it isn’t firing rockets, it’s using machine guns—meaning you only have brief openings to attack safely. Because you’re using the right-hand route, the Colossus also will not recharge its shields. That detail is especially valuable if you’re aiming for the Pulse Rifle reward.
When the Colossus is destroyed, you’re free to explore the surrounding area.
- 1,600 Refined Iridium – Split across four separate boxes, each holding 400 Iridium. They’re placed on the four drilling machines in the outdoor portion of the area.
- Power Cells – 100 Credits. On a block at the base of the corner column to the left of the door leading to Tali.
- Power Cells – 100 Credits. On crates to the right of the door to Tali, tucked into a dark corner.
- Damaged Geth – 9,000 Credits. The red Geth body directly in front of you when you open the door to Tali.
- Intact Pulse Rifle – Located on the right-hand wall of Tali’s room. There’s a sparking Geth holding a Pulse Rifle. If you completed the entire mission on Hardcore or Insanity, you can pick up this Pulse Rifle.
If you meant to do that but forgot to switch your difficulty to Hardcore or Insanity before starting, you can pause and use the Load menu to restart the mission. That also lets you reselect your squad and weapons.
Geth Pulse Rifle
The Geth Pulse Rifle is one of Mass Effect 2’s most distinctive weapons. Its rate of fire rises and falls like a sine wave, and while it’s extremely accurate, it shreds shields and synthetic enemies effectively. It struggles against organic targets, but Incendiary Ammo can help, or you can lean into Disruptor Ammo for more disruption.
After that, head to Tali and start the conversation. Early on, choose:
- “Can you join me now?” for +2 Paragon Points.
- “The quarians owe me” for +2 Renegade Points.
Talk with her at length about what’s happening and what her system-center sun research has produced. If Kal’Reegar survived the Colossus battle, he’ll be here too—still injured, but alive. You can then speak with Kal using:
- “Do you need transportation?” for +2 Paragon Points.
- “Tali’s with me now” for +2 Renegade Points.
Once her mission is complete, Tali joins your squad. Kal heads back to the Quarian fleet on his own. Finishing the assignment awards you +5 Paragon Points and +5 Renegade Points.
Back on the Normandy
After speaking with Tali on the planet surface, the game automatically transports you back to the Normandy. If you remember “Freedom’s Progress,” Cerberus infiltrated the Quarian fleet and destroyed one of its ships. Tali hasn’t forgotten, and she makes it clear she’s here for Shepard—not for them.
- Tell her “I agree completely” for +2 Paragon Points, then choose “Feel free to study the ship” for +2 Paragon Points more.
Next, go to Engineering and talk to Tali at the station on the left side of where Gabby and Ken are. If you ask how she’s doing, you can say:
- “I don’t trust them” for +2 Paragon Points.
- “They’re on our side” for +2 Renegade Points.
Tali’s Research upgrade is a major one: Cyclonic Shields for the Normandy. Since the ship has previously been targeted by the Collector’s forces, it’s a smart purchase. If you’ve collected all three Normandy combat upgrades—Cyclonic Shields, Silaris Armor, and Thanix Cannon—you can talk to Joker again and ask about the mission to trigger an additional dialogue line.
Now it’s time to wrap up your post-mission visits.
- Engineering – Stop by for Gabby and Ken’s thoughts about Tali, then speak directly with Tali.
- Crew Deck – Talk to Garrus to pick up his Loyalty Mission.
- CIC – Speak with Kelly and Joker for their opinions about Tali. If you purchased all three Normandy upgrades, ask Joker about the mission for updated dialogue.
If you’ve been putting off the “Normandy: FBA Couplings” assignment because you wanted extra unique dialogue, now’s the moment to finish it. Tali joins the poker game: select the white dialogue options to win or lose 100 Credits, or use Charm/Intimidate options to win 500 Credits.
Before you do anything else, head to Omega to begin the “Omega: Packages for Ish” assignment in the main plaza.
After starting that, it’s also recommended that you visit Ilium, which includes a large number of new stores and additional Side Quests. Those details are covered in the “Illium – Shopping and Side Quests” page.
Want more Mass Effect 2 help? Check out these additional pages:
- Legendary Edition Changes
- How-To Guides
- Key Choices and Consequences
- Romance Options
- Walkthrough
- Side Quests
Up Next: Dossier – The Assassin
Top Guide Sections
- Legendary Edition Changes
- Basics
- Tips and Tricks
- How-To Guides


