Black Ops 7 Endgame: How to Defeat 3 Glitch Bosses in Prime Target
The last phase of Operation: King Killer in Black Ops 7 Endgame can feel like a puzzle box—especially if you’re unsure what the game actually wants you to do. After you clear the Terminal Vector Activity and make it to the Prime Target Glitch, your job becomes straightforward but demanding: take down three Glitch Bosses across three separate Glitch Sectors. This guide breaks down the complete Glitch Step: Prime Target, plus quick, practical tactics for defeating every Glitch Boss fast.
Release & availability snapshot: Endgame Glitch Step: Prime Target
These steps are part of Black Ops 7 Endgame’s Operation: King Killer. The Prime Target Glitch “fracture” is described as becoming available for all future games after you finish the Terminal Vector Activity waves, meaning you shouldn’t need to repeat that portion once it’s unlocked.
Successful completion of the Prime Target Glitch provides Operation: King Killer final rewards and also includes Nightmare Skill rewards for your Operator. The guide also lists multiple reward conditions tied to specific character runs and solo performance.
Objective #1: Complete a Terminal Vector Activity
To complete a Terminal Vector Activity, you first need an Encryption Key. You can obtain one by either defeating a DAWG or Rhino during a Surprise Shipment Activity in the Tier IV Zone, or by eliminating a Titan in a Guild Stronghold within the Tier IV Zone.
With an Encryption Key in your inventory, a Terminal Vector Activity will appear on the map in one of two locations: the building south of High Town or the Heli Port. Travel to the activity site while carrying the Encryption Key, then interact with the Command Node at either point of interest to start the activity.
Inside, you must clear four distinct waves within the building where the activity was triggered. Here’s what each wave requires:
- Lockdown Imminent (Remain in the Area): Stay in the designated area until the timer hits zero. During this stage, enemies are delivered via VTOLs. Eliminate them to reduce the amount of pressure you’ll face in the next wave.
- Lockdown (Destroy Firewall Modules): Firewall Modules will appear around the building’s walls. Destroy every module before the timer runs out. You can scout where they are during the previous Lockdown Imminent step to save time. Guild Bots will activate during this phase too, so handle them as well.
- Defend the Command Node: Return to the Command Node (terminal) and stay within the blue zone while you defend against incoming enemies. Stop the push long enough to fill the progress bar before time expires.
- Survive the Onslaught: Hold out against enemy waves until the timer reaches zero. The guide’s approach is to camp in a room with a single entrance to make enemy elimination easier. Note that the objective is purely to survive—enemies keep spawning until the timer ends.
After all four waves are cleared, the Prime Target Glitch Fracture is unlocked for all future games, removing the need to repeat this Terminal Vector Activity.
Black Ops 7 Endgames Operation Broken Mirror may be easier until the end, but for Operation: King Killer, the final stretch is the Prime Target Glitch itself. Next up is how to enter it and beat the Glitch Bosses efficiently.
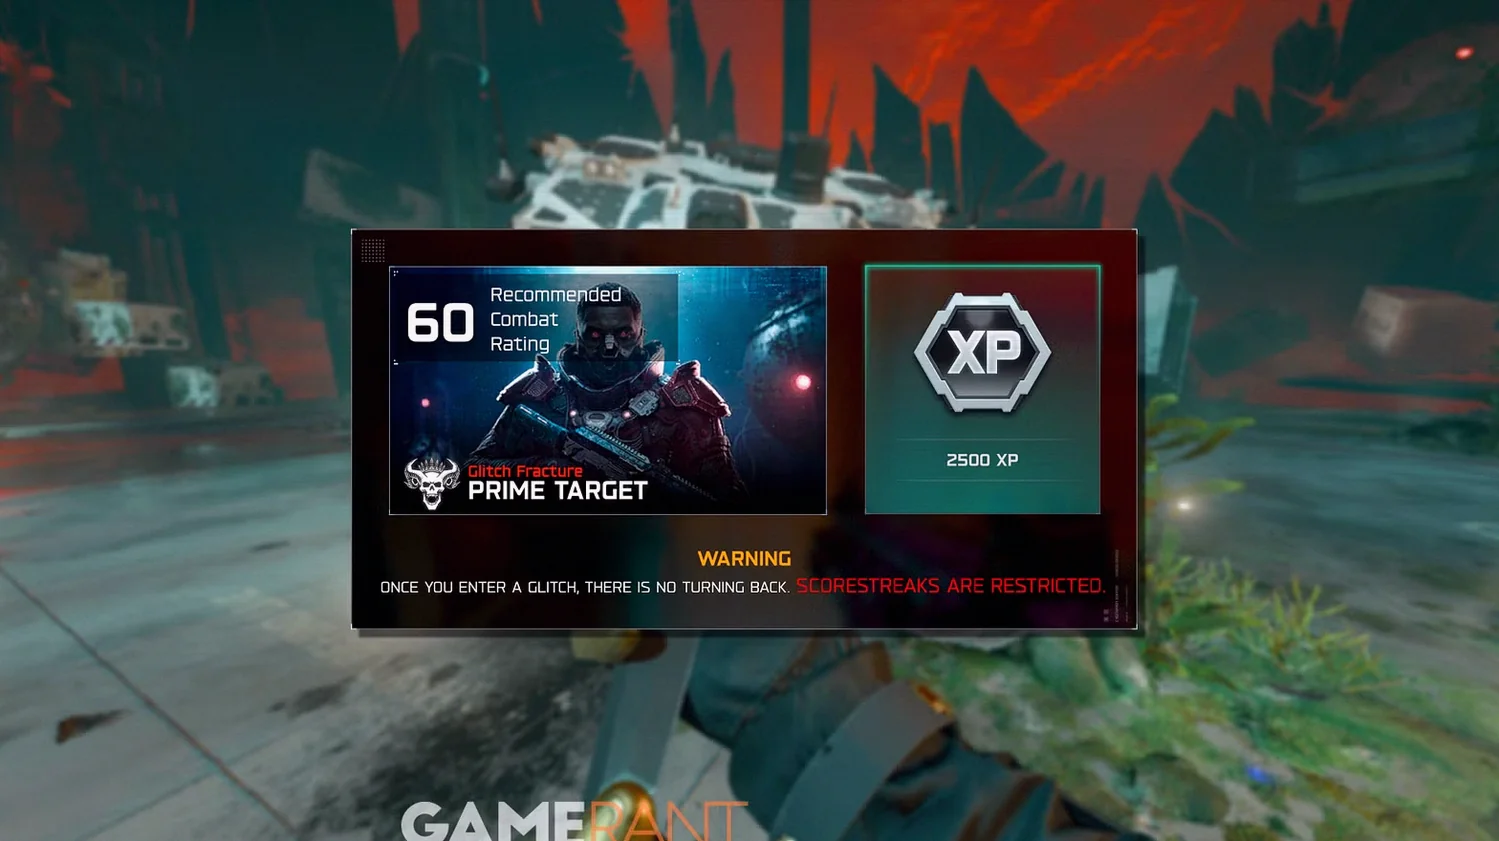
Objective #2: Enter the Prime Target Glitch and Defeat the Glitch Boss
The Prime Target Glitch is located on the island south of Coastal Security. Before you head over, the guide recommends bringing an Operator with a Combat Rating of at least 60 and at least one fully upgraded Exotic Weapon. Once you reach the Glitch location, interact with it to enter.
Loadout suggestions include equipping an EMP Grenade as your Tactical. If you’re playing solo, the guide suggests using the Crash Cart ability; if you’re in a squad, it recommends having a teammate run Ballistic Shield. Inside the Prime Target Glitch, you must defeat three Glitch Bosses across three different Glitch Sectors before the time limit runs out.
Glitch Sector 1: How to Beat HZRD-666
This sector pits you against a boss version of the Rhino Elite enemy. For maximum damage, aim for the center of HZRD-666’s head to land critical hits. Use cover, stay aware of additional enemies spawning, and watch for Unknown Entities that can trap you. When you need a damage window, use EMP Grenades to briefly stun HZRD-666, so you can fire without interruptions.
At intervals, HZRD-666 becomes immune to damage. When that happens, eliminate the enemies marked in yellow and then return the shards they drop to the central zone in the sector. In solo play, you’ll need to deposit four shards; in squads, that requirement rises to eight. Once enough shards are placed, HZRD-666 becomes vulnerable again—repeat until the boss is defeated.
Glitch Sector 2: How to Beat X9-Hellcore
To beat X9-Hellcore, you first have to make the boss vulnerable by capturing a zone shown on your HUD. Stay inside the highlighted zone and defend it until the capture completes. Avoid getting trapped while you’re holding the area. Since many threats are Unknown Entities and Guild Bots, you can stun them with EMP Grenades during the capture phase.
When X9-Hellcore becomes vulnerable, the guide’s recommended positioning is moving directly underneath the boss, since this helps reduce the chance of getting hit by its projectiles. Then keep firing continuously at X9-Hellcore to deal as much damage as possible until it becomes invulnerable again. Capture the next zone and repeat the cycle until its health reaches zero.
Glitch Sector 3: How to Beat D3M-ON
The final boss is D3M-ON. Before it spawns, the guide suggests heading to each yellow-marked Sentry Turret and activating them. These turrets help keep Unknown Entities off you during the fight. Reactivate them as needed, because they remain active only for a limited duration.
After setup, the fight comes down to dealing enough damage. The guide notes it couldn’t find a critical weak spot, meaning firing from your available angles is still effective. You also can’t get close to the boss or stun it using EMP Grenades, so plan around that reality. D3M-ON uses several attacks, and here’s how to respond to each one:
- Standard ranged turret attack: This is the most basic move. It’s described as inaccurate, so keep moving while continuing to shoot.
- Laser attack: At the beginning of each phase, D3M-ON fires a laser that can shock you. Stay behind cover to avoid it. Once the laser points away, use the opening to fire.
- Rocket attack: Two variations. First, a trio of rockets fired after D3M-ON jumps to the side of the arena—sidestep or take cover. Second, a barrage that marks locations while the boss stays in the arena—sidestep to avoid taking damage.
- Leap Shockwave: This happens when D3M-ON leaps back to the center after jumping out of the arena area. Make sure you’re in the air when the shockwave lands to avoid the hit.
Once you’ve dealt enough damage, D3M-ON is defeated. That completes the Prime Target Glitch, granting your final rewards for Operation: King Killer, plus a Nightmare Skill for your Operator.
All Glitch Step: Prime Target Rewards in Black Ops 7 Endgame
To the Grave Calling Card
Complete all earlier Operation King Killer steps, then complete the following objectives:
- Complete a Terminal Vector Activity
- Enter the Prime Target Glitch and defeat the Glitch Boss
Defeat the Prime Target Glitch Boss as Samuels
Defeat the Prime Target Glitch Boss as Wei Lin
Defeat the Prime Target Glitch Boss as Kagan
Unlock one Data Freeze Operator Skin
Unlock all three Data Freeze Operator Skins
Complete the Prime Target Glitch Solo
Defeat the Rhino in the Prime Target Glitch without anyone being Shocked


