Mass Effect 2: N7 Archaeological Dig Site Walkthrough and Collectibles Guide
This Mass Effect 2 walkthrough page focuses on the Archaelogical Dig Assignment, laying out where to locate every collectible, how to handle the mission’s combat waves, and which decisions to make so your playthrough stays on track.
Checklists
- Assignment Rewards
- Travel to Joab
- Investigate Dig Site
- Retrieve Artifact
- Back on the Normandy
Assignment Rewards
- Experience: 125 XP
- Mission Credits: 3,750 credits
- Found Credits: 3,750 credits
- Resources: 500 Element Zero
Travel to Joab
- Prerequisite: Unlock “Jacob: The Gift of Greatness”.
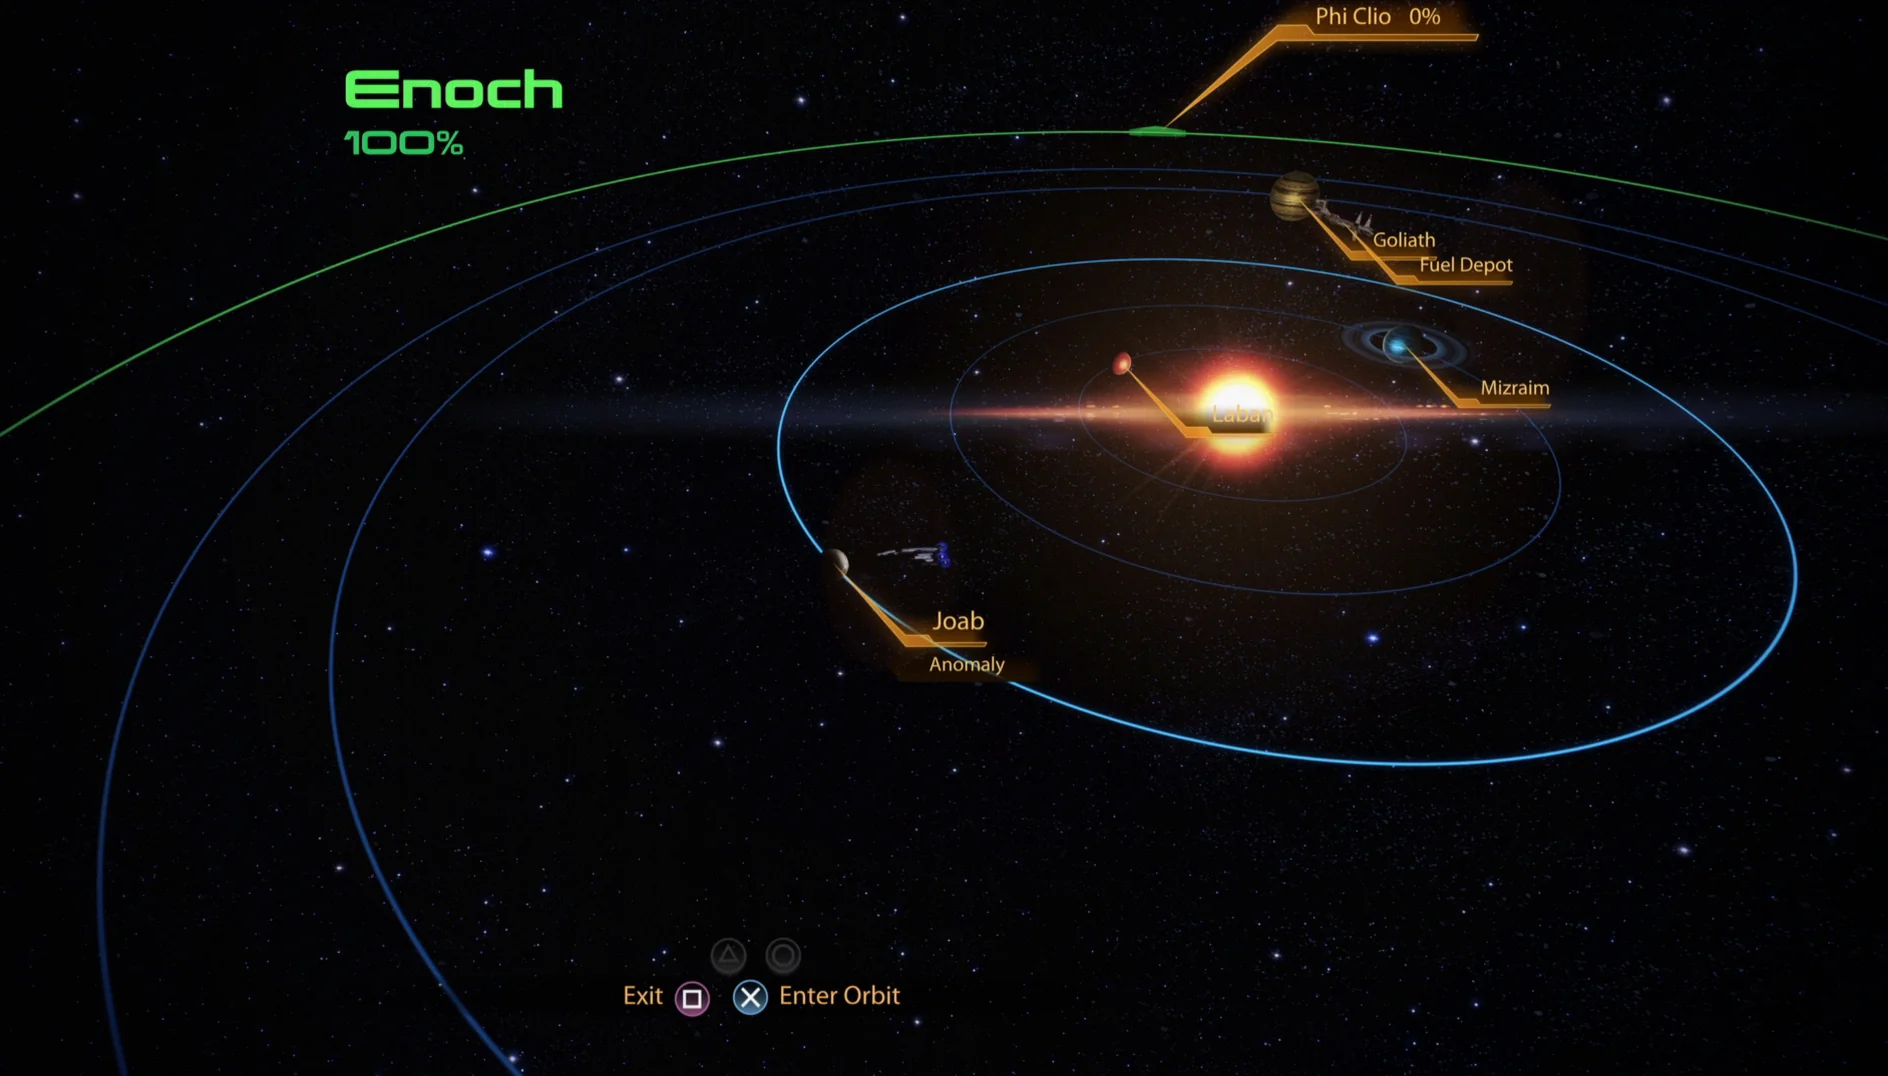
- Location: Rosetta Nebula – Enoch – Joab
You can only start this Assignment after you’ve unlocked “Jacob: The Gift of Greatness.” Once that’s done, the Rosetta Nebula becomes available, and this mission can be selected whenever you want. Your goal is a small rocky world in the Enoch system—Joab is the third planet orbiting its star.
Joab carries some extra side-quest flavor. Long ago, a spacefaring people established themselves here, but their history ends in total destruction—apparently by someone who leaves no survivors. Today, Blue Suns mercenaries have taken shelter inside one of the dig locations. Your job is to make sure they leave, by force if necessary.
If you’re hoping to mine, Joab is tied to the only Rich world in the Enoch system:
Recommended Loadout
- Squad Tactics:
- Because the Blue Suns you’ll face are high-level, Garrus and Zaeed are strong picks. Their survivability is high, and they can strip both Shields and Armor.
- If you don’t have Zaeed, Grunt works as a solid alternative.
- Because the Blue Suns you’ll face are high-level, Garrus and Zaeed are strong picks. Their survivability is high, and they can strip both Shields and Armor.
- If you don’t have Zaeed, Grunt works as a solid alternative.
Investigate Dig Site
After scanning the planet, dropping a probe at the correct spot, and landing there, you’ll take control of your squad on the surface of this temperate world. As you advance toward the entrance to the archaeological dig, mercenaries intercept you and emerge in multiple waves.
Make use of the cover in the area to reduce incoming damage. Try to avoid the “fragile crates” when possible, since they don’t provide reliable protection. When you have a safe opening, return fire and slowly thin the enemy group as they funnel through the doorway.
Once you’re confident this wave has fully stopped (for the moment), push through the same door to continue. Before you do, though, take a moment to explore:
- 125 Refined Element Zero – Stand facing the entryway, then follow the rock wall on the left to locate a side section with two trucks. The Element Zero cache is hidden in a box among crates between the two “080” trucks.
- 175 Refined Element Zero – Starting from the Element Zero box you found above, keep moving along the left rock wall past one of the “080” trucks. You’ll spot a stack of crates, with this Eezo container sitting on top.
Return to the front and enter. Immediately find cover—there are several Blue Suns mercenaries in this larger room, and more will pour out through the two doors on your left. After that, another assault comes from the glass-lined catwalks at the far end. You’ll need to fight in quick succession so you don’t get overwhelmed by numbers.
Be smart about positioning as well. Attacks can come from three different angles, so prioritize threats based on proximity: the enemies closest to you are typically the most dangerous. If things start to spread out, it becomes a scramble—so keep moving and eliminate targets as efficiently as you can.
When the area seems clear and most (or all) of the nearby enemies are gone, it’s time to do some more searching.
- Personal Locker – 750 Credits. From the entry door, follow the left-hand wall until you see a row of bunk beds. One of the lockers between those bunks can be opened.
- Personal Locker – 750 Credits. From the entry door, follow the right-hand wall to find two bunk beds with this locker placed between them.
- Med Kit – 100 Credits. Found on a table in the kitchen/dining area of the main room, near the ramp.
- Computer Terminal – Located on the side of the ramp with the glass railing. This terminal provides lore about how the Blue Suns ended up here.
- Personal Locker – 2,250 Credits. In the main room with the ramp, go up the ramp and then turn left through a door. Ahead on the back wall are three lockers; open the left-hand one.
When you’re ready, exit the room through the door on the upper balcony. Head left down a long sloping tunnel toward the next doorway. As soon as you step through, take cover immediately and brace for another enemy barrage. As usual, the “fragile crates” aren’t worth trusting—use the glass railings instead, since they hold up far better. The small initial group should fall without too much trouble.
As you push toward the center of the room and continue to the right, enemies reveal themselves again from a broader area packed with crates. Among them is Lieutenant Locke—take him down. Then deal with the Blue Suns Commander, who is significantly tougher. Once that fight is over, you’ll be ready to grab the final loot items in this space:
- 200 Refined Element Zero – Stand in the middle of the crate arena, face the back door, and then look to your right. Against the glass railing is a stack of crates with this Eezo box sitting on top.
- PDA – Still in the middle of the crate arena, face the back door and then look left to find a lone crate leaning against the glass railing. The PDA is on top. Reading it grants the “N7: MSV Strontium Mule” Assignment. If you somehow miss it here, checking your Private Terminal afterward will also unlock the Assignment.
Retrieve Artifact
With the enemies eliminated and the loot secured, go through the final door. Inside you’ll find a Prothean Video Log. Watching it completes the side quest. Be ready, though: Shepard’s next vision is closely related to the one seen on Eden Prime, just with a small added twist.
Back on the Normandy
Once you’re back aboard the ship, it’s time for a quick follow-up.
- CIC – Speak with Jacob again for more reflections, and you’ll also gain Morality Points if you choose: “The ship needs a bar:
- Choose “It usually is” for +2 Paragon Points.
- Choose “I wouldn’t know” for +2 Renegade Points.
- Choose “It usually is” for +2 Paragon Points.
- Choose “I wouldn’t know” for +2 Renegade Points.
If you want more help with Mass Effect 2, there are additional pages to check out:
- Legendary Edition Changes
- How-To Guides
- Key Choices and Consequences
- Romance Options
- Walkthrough
- Side Quests
Up Next: N7 – Blood Pack Base
Top Guide Sections
- Legendary Edition Changes
- Basics
- Tips and Tricks
- How-To Guides