SAND Raiders of Sophie: Extraction Tips to Win Fights and Grab Loot
Extracting resources in SAND: Raiders of Sophie is one of the most stressful parts of each expedition. You’re not only racing against the match timer and the map’s shifting danger—you also have to worry about other players cutting in and taking what you hauled back. The good news is that extraction follows a clear set of rules once you know what to look for.
Checklists
Getting out and extracting your hard-earned resources is a difficult task in SAND: Raiders of Sophie. You’ll need to locate an extraction point while also hoping no other player swoops in to steal your equipment. Even worse, extraction locations aren’t always easy to spot at first. Here’s what you need to understand about extracting during your run.
- How to Find Extraction Points
- How Extraction Works in SAND: Raiders of Sophie
How to Find Extraction Points
When you load into a match and begin your expedition in SAND: Raiders of Sophie, extraction points won’t be visible on the map right away. They don’t show up at the start of the round. Instead, you need to wait for the second round to begin.
Once that second round starts, a new storm circle appears and starts closing toward the middle of the map. That timing matters: it gives you a window to scout the outer areas first, grab extra loot, and then move inward—often toward zones where other players may already be converging.
After the second round begins, multiple door icons start appearing across the map. You can spot these icons while you’re driving your walker, or by pulling up the pocket map you keep on your character. These door symbols mark extraction locations. Head to any of them to start the extraction sequence.
How Extraction Works in SAND: Raiders of Sophie
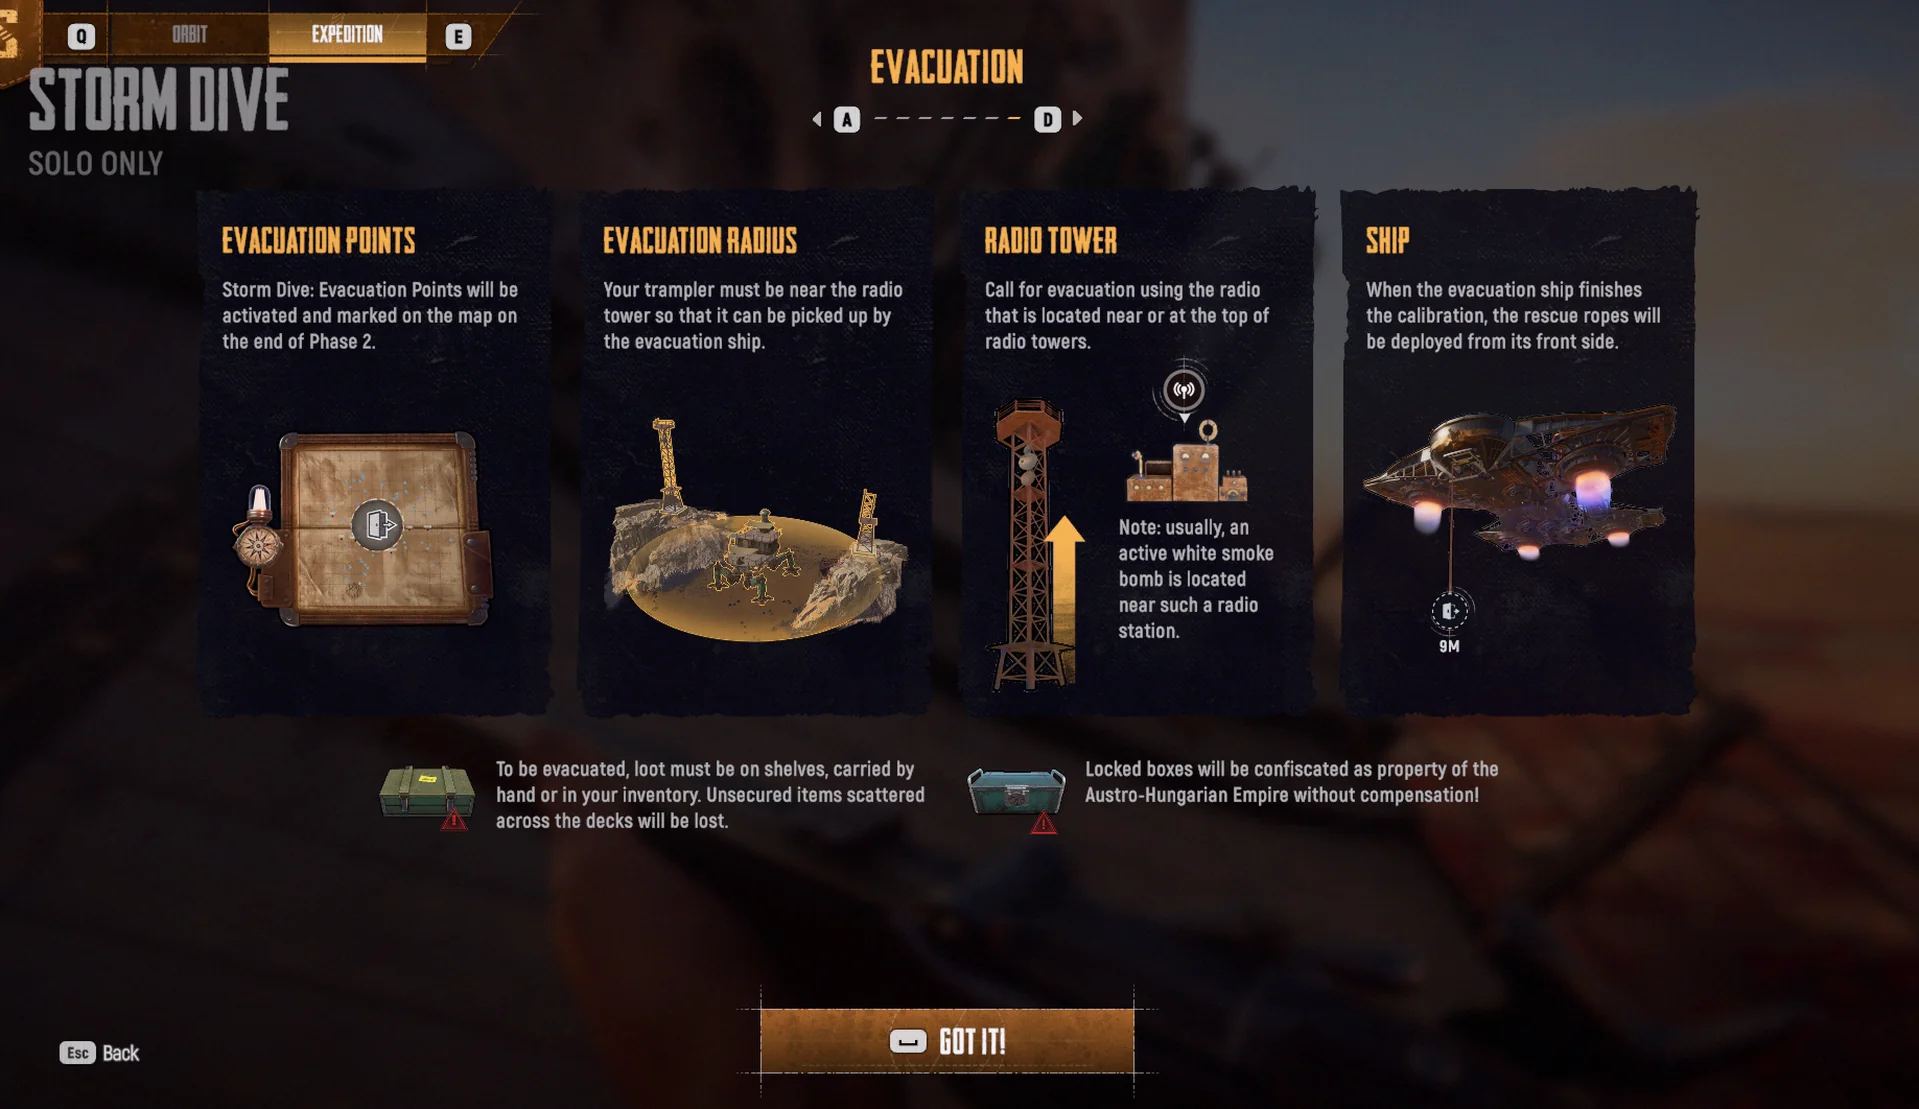
When you arrive at an extraction site, you’ll find yourself at a radio tower. Your HUD will display an icon that points to the precise tower location. When you’re ready to leave, make your way to the top of the structure.
At the top, there’s a small radio you can interact with. Using it calls in the rescue ship, sending it to your position so you can escape with your loot.
Keep in mind the rescue doesn’t arrive instantly. You’ll see a timer appear at the top of your screen showing how long you must wait until the ship reaches you.
When the rescue ship finally arrives, it first grabs your walker. Then it deploys a rope for your character to grab. At that point, you should exit your walker, use the rope to climb out, and complete the extraction. Be sure to collect all loot before you leave, and your walker will be secured—along with everything you picked up during the expedition.
For more SAND: Raiders of Sophie guides, check out:
- Loot Guide: What to Keep and Sell
- Dreadnought: How to Open Black Door
Why this extraction flow matters
Extraction in SAND: Raiders of Sophie isn’t just a “get to a marker” objective—it’s a multi-stage decision built around timing. Since extraction points only become available when the second storm circle appears, your early route should prioritize loot on the edges while planning a safe transition toward the center. The door icons then act as your tactical compass, letting you choose a tower before other players lock in on the same escape options.
Once you commit to an extraction site, the radio-and-rescue sequence adds another layer of risk. You’re effectively choosing when to become vulnerable—waiting for the ship, then leaving your walker to grab the rope, all while other players may be nearby. Understanding that your walker is handled first by the rescue ship helps you plan your final steps so you don’t lose time or loot at the worst possible moment.
Key takeaways
- Extraction points don’t appear at the start; they show up when the second round begins and the next storm circle forms.
- Door icons on the map mark extraction locations, and you can view them via your walker or your pocket map.
- Each extraction site is a radio tower; interact with the radio at the top to call the rescue ship.
- A visible timer tells you when the ship arrives; it secures your walker first and then drops a rope for you to escape.
Up Next: Loot Guide: What to Keep and Sell
Top Guide Sections
- Dreadnought: How to Open Black Door (All Key Locations)
- How to Extract
- Loot Guide: What to Keep and Sell
- Patch Notes July 3: Update 2


