Mina the Hollower Kear Locations: All Keys, Lock Uses, and Where to Buy
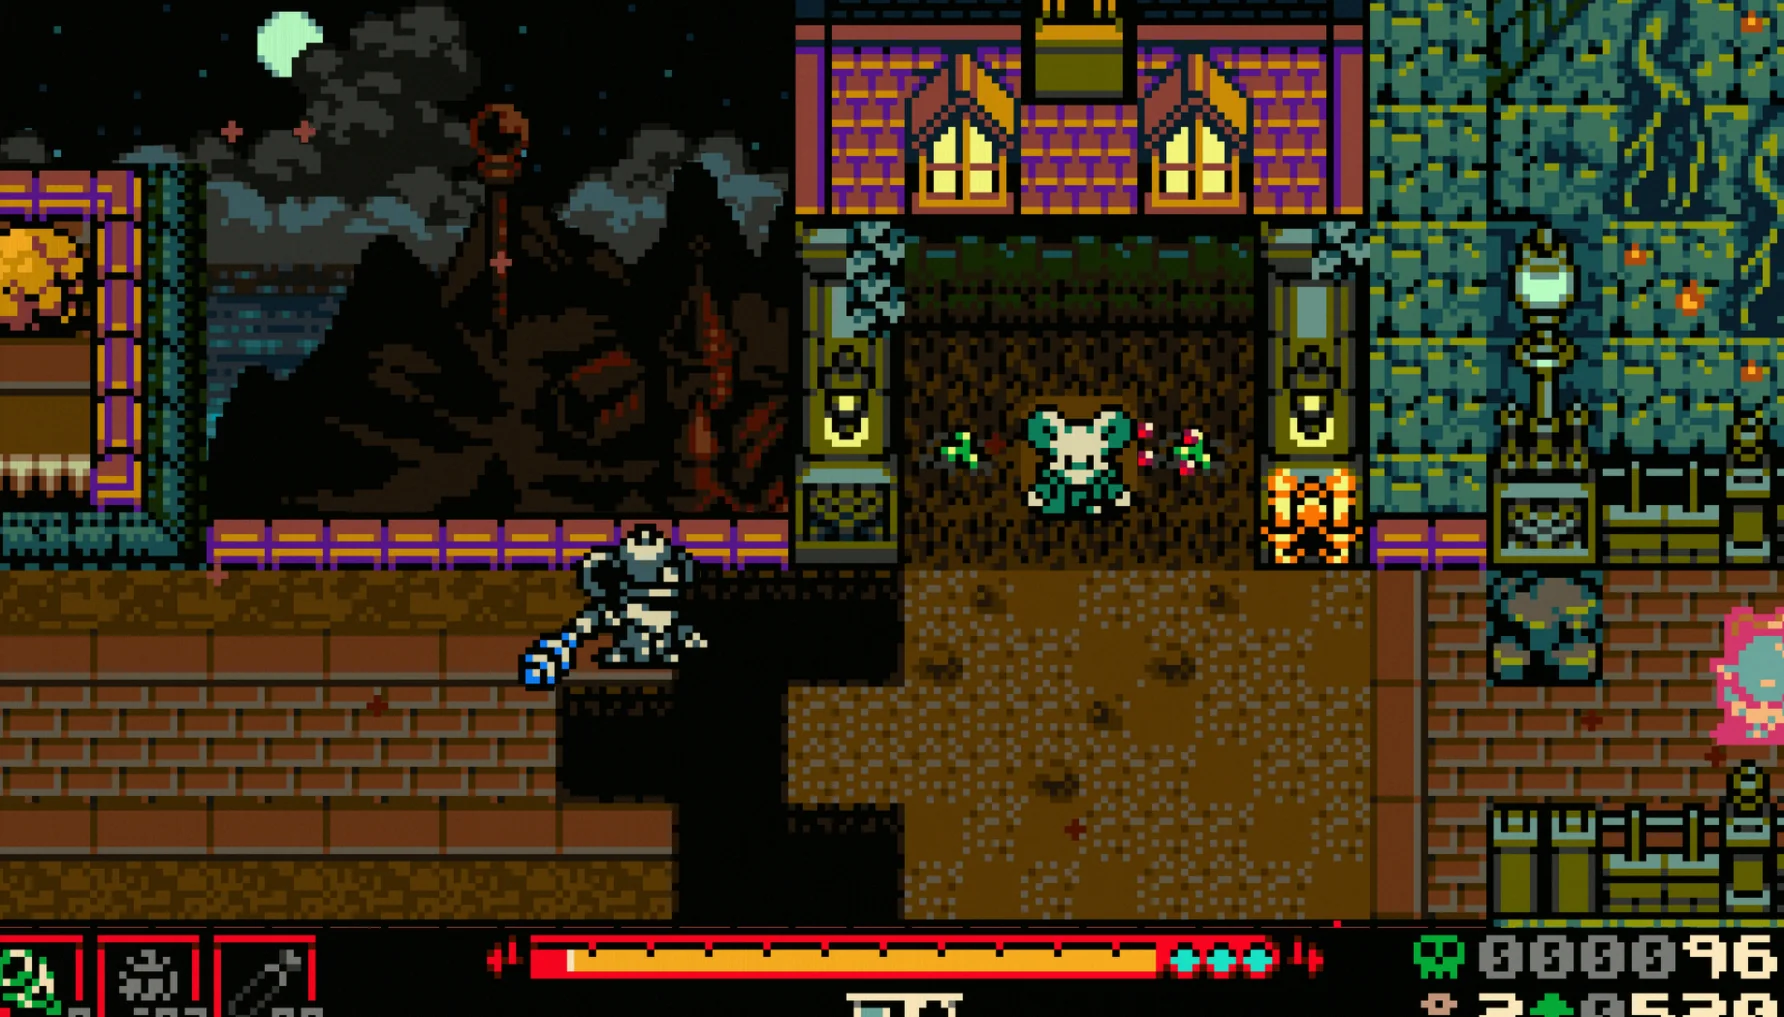
In Mina the Hollower, Kears are the key to unlocking Kear Locks—often doors, chests, and other mission blockers—so having a healthy collection can make or break your run. This guide lays out every Kear pickup, including what to do when you run short and need to buy more.
Checklists
This guide covers the 50 Kear (or “key”) locations in Mina the Hollower. Stocking up on Kears is crucial for success during your playthrough: Kears are special collectibles that unlock Kear Locks, which are frequently used to guard doors, chests, and other barriers.
Below is a full list of all Kear locations in Mina the Hollower. There are 50 Kears total, but only 40 Kear Locks. The remaining 10 Kears can be sold in bulk at the Kear shop in Ossex.
- All Kear Locations
- Loner’s Landing
- Southern Outskirts
- Ossex
- Eastern Heath
- Mourner’s Mile
- Queensbury Crypt
- Western Wilds
- Kindlewood
- Backwaters
- Nox’s Bayou
- Coltrane Peak
- Astral Orrey
- How to Buy More Kears
- Loner’s Landing
- Southern Outskirts
- Ossex
- Eastern Heath
- Mourner’s Mile
- Queensbury Crypt
- Western Wilds
- Kindlewood
- Backwaters
- Nox’s Bayou
- Coltrane Peak
- Astral Orrey
Use the section shortcuts above if you need to jump around, and be sure to review the full collectibles coverage so you don’t miss other rewards during your run.
All Kear Locations
Before the detailed breakdown, there’s a map showing every Kear location in Mina the Hollower.
These are the spots for the 40 Kear Locks.
Loner’s Landing Kear Locations
Loner’s Landing is the Prologue portion of Mina the Hollower. You’ll find 2 Kears here.
Loner’s Landing Kear 1 Location
The first Kear shows up in Loner’s Landing—Blighted Docks. As you move east, look north for a concealed cave entrance near the pink roof. After handling the trio of enemies nearby and striking the ground to reveal the underground access, drop down.
Inside, follow the route around the room, dig under barriers, and avoid getting knocked into the pits. The Kear is inside a floating bubble near the exit.
Loner’s Landing Kear 2 Location
The second Kear in Loner’s Landing is in the Boardwalk area, south of the entrance that leads to the Southern Outskirts. Head east, cross the two moving platforms while avoiding fire, then use the purple puff shroom to leap south toward a small opening in the flames.
On the next stretch, you’ll navigate a maze of fire and use purple puff shrooms to reach a guarded chest. Clear the two Troopers if you want the safe route—or you can rush it if you’re comfortable getting hit—then take the Kear.
Southern Outskirts Kear Locations
The Southern Outskirts region sits in the south of Mina the Hollower’s map and provides direct access to Ossex City Center. There are 3 Kears in this area.
Southern Outskirts Kear 1 Location
The first Kear in Southern Outskirts requires a detour into Ossex City Center first.
Go into the fireplace in the house where Ossex Kear 12 is located. That house is across the bridge in the upper sections of Ossex City Center, reached by crossing over the gap to the other side of the bridge. From there, head west along the path and stay on it as it leads you through the Occupied Bridge area before eventually returning you to the Southern Outskirts Kear spot.
Southern Outskirts Kear 2 Location
You can grab a Kear from the Poppit shop in Southern Outskirts, located right where you’ll find the Kerri the Wisp Trinket.
To reach the shop, go near the Sandfalls entrance; the doorway is tucked into the cliff face and marked by purple torches.
This Kear costs 300 Bones.
Southern Outskirts Kear 3 Location
The third Southern Outskirts Kear is found in the Mining Passage that leads into the Sandfalls area.
When you meet an enemy swinging a flail-like weapon toward the west, defeat it and cross the room.
Along the western wall, there’s a small cave entrance leading to a tiny chamber with a chest. Open the chest to collect the Kear.
Ossex Kear Locations
Ossex’s central city has 14 Kears. Of those, 9 are available to purchase in one go.
Ossex Kears 1 – 9 Locations
All 9 Ossex Kear Institute Kears count toward your tracked inventory. For convenience, the checklist marks are organized in a table.
Ossex Kear 10 Location
Burrow into the entrance to the Ossex Hollower’s Guild from City Center. Go through the doorway behind the desk, and the chest holding the Kear is on the right.
Ossex Kear 11 Location
On Ossex High Street, travel north past a locked gate. Interact with the telescope, then pan right to zoom in on a red planet.
A comet will strike the telescope, and the Kear will appear and land next to you.
Ossex Kear 12 Location
From Ossex High Street, open the route to the Trinket Store, then head west to the broken bridge. Go inside the open house on the far western side.
Inside, speak to the character on the right-hand side of the fireplace. If you’ve been spotted donating Bones to someone on the street, she’ll hand over a Kear as thanks.
More specifically, you must donate 100 Bones to two different characters. Testing suggests it doesn’t matter which characters you donate to—just talk to nearby NPCs.
Ossex Kear 13 Location
The next Kear is in the Trinket Bazaar basement.
This purple store in Ossex is where you stock up on Trinkets from the multi-faced Lady Susan.
To access the basement through the locked trap door in the corner, you’ll need to repeatedly strike Lady Susan so their heads spin around. Use nearby vases, your weapon, or your Sidearms to speed things up.
Once their heads are spinning so fast they blur, burrow down into the basement without being stopped.
Talk to the person inside the large cage to receive the Kear.
Ossex Kear Location 14
The final Ossex Kear can shift depending on how the races line up. You must defeat Blaise, a fast-moving ghost, by winning three races across the game—reaching the target location without touching the stairs.
For more people, the Western Wilds race is the second Blaise encounter, but the Kear reward typically shows up in Ossex. Blaise appears in the northern part of the area near the dual fight against giant guards.
If you defeat Blaise in 40 seconds or less, you’ll earn a Kear.
To win the race, head down the bridge from the station. Jump over the first set of stairs, then use a Sidearm such as the Deflector Parasol for the longer second staircase. After that, burrow-jump toward the fountain.
Eastern Heath Kear Locations
Eastern Heath is located east of Ossex on the map. You’ll find 2 Kears here.
Eastern Heath Kear 1 Location
To get this Kear, first find the Eastern Heath Poppit Shop. Leave Ossex via the bridge and head east across the screen containing two vertical saw traps.
Go south and cross the traps until you spot a small purple cavern entrance with torches on both sides. Burrow down to continue.
Cross one screen to the right, and you can buy the Kear from Poppit, alongside the Willow the Wisp Trinket.
Eastern Heath Kear 2 Location
Go back toward the Ossex bridge, cross it, then go south one screen to reach a moving platform with two spinning saw blades.
Cross up into the top-left corner and enter. Then drop down into the water. Burrow upstream, pause on the small strip of land beside the bridge as you move across the screen, and burrow underneath the bridge.
In this area, you’ll fight a tough mob guarding the room with the Kear. Offensive Trinkets can make the fight much easier.
After defeating the enemy, the red spikes to the west will drop, opening the way forward.
Enter the room to claim the Kear.
Mourner’s Mile Kear Locations
Mourner’s Mile is in the northeast area of the map and can be reached from Eastern Heath. There are 2 Kears here.
Mourner’s Mile Kear 1 Location
Once in Mourner’s Mile, go north and follow the path past the Knight’s Rest main entrance, continuing upward.
There’s a graveyard to the east. If you hit the second grave from the left, it will reveal a burrowable hole.
There’s also a Vial Pouch upgrade in a chest nearby, but your goal Kear is in the top-left corner of the room.
Jump down over the ledge and climb the stairs to reach it. Strike the top-left wall to reveal the room beyond. As you cross, you’ll need to avoid a moving spike path.
Repeat the process: break one more left-hand wall, then deal with another spike block. The Kear sits in the middle of the pit on that screen.
Mourner’s Mile Kear 2 Location
As you move down the long corridor-like section in Mourner’s Mile, head east. Go to the far bottom-right corner to find a cavern entrance leading downward.
Follow it through, then attack the third gravestone from the left on the top row of this screen.
Drop into the cavern. The Kear is located here, illuminated by floating candles.
Queensbury Crypt Kear Locations
Queensbury Crypt is a dungeon in the northeast portion of the map, accessible through Mourner’s Mile. There are 3 Kears inside Queensbury Crypt.
Queensbury Crypt Kear 1 Location
The third Kear in the Queensbury Crypt area is outside the dungeon. Speak to Mrs. Sodsby, who is digging a grave near the dungeon entrance.
Then dig through every brown rock in the immediate area—don’t only destroy the ones on the current screen, but also the rocks to the east.
Once all rocks are gone, Mrs. Sodsby will start dancing, indicating it’s time to talk to her again.
Speaking with her rewards you with the Kear.
Queensbury Crypt Kear 2 Location
After passing the first main-level room in Queensbury Crypt that has two large rolling pillars, go to the bottom-right corner and smash the wall. This room contains murky brown water.
Cross to the right-hand side using the moving platforms.
The Kear is inside the chest on that side of the room.
Queensbury Crypt Kear 3 Location
There’s a Kear for sale on the Statue Head Hall level inside Queensbury Crypt. A couple screens into this mid-point area, you’ll reach a T-junction with several tunnels that you can burrow into.
Enter the tunnel on the top-left side of the screen to find the merchant Belvedere.
The Kear costs 300 Bones, and the Stolenoid Trinket is available for purchase as well.
Western Wilds Kear Locations
Western Wilds is west of Ossex. You can reach it via the Occupied Bridge area. There are 2 Kears to obtain here.
Western Wilds Kear 1 Location
The first Kear in Western Wilds is obtainable as soon as you enter Occupied Bridge. It’s right when you encounter bull-like enemies that jump up and slap the ground.
Go to the pool in the top-right corner and burrow downward.
In the secret cavern, you’ll find a Kear to the west.
Western Wilds Kear 2 Location
Enter the Molten Foundry building in the north of Western Wilds and destroy the boxes in the room. Burrow into the dirt at the top-right corner, then follow the route beneath the grates around the room until you pass under the gate.
Head north into the main chamber.
You’ll need to burrow from lava and move west, guiding it through a cave opening in the wall and pushing it north until it lights up the room.
Break through the northern wall to find Poppit’s stall.
There’s a Kear for sale here for 200 Bones, along with the Helio the Wisp Trinket.
Kindlewood Kear Locations
Kindlewood is in the west or northwest region of Mina the Hollower’s map and can be reached through Western Wilds. There are 3 Kears here.
Kindlewood Kear 1 Location
When you enter Kindlewood from Western Wilds and follow the foliage-covered paths, you’ll reach a barn guarded by a fire-spitting enemy.
Go inside and look for a torch on the left side of the room.
Use the torch to burn the straw pile beside the bed and the chest in the top-left corner. Then burrow under the desk in front of the chest and go down through the newly opened hole.
In the next room, cross moving platforms to reach the chest on the far side while dodging a ranged enemy.
The Kear is inside that chest.
Kindlewood Kear 2 Location
Kindlewood’s major boss fight is called the Madd House fight. You’ll need to defeat a gigantic googly-eyed house that lands heavy-hitting attacks.
Movement-improving Trinkets and Sidearms can help. You can also throw the pumpkins in the area to deal ranged damage.
After the boss is defeated, you can enter and shop at a new merchant.
This merchant sells a Kear for 1000 Bones.
Kindlewood Kear 3 Location
When you reach Kindlewood Town, move to the foliage-covered tunnels to the north or northwest. Follow them past the pumpkin-headed character until you reach a small building above the Train Station.
There will be a chest you can smash open with a ranged weapon. The Dynamo Lantern is suggested for easier access.
The Kear is inside the chest and will appear once it’s broken.
Smash the candelabra on the wall, then take the revealed path to reach the Kear.
Septemburg Kear Locations
Septemburg is accessible from the northwest by traveling through Kindlewood. There are 4 Kears in Septemburg.
Septemburg Kear 1 Location
As you approach Septemburg’s main entrance, cross west through Withered Farms and head north. Look for a broken tree stump in the top-left corner.
Smash the stump and jump onto the pad it reveals.
Next, you’ll navigate a short maze-like segment with moving platforms and jump pads, aiming to move west.
On the far western side, you’ll find a crow strung up. Cutting it down triggers a small combat encounter.
Defeating the enemy grants you a Kear.
Septemburg Kear 2 Location
In the thresher area of Septemburg, head north until you reach a screen containing five threshers moving back and forth.
Use the jump pad to hop onto the ledge, then smash the broken wall to the east. Jump over the surprise thresher using nearby jump pads.
Drop down the rope and work your way east along the path, then smash the broken wall at the end.
A thresher will spawn—quickly return to the rope and climb up. Once it reverses direction, jump into the newly exposed pipe to reach the chest in this section.
The Kear is inside the chest.
Septemburg Kear 3 Location
In the scarecrow area of central Crow Town—on the raised path to the east—there’s a green crow strung up in the far north part of the area.
Cutting it down reveals it as a merchant. That merchant sells the Repulsing Root Trinket and also offers a Kear for 750 Bones.
Septemburg Kear 4 Location
In the Tangled Woods area (reachable by going far north in Crow Town, then heading east), go south from the first screen. Break a tree stump to open the way to the next screen.
Go down two screens, then circle up to the north on the other side to reach the chest in a forest clearing.
The Kear is inside that chest.
Backwaters Kear Locations
Backwaters is a Mina the Hollower area located southwest of Ossex and is fairly easy to reach via Western Wilds. There are 2 Kears here.
Backwaters Kear 1 Location
The first Kear in Backwaters is sold at Pinky’s store in the Shanty Swamp section. The shop is marked by a pink bridge to the southeast of this zone.
This Kear is available for 300 Bones.
You can also pick up the Spark Catcher Trinket here.
Backwaters Kear 2 Location
From the bridge leading to Pinky’s store, go south one screen and aim for the small blue building sitting in the middle of rotating platforms.
Burrow under the front of the building, then burrow under the large plant on the left side of the room to reveal a character named Lucky.
Speaking to Lucky rewards you with a Kear.
Nox’s Bayou Kear Locations
Nox’s Bayou is a watery region in Mina the Hollower’s map, found to the southwest. There are 3 Kears here.
Nox’s Bayou Kear 1 Location
Go into the Big Lagoon area of Nox’s Bayou, accessible by heading west and then taking the path north.
Make your way to the top-left corner of Big Lagoon, then smash through the top tile to reveal a downward hole.
Drop down, then head to the east side of the secret cavern to locate a chest.
The Kear is inside that chest.
Nox’s Bayou Kear Location 2
The next Kear in the Big Lagoon portion of Nox’s Bayou is in a store to the northeast, but you must use the golden tap in the center of the room to switch the biome state before continuing.
Inside the shack toward the northeast, you can buy the Kear for 300 Bones.
There’s also a Pit Preserver Trinket for sale here, which is valuable for Nox’s Bayou.
Nox’s Bayou Kear Location 3
Work through the Thick Thicket section of Nox’s Bayou by heading north and crossing bridges to the east.
Move south and carefully cross the platforms until you reach the bottom of the segment, then go to the far left corner. From there, move downward and break a hole in the cliff face opposite you to reveal a cave.
Inside the cave, cross three moving boats while dodging skating enemies as you head toward a chest in the top-right corner.
Coltrane Peak Kear Locations
Coltrane Peak is a snowy, late-game area in Mina the Hollower located northeast of Ossex. The easiest route is by taking the train. There are 3 Kears here.
Coltrane Peak Kear 1 Location
In Dead Man’s Gorge (the area east of the Train Station), go all the way south, then follow the path back north until you reach Frostbite Woods.
From the first Frostbite Woods screen, head south and burrow under the rail track into the eastern cavern.
Inside, destroy the large ice blocks and defeat the enemies within them. Work around the room to reach the other side and access the chest.
The first Coltrane Peak Kear is inside that chest.
Coltrane Peak Kear 2 Location
Keep moving upward from Frostbite Woods until you reach the Rail Yard.
Slide along the rails to the northwest corner of the zone to unlock the Kear Lock there.
In this segment, team up with a character named Rupert. Free him from his self-inflicted ice prison by burrowing onto him, which unlocks him as a merchant.
Rupert sells a Kear for 1000 Bones.
Coltrane Peak Kear 3 Location
While climbing Spiral Summit (the area north of the Rail Yard), look for a wall you can break on the left side of the screen.
Jump over and smash through.
In this room, time your movements carefully to reach the chest on the other side of the ice.
The Kear is inside the chest.
Sandfalls Kear Locations
Sandfalls is a late-game area on Tenebrous Isle, located south and reached easily from the Southern Outskirts. There is only 1 Kear here.
Sandfalls Kear 1 Location
You can obtain this Kear after finishing the Bone Beach dungeon and the following Sandfalls Generator. When you complete the Generator sequence, head down and west through the Spark gate.
Follow the route until you return to Sandfalls’ purple zones, then smash the turquoise bricks that block your way back down to the small house by the sand—where a man previously sat in a rocking chair with his pet dog.
Now, there’s only the dog, with a suspiciously human-shaped stomach.
Defeat the big puppy to claim the Kear.
Bone Beach Kear Locations
Bone Beach is the next area after Sandfalls, located in the southern part of Mina the Hollower’s map. There are 3 Kears here.
Bone Beach Kear 1 Location
In the Bone Rush Trail area, head west along the waterfront. Climb the first steps and enter the tent marked with a purple sign.
Smash through the explosive rock, then go north to find a merchant.
Buy the Kear for 750 Bones.
Bone Beach Kear 2 Location
In the Mining Camp area of Bone Beach—featuring cliff faces with rolling eyeballs and multiple Calcified Cave entrances—head to the cavern entrance between the double waterfall and the double wooden pillars. The Kear Lock is below it.
Inside, cross the beams with the eyeball in the center and move downward.
The Kear is in a chest in the bottom-left corner of this area.
Bone Beach Kear 3 Location
A Kear is tucked away in the Stomach Mines section of the Bone Beach dungeon, located in the far southeast corner of the room.
Use the central acid geyser to reach the top area first. Then drop down, clear the explosives along the bottom wall, and free access to both ledges.
Next, bounce across from the right-hand side to the platform with the button, double back, then bounce off the next purple sponge. Wriggle into the farthest corner where the Kear is hidden.
Astral Orrey Kear Locations
Astral Orrey is the final area of the game, reached by traveling through mirrors. There are 3 Kears here.
Astral Orrey Kear 1 Location
Go to the Cog Lab (the red portion of Astral Orrey) and follow the path east, then south. Continue until the space opens into a large cavern.
You can access a small cave entrance in the bottom-right corner by crossing under the chains and using blue cubes to destroy ray guns when needed.
In the next room, you can collect a Kear in the far corner.
Astral Orrey Kear 2 Location
After clearing the Mutant Lab area of Astral Orrey (the green section with glass-heavy paths), you can meet Tubert, a friendly vendor in a tube, just beside where the Mutant Lab exit spits you out.
Tubert sells a Kear for 1000 Bones.
This area also has the Vial Salvo Trinket for sale.
Astral Orrey Kear 3 Location
In the Gravity Zone of Astral Orrey, you can reach a key area on the far east side once you reach the purple gravity vortex phase of the platforming challenge.
After hitting the switch and activating the gravity vortexes/black holes, head east and make your way across the screen. Use the purple swirls to hop ledges, and use movement-enhancing Sidearms where necessary.
You’ll find a Kear inside a chest on the far right side of this section.
How to Buy More Kears
Most Kears come from exploration, but if you’re struggling to find one during your run, you can purchase them in Ossex City Center.
Go to City Center and look for the store with a huge Kear above the door. The blown-up image looks like a key with a flower instead of a standard handle, and it’s positioned next to a shop with flowers outside it.
Enter and talk to Kearnes, the blue character on the right, to buy Kears. He has 10 available for sale, with each one costing incrementally more.
Speaking with Freeton helps you see how many Kears remain in the overworld, which can help you gauge how close you are to fully completing Mina the Hollower.
Up Next: All Trinkets
Top Guide Sections
- Essential Tips and Tricks
- Things Mina the Hollower Doesn’t Tell You
- Things to Do First in Mina the Hollower
- Walkthrough