Mass Effect 2 Dossier Guide: The Justicar Mission on Illium
This Mass Effect 2 wiki guide page covers the Dossier mission “The Justicar Mission” on Illium. It walks you through every major combat encounter, points out where to grab collectibles, and lays out the dialogue options that can shift your Paragon or Renegade standing during your run.
Looking for something specific? Here are the jump points this guide provides: Mission Stats, Travel to Tasale, Talk to Liara, Go to Transport Hub, Talk to Locals, Visit Crime Scene, Attack Eclipse Hideout, Return to Samara, and Back on the Normandy.
Mission Stats
Video Guide
Mission Rewards
- Experience: 1,000 XP
- Weapons: M-27 Scimitar
- Research: Biotic Damage
- Mission Credits: 30,000 credits
- Found Credits:
- 25,200 credits (Paragon)
- 30,000 credits (Renegade)
- Resources: 2,000 Platinum
- 25,200 credits (Paragon)
- 30,000 credits (Renegade)
Travel to Tasale
- Prerequisite: Complete “Horizon”.
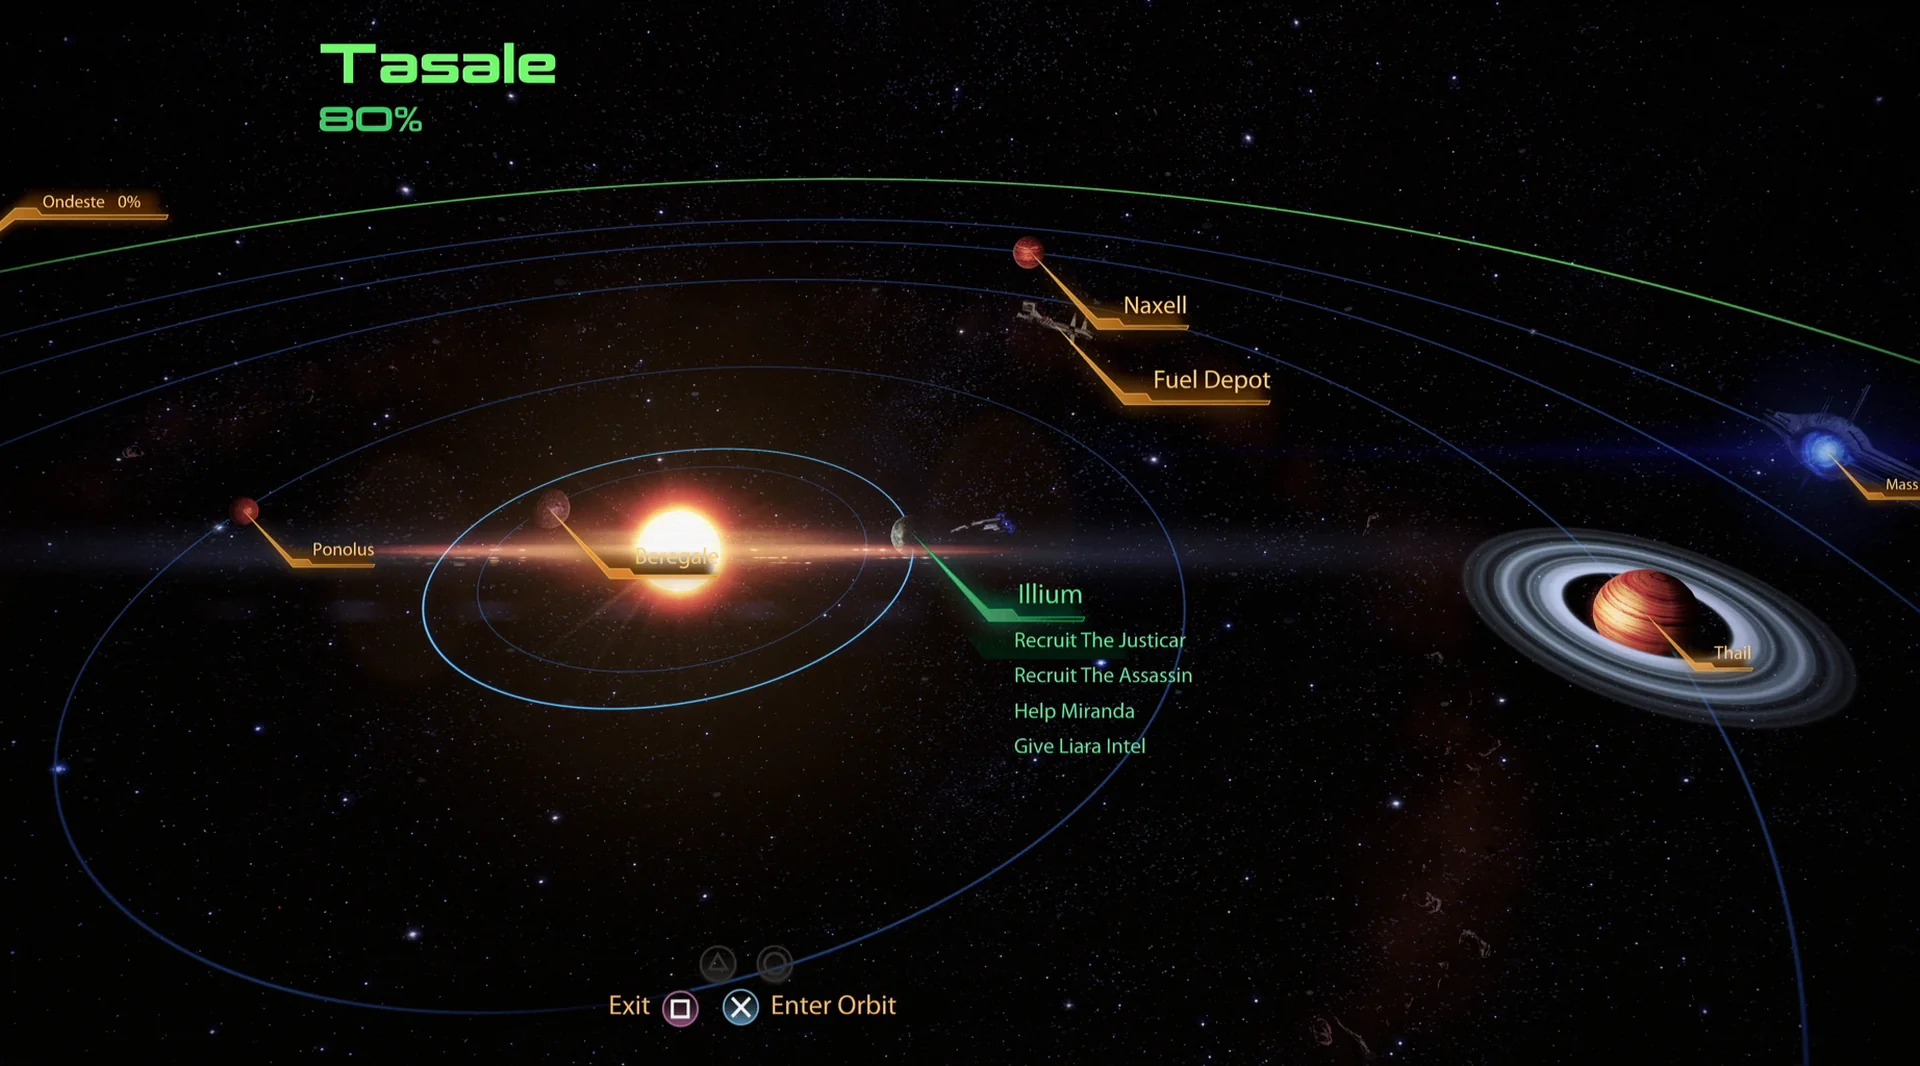
- Location: Crescent Nebula – Tasale – Illium
To start this Dossier, you’ll visit Illium, which becomes available after you complete the “Horizon” mission. You’ll reach Illium while arriving in the Tasale System inside the Crescent Nebula. Illium is the second planet orbiting the star, so land there when you’re ready to proceed.
If you’re the kind of player who likes to mine, the guide calls out the rich planets in the system where Illium is located, specifically Tasale:
Recommended Loadout
- Squad Tactics:
- Miranda is a strong pick versus the Eclipse mercenaries here, since her Warp can strip away their Barrier protections.
- Tali pairs well with Miranda by using AI Hacking and Combat Drones to disrupt Eclipse mech reinforcements.
- Kasumi can be a fun option thanks to her Flashbang Grenade, which can temporarily freeze even very dangerous enemies.
- Unique Dialogue:
- If you want extra unique dialogue, Garrus and Grunt are suggested.
- Miranda is a strong pick versus the Eclipse mercenaries here, since her Warp can strip away their Barrier protections.
- Tali pairs well with Miranda by using AI Hacking and Combat Drones to disrupt Eclipse mech reinforcements.
- Kasumi can be a fun option thanks to her Flashbang Grenade, which can temporarily freeze even very dangerous enemies.
- If you want extra unique dialogue, Garrus and Grunt are suggested.
Talk to Liara
If this is your first trip to Illium, you can do plenty of things before worrying about the target, the Assassin Thane. The guide points you to “Illium – Shopping and Side Quests” for a full walkthrough of what you can handle during your visit.
Once you’re finished (or if you want to jump straight into the mission), find Liara’s Office. It’s located in the center of the Trading Floor area, tucked into an alcove with the staircase beside the door that leads toward the transport section. Speak with Liara, then choose “Samara” to receive a lead.
Liara explains that the Justicar is an Asari named Samara, who has recently registered with Tracking Officer Dara. Samara can be found at the Transport Hub in the south, at the Taxi Stand—so it’s time to head over.
Go to Transport Hub
Officer Dara is at the Tracking Station in the far south-west portion of the map. Talk to her and expect her to be visibly nervous about you going after a Justicar. At the start of the conversation, you can earn Morality Points with:
- “I only want to talk” for +2 Paragon Points.
- “So what if she did?” for +2 Renegade Points.
If you use the Investigate dialogue options, the guide notes it isn’t because Samara is unjust or morally rotten. Instead, she follows her Code strictly and kills anyone who is unjust—and Illium has plenty of that.
After you’re done with Officer Dara, you can either request a cab from her or call one manually using the Cab Console at the end of the Taxi Stand in the middle of the area. The guide recommends calling it yourself, since you’ll pass an Asari whose chatter acts like a premonition for what’s waiting ahead.
Talk to Locals
The moment you arrive in this new part of Illium, you’ll witness an odd confrontation. A temperamental Volus merchant named Pitne For tries to leave, but Detective Anaya—an Asari—stops him and claims he’s a suspect in the death of his business partner. Pitne For insists he’s innocent, yet he’s still prevented from departing. He’s scared of the Justicar, but Detective Anaya replies that she only kills the unjust, implying he has nothing to worry about.
When Shepard arrives, speak with Pitne For. He won’t grant any Morality Points, but he does provide a lead on where the Justicar is: at the crime scene where his partner was killed. To access that location, you’ll need to speak with Detective Anaya at the nearby Police Station. You can also pick up additional dialogue from the Turian Worker close to the railing and from the Spaceport Official near the Police Station entrance.
- Medical Station – 100 credits. Located in the right-hand column visible as you enter the Police Station.
Enter the Police Station and talk to Anaya. As the situation becomes clear, she’s eager to get the Justicar out of her hands because her superiors ordered her to arrest Samara. That would force the Justicar to kill her in order to follow her Code—so since your mission is to remove Samara, Anaya allows you into the crime scene without hesitation.
Visit Crime Scene
With Detective Anaya’s approval, you can push past the police line at the far end of the area. You may have noticed this spot earlier: it’s where two Asari stand guard with a blue cordon around them. Now you can walk straight through that line and move past the guards to continue onward.
After going through the doorway, look right to find a terminal labeled Shipping Details that you can Read. This ties into the assignment “Illium: The Justicar: Smuggling Evidence.” If you listened earlier to the Asari at the Taxi Stand, you’ll recognize Thax as the person she’s trying to con.
You can choose to Upload the message, but the guide warns you that this will always award Renegade Points. You may still be able to earn some Paragon Points as well, but Renegade is guaranteed.
Before moving on, gear up your Weapons how you like, then round the corner into the alley.
- Circuit Boards – 3,000 Credits. At the far end of the alley, take the steps down to find circuit boards to salvage from the bomb-like device sitting on the right wall.
Head back up and take a side route to enter a second alley—one filled with Eclipse mercenaries.
This encounter has only a couple of Asari; the rest are weak LOKI Mechs. Space is tight and there isn’t much cover, so you’ll need to be forceful, fast, and aggressive to clear the enemies before they gain the upper hand in this narrow area. Once they’re down, collect any ammo they drop, then continue down the alley and go through the door behind another blue cordon.
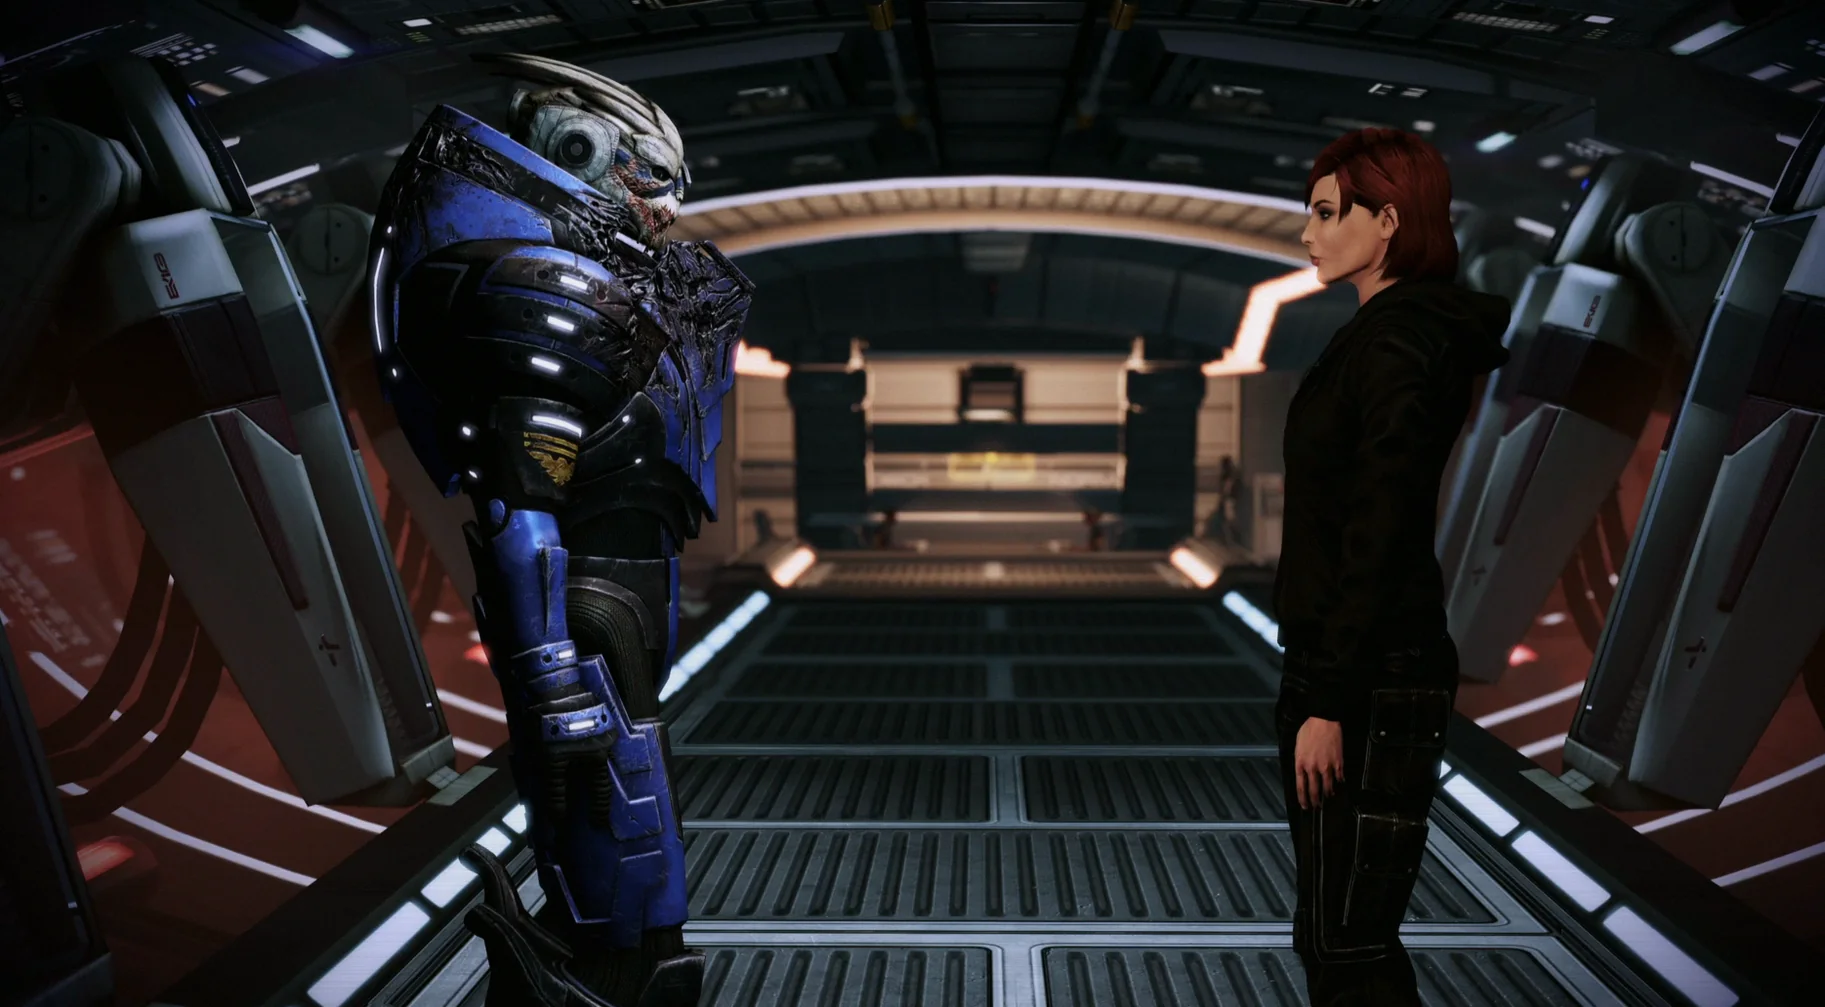
When you arrive, you finally get a direct look at the Justicar herself, Samara. The guide also notes you can earn Morality Points during your encounter:
- At the start of the conversation, say “You killed in cold blood” for +2 Paragon Points. After that, you can choose either:
- “Yes, I am” for +2 Paragon Points.
- “No, not really” for +2 Renegade Points.
- Later, you can say “I need you on my team” / “I need the best” for +4 Paragon Points.
- “Yes, I am” for +2 Paragon Points.
- “No, not really” for +2 Renegade Points.
Detective Anaya soon arrives and tells Samara she’s been ordered to take her into custody. Luckily, Samara won’t need to kill her immediately because there’s a 24-hour grace window. However, if you can learn the name of the ship Samara is searching for, Anaya can let things end peacefully.
- At the end of the conversation, pick “Maybe I can help” for +2 Paragon Points.
Samara says Pitne For is somehow involved, so it’s time to question him again.
Back outside on the Police Station grounds, find Pitne among the crates and press him for more details.
- If you take the Renegade Interrupt, you’ll pull a gun on him and earn +5 Renegade Points.
Pitne For admits he doesn’t know the ship name, but he provides a copied passcard so you can track it down. You’ll also learn why Eclipse killed his business partner, Dakni Kur: they provided a biotic-boosting drug called Minagen X3. It massively increases biotic power, but taking too much will kill you—the part they “forgot” to mention. Since Minagen X3 is also extremely illegal, Pitne wants to leave before Samara can connect him to the crime scene.
That covers the essentials, but if you want more conversation, you can return inside the Police Station to speak with Anaya and Samara for extra dialogue. When you’re ready to proceed, go through the elevator door to the right of the Police Station entrance.
Attack Eclipse Hideout
The moment the elevator opens, a single LOKI Mech attacks while you’re still inside. Deal with it quickly, then step off the elevator and head left through the next door.
Remember the hazardous substance Pitne For mentioned—Minagen X3? It’s stored in containers throughout this area. Shooting those containers can injure enemies, but it can also poison you. If you step into the orange smoke, a toxicity meter appears at the bottom of your screen. Staying exposed too long will get you killed, so sprint through when you need to cross. The safest approach is to avoid blowing up the containers whenever possible, though sometimes that’s unavoidable.
When the area is clear, grab an important piece of loot:
- Scimitar Assault Shotgun – Found in the back-right corner of the room after the exterior balcony area. This is the room where most of the enemies entered from.
M-27 Scimitar
The M-27 Scimitar is a rapid-fire shotgun that holds 8 shots per clip and can fire them off quickly. It isn’t great against armored targets, but if you like pushing forward and spraying enemies down, this is the weapon for you.
If you miss the Scimitar during this section, you’ll be able to pick it up again right before each of the two boss fights in the Eclipse Base. If you miss it in those moments as well, it’s automatically provided at the end of the level.
Now face forward toward a staircase. Check to the right side of the staircase to find a door you can open. After a long investigative cutscene, you’ll speak with an Asari named Elnora.
- If you take the Renegade Interrupt, you’ll shoot her down for +5 Renegade Points.
- For story reasons, Paragon players may consider taking this as well, but the guide notes it removes some pointed dialogue later when you return to Samara.
- If you ignore the Renegade Interrupt, you can gather a lot of information first, then say “Go” to earn +5 Paragon Points.
- For story reasons, Paragon players may consider taking this as well, but the guide notes it removes some pointed dialogue later when you return to Samara.
After handling Elnora, search the room for loot:
- Power Cells – On the left wall of the room where you meet Elnora.
- Sample 634 Analysis – Biotic Damage research data. This is on a terminal podium in the back-right corner of the same room.
Once you reach the stairs, breach the door and keep your weapons ready as you push ahead. Swing left and you’ll run into a group of LOKI Mechs—typical Asari mercenaries—along with some Vanguards. More Minagen X3 containers are scattered around, including near you, so don’t stand directly in front of them. During combat, stray shots can hit those containers and create problems. Try to avoid triggering them while you fight, since the damage to you can be severe.
Move forward using cover to clear enemies one by one. As the path turns left toward an office, expect the remaining LOKI Mechs and Vanguards to come at you with full force. Cover is available, which helps, but the Toxic Canisters are still a nuisance. If you’re forced to run through the gas, keep an eye on your toxicity level so it doesn’t fill the entire bar—otherwise you’ll die quickly.
With this wave mostly dealt with, you can breach into the office-like room where many enemies had been spilling out. A staircase rises just ahead on your right, but before taking it, explore for loot:
- Medical Station – On the wall between a doorway and a tall planter.
- Eclipse Terminal – 3,000 Credits. Located in the room through the doorway where the Medical Station was nearby.
Then climb upward. The battlefield here is cramped and dangerous, meaning you’re more likely than ever to get hit by toxic gas lingering around you. The most annoying enemies in this particular spot are the LOKI Mechs at the far end of the room. You can’t reach them on foot, so you’ll have to shoot them from distance.
To continue, head left to spot yet another staircase leading up, but before you take it:
- Medical Station – 100 Credits. On the wall to the left of the stairs.
- Eclipse Terminal – 6,000 Credits. A tall terminal on the wall to the right of the stairs.
Up the stairs, prepare for a long, entrenched fight—the area is large.
From the stairs, push to the right and eliminate the Asari mercenaries waiting there.
- 2,000 Refined Platinum – Once the Asari are dead, move to the divider wall, then go left and up the stairs to locate a box of supplies that can be easy to miss.
Next, you’ll cross one of the staircase bridges to reach the opposite dock and the doorway where enemies are coming from. Clear the Eclipse there as you go. As for the Gunship you were told to ignore earlier, you’ll deal with that soon enough.
Through the doorway, you’ll find additional items:
- Power Cells – 100 Credits. On the left wall.
- Medical Station – 100 Credits. On the right wall, between the corner and the laptop.
Once you’re done feeling victorious (or guilty) about what you’ve found, go through the rear door of the room, move down the tunnel, and pass through another door.
Remember that Gunship you ignored earlier? You’ll be handling it now. First, work your way away from the door and toward a few stray LOKI Mechs. After you take them out, move toward their location and go left over the bridge.
- Power Cells – 100 Credits. At the back wall near the large canisters, close to the stairs across from you.
As soon as you cross the walkway, the Gunship arrives. It’s time to destroy it for good. The ship has a yellow armor indicator, and that’s effectively the only health measure it uses—once that armor is gone, the ship will explode. Heavy weapons are your best tool here, though you can grind through its armor slowly with conventional guns. The faster you remove it, the better, since it can unleash massive damage and knock you out of cover with its rockets. Also, it will drop FENRIS Mechs when it goes down.
After it’s destroyed, search for the door ahead at the far end of the walkway, but don’t forget to pick up one more item:
- Med Kit – 100 Credits. On the far right side of the exit door, tucked into a corner atop some machinery.
Now bypass the door and enter the office.
On your right, you can find a Shipping Manifest PDA. Picking it up starts the assignment “Illium: The Justicar: Smuggling Evidence.” This is direct proof that Pitne For sold Minagen X3 to the Eclipse, along with evidence involving the illegal Red Sand drug. You’ll sort out the fallout back at the Police Station.
Also grab the following item in the same office:
- Eclipse Terminal – 6,000 Credits. Across from the Shipping Manifest, and to the left of the exit door.
In the next corridor, you’ll run into an entertaining interaction with Niftu Cal, a Volus being heavily affected by Mutagen X3. He believes himself to be a god. Early on, you can answer with:
- “Calm down” for +2 Paragon Points.
- “You’re high” for +2 Renegade Points.
After Niftu mentions that Wasea is in the room ahead, you can decide how to handle him:
- If you say “You should lie down,” you’ll trigger a Paragon Interrupt that helps him realize how weak he is, earning +5 Paragon Points.
- If you say “We’re right behind you,” Niftu moves forward to fight Captain Wasea, granting +5 Renegade Points.
No matter what you choose, move through the door to the final corridor. There you’ll find a Weapons Locker, and also:
- Medical Station – 100 Credits. On the corner of the wall between the door and the Weapons Locker.
When you go through the next door, you’ll meet Captain Wasea. If you allow Niftu to charge ahead, he tries a biotic attack against her that ends up being more like a harmless joke—she blasts him away and immediately turns her attention to you.
Captain Wasea’s room is full of Minagen X3. That actually helps her, because she’s already a powerful biotic user. For you, though, the same toxic setup is a serious disadvantage, and the battle becomes harder since the walkable spaces are restricted by Minagen X3 clouds. Practically speaking, you’ll need to find a safe hiding spot and shoot from cover, because your movement options will be extremely limited.
Wasea also brings reinforcements, mostly LOKI Mechs and initiates. Still, they’re not as dangerous as the mercenary commander herself. Once you eliminate her allies, focus entirely on taking Wasea down. When you break her barrier, the fight becomes much more straightforward. If you fail to finish her quickly, she can move containers and retreat into a back arena with minimal cover, where she can toss Mutagen X3 canisters at you. Prioritize Wasea first so you don’t have to deal with that later.
Once Wasea is defeated, check the area for one final reward:
- Eclipse Terminal – 3,000 Credits. The terminal is to the right of Wasea’s desk, and the route toward the back area that had been blocked by two large crates.
Then examine her desk and take Wasea’s Datapad. This reveals that the fugitive Samara is tracking is on a ship called the AML Demeter. That’s enough to move forward for Samara. If you didn’t hack the Eclipse Terminal mentioned earlier, you can choose “Look around” to explore the room instead of hacking it.
Return to Samara
With the ship name in hand, you return to the Police Station grounds. If you spared Niftu Cal, you’ll find him there and he’ll be back to normal—so you can talk to him while he’s sobered up. Outside the Police Station, Pitne For waits. Speak with him to learn he’s especially interested in the Smuggling Evidence you found in the Eclipse Base. At this point you have two options: hand the evidence to Pitne or give it to Detective Anaya. The rewards differ:
- Giving the evidence to Pitne earns 9,000 credits and +5 Renegade Points.
- Giving the evidence to Anaya earns 4,200 credits and +5 Paragon Points.
Whichever choice you make, head inside the Police Station and talk to Anaya, then Samara. The guide says Samara is impressed that you went out of your way to help her. In return, she agrees to continue your mission without forcing the situation into killing Detective Anaya. After Samara’s oath:
- Choose either “I am honored” or “Welcome to the team” for +2 Paragon Points.
- Choose “You’ll do anything I say?” for +2 Renegade Points.
You’ll also receive +5 Paragon and Renegade Points simply for completing the mission.
Before you leave, the guide recommends speaking with Detective Anaya again by selecting either “Not yet” or “I have business with Anaya.” If you met Elnora and then found the data file revealing that she killed Dakni Kur, you can present it to Anaya. Samara can vouch for you so the evidence is considered admissible. After that, you can tell Anaya, “Pitne For is a smuggler,” and complete the hand-in. If you do, you can speak with Pitne outside the Police Station to find out that he still can’t leave—at least not for now-obvious reasons.
No matter how you handle it, talk to either Anaya or Samara so you can Return to the Normandy.
Back on the Normandy
Once you get back to the Normandy, Jacob formally inducts Samara into your team.
- You can pick “We need her” for +2 Renegade Points.
Samara is located in the Starboard Observation Deck on the Crew Deck. The guide also notes there’s a new EDI Terminal there. Samara’s Normandy upgrade is the Extended Fuel cells, which increases the Normandy’s fuel capacity by 50%, bringing the total to 1,500. Be sure to speak with Samara to learn more about her and move toward her Loyalty Mission.
- Engineering – Stop by and talk with Gabby and Ken for a fresh exchange.
- CIC – Speak with Kelly and Joker so they can share their thoughts about Samara.
Want more Mass Effect 2 help? The guide points you toward additional pages: Legendary Edition Changes, How-To Guides, Key Choices and Consequences, Romance Options, Walkthrough, and Side Quests.
Up Next: Collector Ship
Top Guide Sections
- Legendary Edition Changes
- Basics
- Tips and Tricks
- How-To Guides