Complete Guide to Every Animal Hospital Character and Their Requests
Animal Hospital features a cast of recurring characters with their own missions, requests, and bits of story that can directly affect your shift routine. Here’s a complete walkthrough of every character you can encounter, what each one wants, and how those choices play out.
Checklists
While playing Animal Hospital, you’ll come across multiple people with distinct roles, backgrounds, and reasons for showing up. Some of them can provide practical perks if you’re willing to help them. Below is a full character breakdown of everyone you can meet during your time in the hospital.
Every Character in Animal Hospital
- Barney
- Dr. Harlow
- Liz
- Officer Duckman
- Ratthew
- Rattina
- Ron from Accounting
Barney
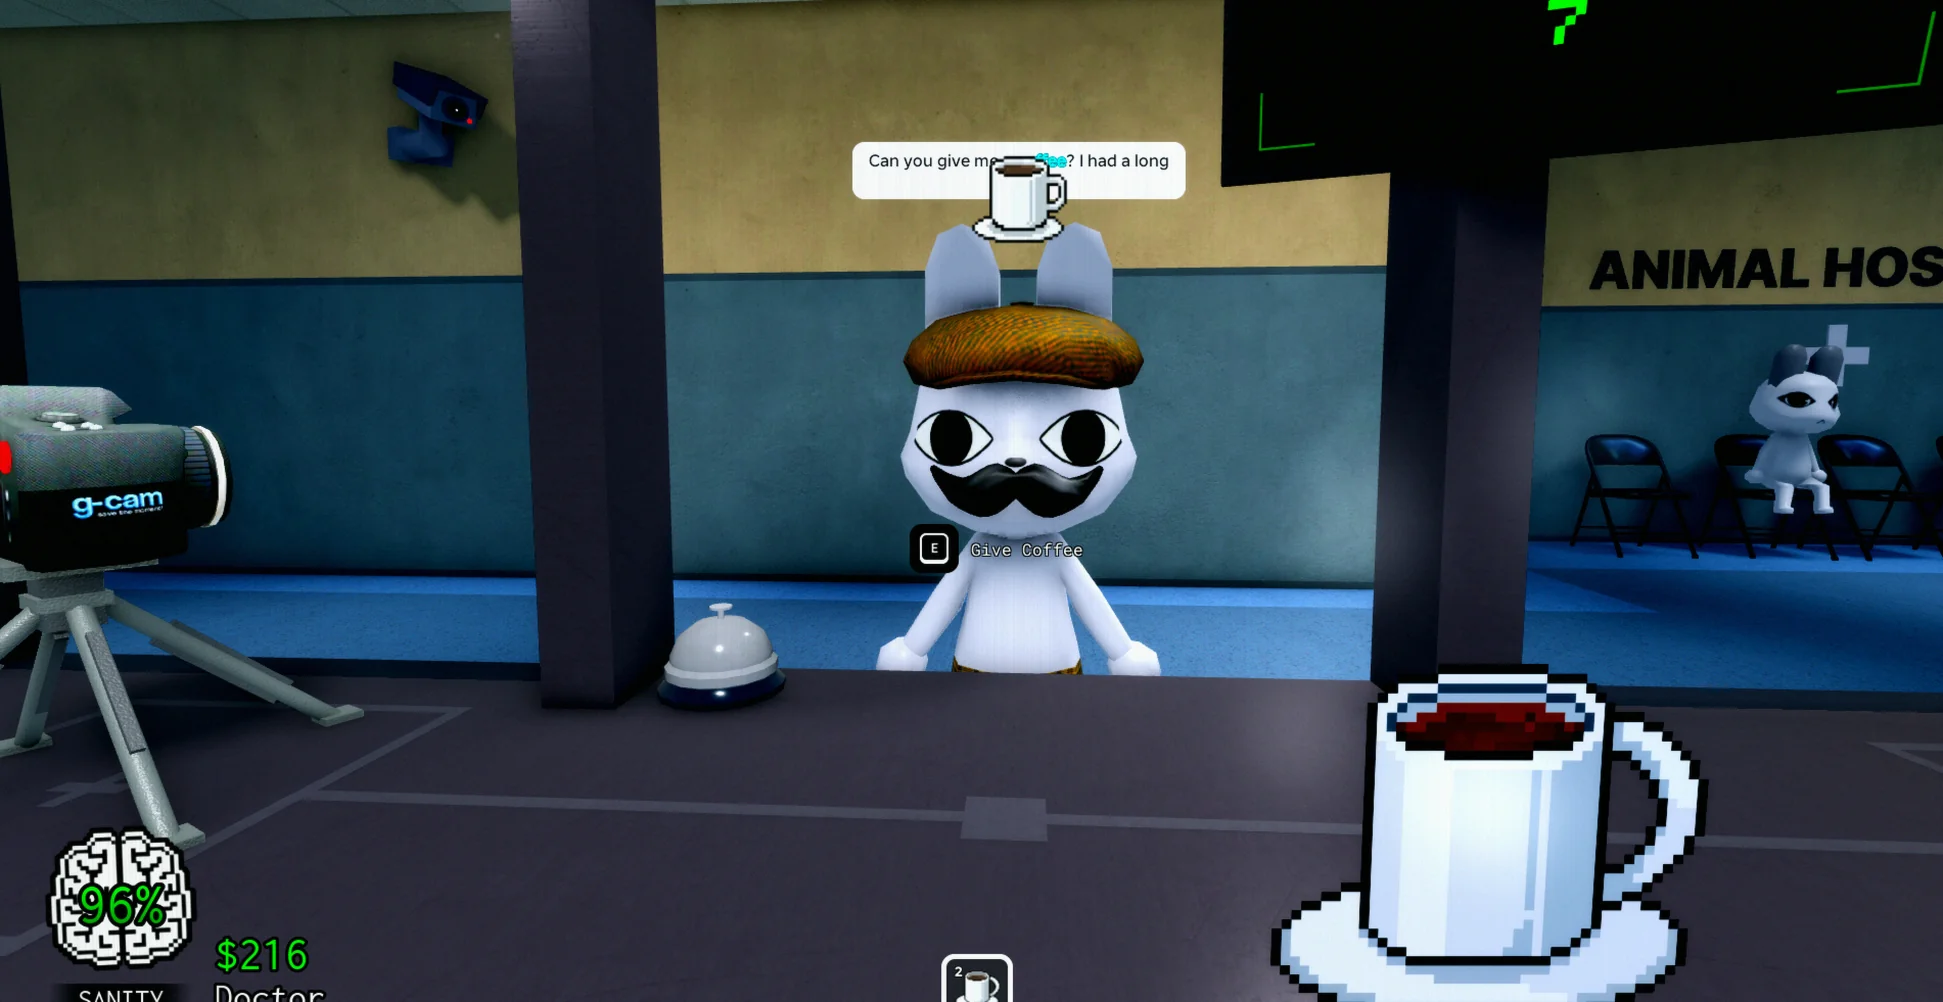
Barney is someone you may meet during the early shifts at the Animal Hospital. He approaches your playable character at the front desk and repeatedly asks if you can spare a cup of coffee. He’ll also request a picture, which reveals that he’s not quite what he seems—an anomaly.
If you agree to help, Barney eventually asks you to conceal a briefcase, with instructions to keep it closed. After that, he asks you to hide for a shift until Officer Duckman arrives, at which point Duckman will ask whether you’ve seen Barney. You’ll then be faced with a decision: turn him in or don’t.
If you choose to turn Barney in, Officer Duckman tries to arrest him, but Duckman gets knocked out. At that point, you’ll have to care for Duckman in the hospital. If you allow Barney to remain hidden instead, he rewards you with a second coffee machine you can use during shifts to help keep you and your team steady.
Dr. Harlow
Dr. Harlow is present at the beginning of the game. He functions as both a helper and the hospital’s boss, appearing only at the start while he walks through early mechanics and what players should expect during shifts. He also warns everyone about the first coming anomaly attack, which triggers an Ambulance Emergency. After that opening segment, he stays around in the hospital as a background figure, but you won’t get many additional chances to interact with him through dialogue.
Liz
Liz is a former reporter for Animal Corp News who stepped away from the role. She can show up after shift 10, and when she does, she asks you to take photographs of specific patients. If you help her, she provides you with a UV camera to use on those patients.
You can’t just shoot the moment you want—Liz’s request requires waiting until the intended patient is present so you can take the photograph. If you complete her photo sequence correctly, she rewards you with a chocolate bar on the third successful request, along with extra lore and details tied to the growing anomaly infection.
Officer Duckman
Officer Duckman enters the story if you let Barney hide in your lobby room. Duckman asks whether you’ve seen the dangerous individual, and he hands you a picture of Barney. From there, you can either turn Barney in or allow him to stay hidden in the front desk area, claiming you haven’t seen him.
If you decide to keep Barney’s location secret, the officer leaves and doesn’t come back. However, if you tell Duckman where Barney is, Barney bursts out from the front desk and knocks Duckman out. After that, you’ll need to treat Duckman in one of the available hospital beds.
In practice, the biggest difference between turning Barney in or not is whether you want access to that additional coffee machine located in the secretary area.
Ratthew
Ratthew is a patient who appears gradually as you progress through the earliest shifts. Helping Ratthew lets you earn his trust and learn more about the hospital’s hidden mysteries and what’s really going on with Animal Corp.
Over time, if you take care of him often enough, he eventually invites himself into the front desk area and takes a seat. This triggers an extended conversation where he shares information about his missing sister, Rattina.
When the dialogue ends, Ratthew leaves behind a key. You can use that key on the poster in Room 5 to uncover a hidden safe and learn additional information about Rattina.
Rattina
Rattina is Ratthew’s missing sister. You can piece together what happened to her as you continue treating Ratthew.
If Ratthew is still alive when he sits behind the front desk, he gives you a key. Bring that key to Room 5, then interact with the poster there to reveal a hidden safe. Use the key to open it and uncover a picture of Rattina, which hints at what may have happened to her.
Ron from Accounting
Ron from Accounting is another character connected to Animal Corp. He visits the hospital frequently, but instead of being a typical patient, he asks for multiple kinds of treatments while acting in that role. As you care for him, he also drops small fragments of lore about the hospital and its wider situation.
Those tidbits cover anomalies, the hospital itself, Animal Corp, and even Ratthew—if the timing lines up and the two interact while Ratthew is beyond the front desk.
To learn Ron’s information, you’ll need to treat him and keep him alive. You also have to prevent anomalies from attacking or eating him during your shifts.
Up Next: All Events and How to Deal With Them
Top Guide Sections
- All Anomalies
- All Animal Hospital Characters
- All Events and How to Deal With Them
- Best Classes Tier List