Dreadnought Black Door Guide: Key Locations and Completion Steps
The big “black door” on the Dreadnought is one of Sand: Raiders of Sophie’s most time-consuming objectives, and it’s not something you can brute-force in a single run. You’ll need to stay alive through a match, track down a specific rare item, and then progress through a chain of doors and keys that span multiple points of interest. Because the job can’t be finished in one sitting, you’ll also have to work across several games—carrying the key forward only if you extract successfully.
Why the Black Door Takes More Than One Match
To get into the huge loot area aboard the Dreadnought, you’re looking at a multi-stage setup. The overall flow is simple in concept—find the right key, open the next door, grab the next key—but the execution depends on what you discover in each match. The game doesn’t allow you to complete the whole sequence in a single run, so planning your extraction matters as much as your combat.
How to Find and Open the Black Door
The sequence starts with locating a green key. That rare key triggers a progression that lets you unlock doors at fixed locations tied to landmarks and points of interest on your map. While the exact places you can find those points of interest may vary from match to match, the doors themselves follow a consistent layout—so once you identify the right stop, you can always move on to the next door in the chain.
Jump points (in the same order as the guide):
- How to Find Green Key
- Where to Use Green Key / How to Find Blue Key
- Where to Use Blue Key / How to Find Red Key
- Where to Use Red Key / How to Find White Key
- Where to Use White Key / How to Find Black Key
- Where to Use Black Key
How to Find Green Key
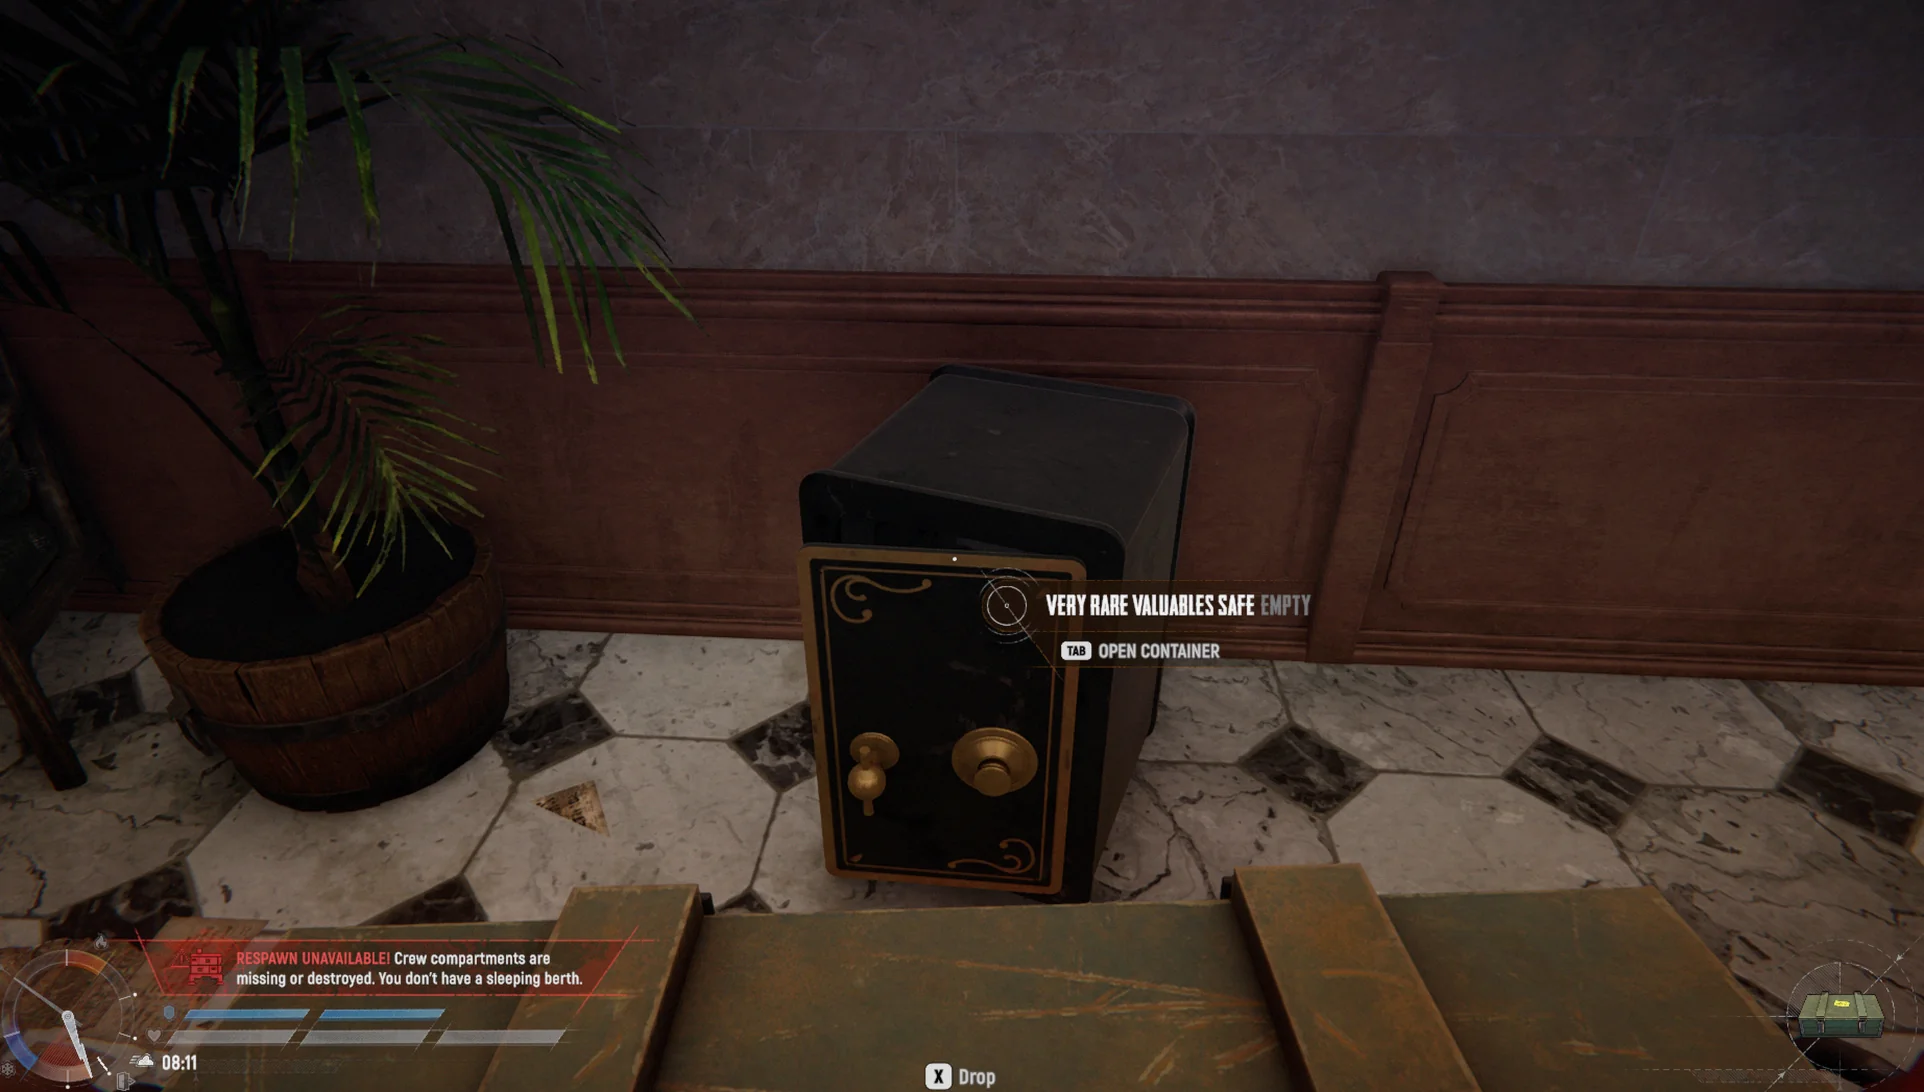
Finding the green key is ultimately a matter of luck. Your best bet is to search Rare Valuable Safes located in towns. If you’re exploring the sandy wasteland, you can also get lucky and find these safes inside a downed boat.
These safes are shaped like small bank vaults that you can open. The rarer the type of Valuable safe you’re able to locate, the better your odds of finding the green key—but there’s no guarantee. You might pull it early in the match or only discover it near the end.
Once you do have the key, you should check how much time remains. If you’re still working with plenty of time, you can attempt the next step immediately by opening the green door using the green key. If time is tight, it’s often smarter to prioritize extraction and come back later with the key. The green key can carry over between matches only if you extract while it’s secured in a box stored on a shelf on your walker, or if you currently have it in your inventory.
Where to Use Green Key / How to Find Blue Key
With the green key in hand, head to Kaiserplatz. It should appear somewhere on your map at the start of your match.
When you arrive, go to the large structure at the top of the town. It resembles the interior of a large church.
Inside, on the ground floor, you’ll find a green door on the left side of the room. Use the green key to open it. Then grab the blue key from the central desk at the back of the space. Like before, you’ll need to move to another landmark to keep the chain going.
Where to Use Blue Key / How to Find Red Key
From Kaiserplatz, make your way to the Meeresauge area. As with the green-door step, there’s a blue door you’ll need to locate—but this time it isn’t in the main city core. Instead, you’ll find it along the side, inside a dock zone on the southwest portion of the city.
Look for a two-story building that sits naturally at the base of a dock, facing the water. The blue door is at the building’s entrance. Unlock it, then search inside for the red key sitting on a partially covered wooden chair. After that, you can proceed to the next location.
Where to Use Red Key / How to Find White Key
Next up is Segen. This location is similar to Kaiserplatz, but the top-of-hill building isn’t part of the layout here. Instead, head toward the far end of the city and search for a bank building.
When you enter, the first floor should show multiple teller stalls on the right side, along with stairs that lead upward to the higher floors. Climb all the way to the third floor.
On the third floor, you’ll find the red door. Use the red key to open it. Inside, the white key is located on one of the desks in the room. At this point, you’re ready to move toward the final point of interest before the Dreadnought.
Where to Use White Key / How to Find Black Key
The final landmark you need is Fort Istria. This is a heavily defended location, so bring several timed bombs—or at least one—before you arrive.
When you reach the fort, the front doors will be locked. You’ll have to break through using one of these options: fire your ship’s cannon to blast it open, use a timed bomb to blow it up, or throw a grenade if you have one available. Any of the methods work. Once you’re at the entrance, you’ll also have to pass through two red doors that block access.
After you get through those doors, there’s another red door to the right of the entrance that you must destroy to reach the lower section of the fort.
Break through that door as well and repeat the process again, though you likely won’t be able to rely on ship cannons for this portion. Eventually, you’ll reach the bottom.
At the bottom, you’ll find a white door at the foot of the ladder. Inside that room is what you’ve been hunting: the black key. Take it with you and use it to open the Dreadnought.
Where to Use Black Key
Getting to the Dreadnought is difficult, and the timing is part of the challenge. You’ll find it during the last phase of the match—when the situation becomes more dangerous because you’ll be competing against other players trying to grab as much loot as possible or focusing purely on extraction. It also becomes the final extraction point you can reach before the sand finishes consuming the rest of the map.
Expect multiple fights. Bringing preparation is crucial if you want to reach the Dreadnought and not get delayed. The ship itself is easy to spot: it looks like a gigantic black vessel sticking out of the sand.
Once you’re aboard, move through quickly and search until you locate the black door. Open it using the black key to enter a massive loot-filled room. While you’re grabbing supplies, keep an eye out for other players who may try to steal what you uncover during the run.
Check out more Sand: Raiders of Sophie guides:
- How to Extract
- Loot Guide: What to Keep and Sell
Up Next: How to Extract
Top Guide Sections
- Dreadnought: How to Open Black Door (All Key Locations)
- How to Extract
- Loot Guide: What to Keep and Sell
- Patch Notes July 3: Update 2