Top Loot Spots in Sand: Raiders of Sophie for Fast Crafting and Upgrades
In Sand: Raiders of Sophie, loot isn’t just a nice-to-have—it’s the backbone of progression. If you don’t return with a solid haul of items and materials, you’ll struggle to craft stronger tramplers and to expand your inventory and loadout for harder encounters. Since every moment counts once you drop onto Sophie, knowing where to hunt for valuable supplies can help you make your runs more efficient. This guide focuses on the best loot spots you can target while playing.
Checklists
One problem you’ll run into is that the map isn’t fixed. In Sand: Raiders of Sophie, landmarks can shift from match to match, some settlements may not show up, and the route you planned might suddenly be irrelevant. That means you’ll need to stay flexible every run, and keep your attention on what’s changing as you move between keeps and locations.
- The Dreadnaught
- Black tarps with symbols
- Behind red doors
- Beacons
- City landmarks
- Forts
- Coral and rock fields
- Radio beacons
- Suspicious piles of sand
Best Places to Get Loot
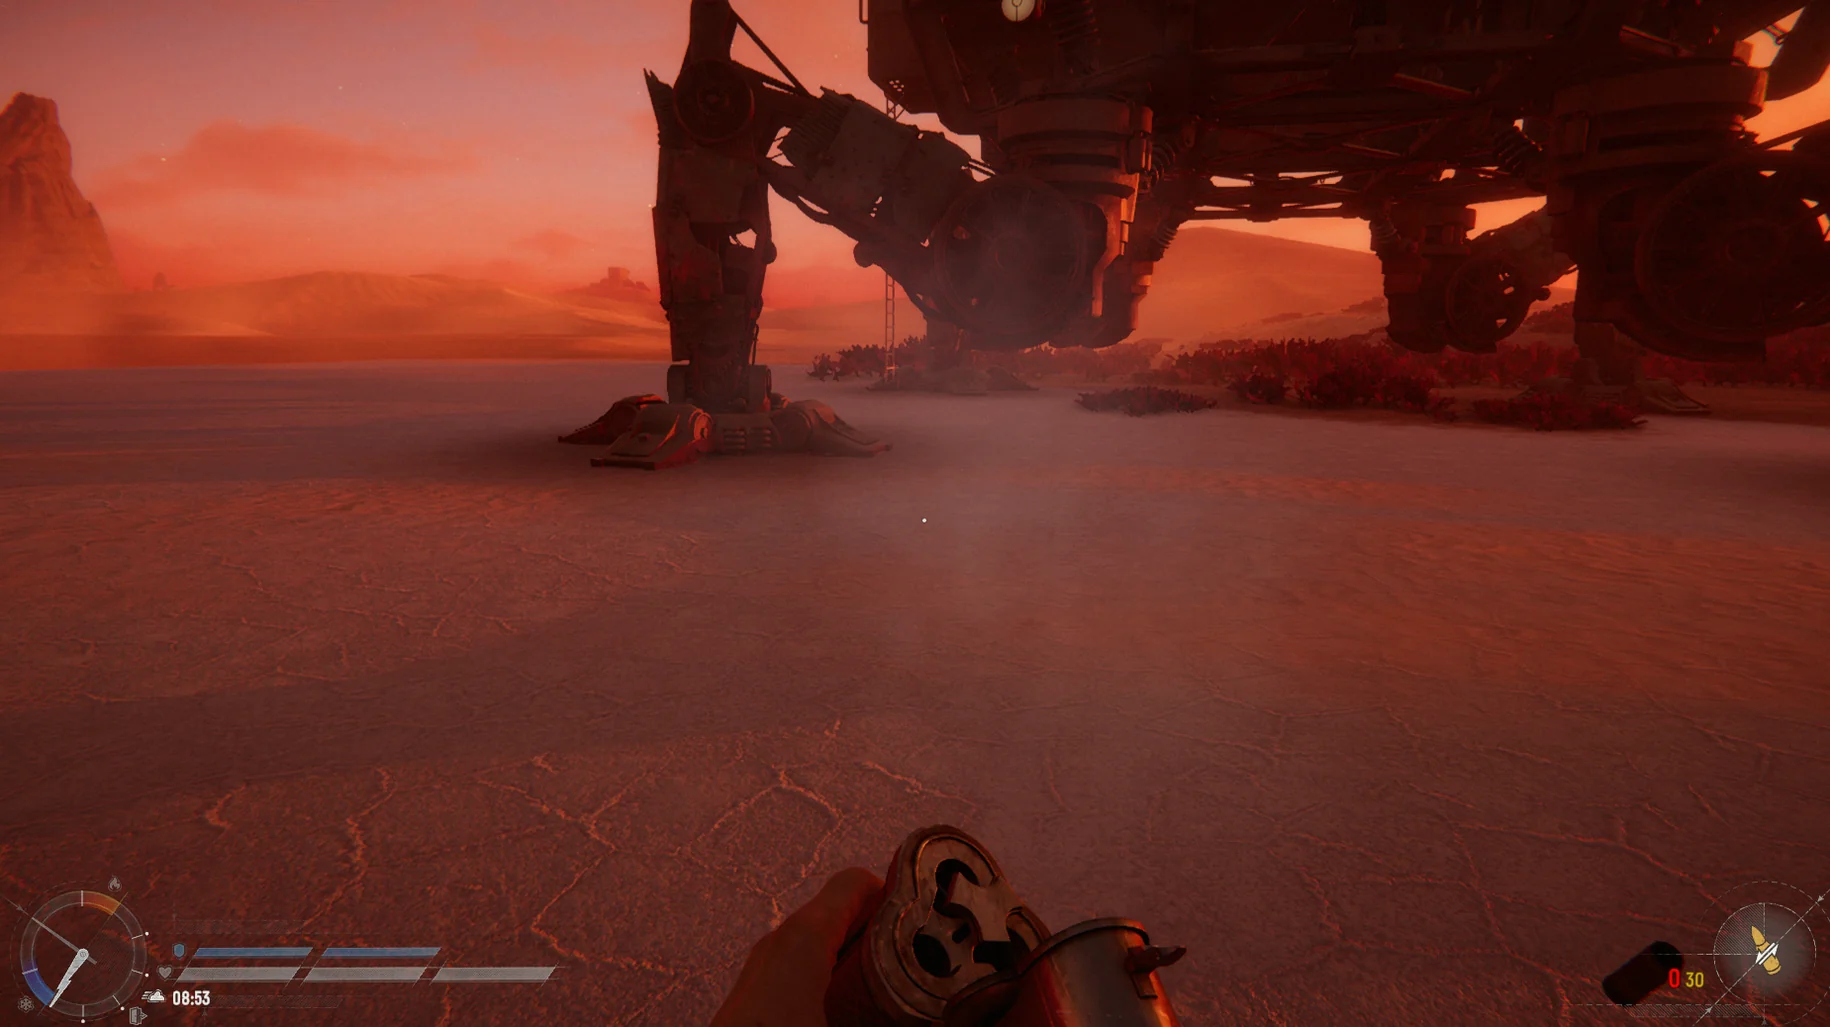
The Dreadnaught
The Dreadnaught is one of the major locations you can find during your time in Sand, but it’s also one of the more dangerous places to go. It typically appears late in the match—specifically, during the final phase—because it’s the last extraction beacon that remains on the map.
When you arrive, you’ll be dealing with a large black ship that you can explore. There are multiple areas inside where you can gather loot, and there’s also a secret room you can unlock if you have the black key. Getting that key can be a serious hurdle and may require several matches before you manage it. Even if you can’t open the secret room, pushing to the Dreadnaught is still worthwhile since there’s other loot sitting around the area.
Black Tarps with Symbols
While you search points of interest, you may notice black tarps marked with symbols. Underneath them you’ll see big piles of sand that you can’t clear in the usual way. Most of the time, these spots are pretty limited—until the match reaches the final circle.
If a landmark is inside the last circle and it has these tarps, the sand can be blown away, exposing rare loot. When it happens, you’ll usually find a small set of rare crates to loot. The catch is timing: you have to wait until the final circle to see the reveal. Waiting that long is risky because other players may already be heading there, too. You’ll need to judge whether the potential reward is worth the time and danger—especially if you suspect others are already in the end zone with you.
Behind Red Doors
When you’re clearing out a town, keep an eye out for red doors. These are partially visible through the environment, so they’re easier to spot and identify early—useful if you’re trying to determine whether they can be broken into. Red doors often lead to a set of rare resources that you can access once you get inside.
The hard part is actually breaking through. In a town, one reliable method is to use a red barrel explosive near the door. You can also shoot to trigger the explosion, but you’ll want to keep a safe distance. Grenades and timed explosives work as well, and if your trampler is close enough, you can use its cannons to destroy the doors. Once they’re down, you’ll be able to grab whatever loot is waiting behind them.
Beacons
As you get near landmarks or cities, beacons will usually spot you before you’re close enough to enter the settlement. Each beacon features an eye-like sigil hovering over it, along with a progress bar that gradually fills as you remain within range—or as you approach and don’t back out. This is the game’s way of summoning an Ironclad, an enemy NPC trampler you’ll have to fight.
Ironclads are about the same size as your trampler, but they aren’t as dangerous. They tend to fall after a handful of well-placed hits, especially compared to how quickly players can deal with them. After you destroy one, don’t immediately move on—pause and check the wreckage for loot. An Ironclad drops a small crate containing a variety of supplies, such as ammunition, alloys, trampler batteries, or repair kits. Grabbing these early can pay off, since it makes town runs much more productive.
City Landmarks
Whenever you see a city landmark nearby, it should be your top priority. You can track them from your pocket map, or from the map next to your trampler wheel. At the start of a match, aiming for the closest settlement is usually the smartest plan—and you should expect to run into beacons on the way.
City landmarks are packed with loot you can bring back to your trampler. You’ll still have to push through coral zombies guarding the area, and those enemies can respawn after some time. The risk is often worth it because these locations are where you’ll find a large portion of what you need to upgrade your tech tree—or to bring back to your base so you can continue improving your trampler. Just don’t linger too long, since other players are likely targeting the same spots, and you may end up crossing paths with them during the scramble.
Forts
Forts are another type of location you can discover around the map. They look like tall, tower-like structures protruding from the sand, supported by a sturdy lower fortification. Like cities, forts are guarded by beacons that summon an Ironclad when you get too close.
Getting into a fort can be tricky. Before you can enter, you have to break through two layers of red doors. However, because of how the fort is positioned, you should be able to angle your trampler’s cannons at key sections of the doors and blast your way in. Once you’re inside, you’ll find wooden platforms to explore, along with a bigger upper area. That’s also where you’ll encounter a contracts box you can complete.
The contracts box lets you fill a weather balloon with a crate of loot. Completing these can directly earn crowns for the items inside the box—especially helpful if you don’t plan on carrying every single item out with you. After a few minutes, the balloon returns with your crowns, which makes extraction easier since you’re transporting rewards rather than hauling everything as physical items.
Coral and Rock Fields
Between towns and forts, you’ll come across large rock fields. These areas usually don’t contain the most exciting loot. You’ll typically find the usual stranded boat tucked among the rocks, but aside from that, the standout finds usually only appear if you spot large glowing purple rocks sticking out of the ground.
Those purple formations usually indicate the presence of crystals. To loot them, use any trampler cannons to destroy the crystals, then collect what drops. You can bring the crystals to your crafting bench to refine them into more useful crystal materials. Refined crystals can then be turned into energy rods for your trampler, and you’ll also need them for certain crafting recipes.
Radio Beacons
Radio beacon boxes offer another opportunity to grab valuable loot, but they come with a real danger factor. These boxes are locked, meaning you can’t open them on the spot—you must take them all the way to orbit. The problem is that the moment you pick one up, a beacon appears on the map for every player on your server. That means anyone can see your exact location if you’re carrying it on your trampler.
The whole setup pushes you to decide whether the reward is worth the exposure. Even if another player knows exactly where you are, they still have to confront you directly to take it from you. You can choose to focus on extracting with the box, or you can fight other players who grab one and try to escape with it. Letting others take the risk while you collect the payoff is often the smarter path—if you can plan your timing.
Suspicious Piles of Sand
Sometimes you’ll notice piles of sand that have a faint glint. They sparkle briefly, and if you move close, the game identifies them as a “Suspicious Pile of Sand.” These spots can be great, but they’re also hard to dig up because you need a shovel in your inventory.
A shovel is the tool you carry to dig through these piles and uncover the loot underneath. As always in Sand: Raiders of Sophie, the loot you get can vary, but it’s still a good idea to keep a shovel on your trampler or in one of your inventory slots so you can take advantage of these finds immediately. In many cases, you’ll spot suspicious piles near the edges of towns or next to destroyed boats.
Up Next: Dreadnought: How to Open Black Door (All Key Locations)
Top Guide Sections
- Dreadnought: How to Open Black Door (All Key Locations)
- How to Extract
- Loot Guide: What to Keep and Sell
- Patch Notes July 3: Update 2